Home Blog Page 3

How to Fix a Leaky Faucet?

0
Faucet

A leaky faucet is one of the most common plumbing issues faced by homeowners. The constant dripping not only wastes water but also disrupts your daily routine with that annoying sound. Fixing a leaky faucet may seem daunting, but it’s actually a pretty straightforward DIY project that you can tackle yourself. With some basic tools, a little patience and this step-by-step guide, you’ll be able to repair that leaky faucet in no time.

Understanding Different Types of Faucets

The first step is identifying the type of faucet you have, as the repair process varies slightly depending on the faucet type. The three main types of faucets are:

Compression Faucets

Compression faucets are the most common type found in most homes. They work by means of a rubber washer that gets compressed when the handle is turned on, sealing the water flow. Over time, this washer wears out or gets damaged, causing leaks. Replacing this washer is an easy fix.

Cartridge Faucets

Instead of washers, cartridge faucets use a cylindrical cartridge to control water flow and mixing. Cartridges have small seals that cause leaks when worn out. Replacing the entire cartridge unit restores watertightness.

Ball Faucets

Ball faucets have a single handle that moves a ball inside to direct water flow. Leaks occur when the inlet seals around the ball become defective. Fixing involves replacing these seals to stop leaks.

Now that you know the basic mechanism of each faucet type, you can diagnose where exactly the leak is coming from. This will determine the specific repair steps.

Gathering Tools and Materials

Before starting any work, gather the necessary tools and materials:

  • Adjustable wrenches – to loosen nuts and bolts
  • Basin wrench – for tight spaces under sinks
  • Screwdrivers – flathead and Phillips heads for removing screws
  • Pliers – to grip cartridges or loosen stiff nuts
  • Replacement parts – washers, cartridges, valve seals etc.
  • Plumber’s putty or silicone sealant
  • Flashlight – to see in dark cabinet space
  • Cloth – to clean area and prevent part damage

Having these supplies ready will make the repair process smooth and efficient. Ensure you have turned off the water supply valves under the sink before starting.

Step-by-Step Repair Guide for Different Faucet Types

Follow the repair steps specific to the type of faucet you have:

Compression Faucet Repair

  1. Turn off hot and cold water supply valves and open the faucet to drain any water in the lines.
  2. Pry off the decorative cap on the handle if present. Remove the handle screw and take off the handle.
  3. Use an adjustable wrench to loosen and remove the spout. This exposes the stem assembly.
  4. Unscrew the stem unit using pliers and replace the worn out washer with a new one of the same size.
  5. Re-install the stem and tighten it properly. Reattach the spout.
  6. Put the handle back on and secure with the screw. Turn on water supply and check for leaks.

Cartridge Faucet Repair

  1. Shut off water supply and remove any parts surrounding the cartridge.
  2. Use pliers to pull out the retainer clip securing the cartridge in place.
  3. Pull the cartridge unit straight up and out with pliers. Examine it for damage.
  4. Grease replacement cartridge seals and insert the new cartridge. Secure with the retainer clip.
  5. Reinstall any parts removed earlier like handles or spout. Turn on water to test for leaks.

Ball Faucet Repair

  1. Shut off water lines and take out any decorative parts, handles, and spout.
  2. Locate the cam assembly securing the ball unit. Remove the cam and lift out the ball.
  3. Use pliers to remove the inlet seals around the ball and replace with new seals.
  4. Put the ball back in, replace the cam and reattach all parts removed earlier.
  5. Turn on water supply and check for any leaks around the ball unit. Tighten cam if needed.

Troubleshooting Common Issues

While repairing your faucet, you may encounter a few problems. Here are some solutions:

  • Dripping doesn’t stop after replacing washers: The seats where washers sit may be worn out. Replace them with new seats.
  • Water flow is restricted: Make sure parts are properly aligned inside the faucet. Flush lines to remove debris.
  • Leaking between spout and wall: Reapply plumber’s putty around the spout base to seal any gaps.
  • Noisy faucet: Disassemble and lubricate components using plumber’s grease. Replace worn parts.
  • Water leaks underneath: Tighten nuts holding supply lines with an adjustable wrench. Replace washers if needed.

Always exercise caution when troubleshooting leaks and turn off water supply before disassembling the faucet. Persistent leaks may require professional help.

Prevention Tips for Future Leaks

Here are some tips to minimize leaks and keep your faucets working properly for years:

  • Install washers made of durable materials like neoprene or silicone. Avoid cheap plastic washers.
  • Clean faucet aerators regularly to remove mineral buildup and debris.
  • Use spray lubricants and cleaners to prevent corrosion on faucet components.
  • Invest in high-quality faucets with ceramic disc cartridges that last longer.
  • Insulate outdoor faucets in winter to prevent freezing and cracks.
  • Replace washers, O-rings, and seals every few years before they wear out completely.
  • Use water softening systems if you have hard water, which causes faster mineral buildup.

With proper maintenance and high-quality parts, you can prevent leaks and extend your faucet’s lifespan significantly.

Conclusion

Fixing a leaky faucet is a straightforward DIY project that you can certainly accomplish yourself. Identify the faucet type, gather the right tools and replacement parts, follow the repair steps, and troubleshoot any issues that arise. Prevent future leaks with regular maintenance and high-quality faucet components. Equipped with this guide, you can easily tackle that annoying dripping faucet and restore your bathroom or kitchen to full working order.


How to Paint Your Home?

0
painting

Painting your home can seem like a daunting task, but with proper planning and preparation, it can be accomplished by any motivated do-it-yourselfer. Not only does a fresh coat of paint improve the aesthetics of your home, it also increases curb appeal and adds value to your property. By following some key steps, you can successfully paint the interior and exterior of your house and unlock the many benefits of DIY home painting.

Planning and Preparing for Painting Your Home

The first step in undertaking any painting project is planning and preparation. Proper planning will help the painting process go smoothly and efficiently while preparation will ensure the paint adheres properly to surfaces.

Choosing the Right Paint

When painting your home, you first need to determine what type of paint is best suited to the job. Key choices include:

  • Interior vs. Exterior Paint: Exterior paints are formulated to withstand weather elements like rain, wind, and sun exposure. Interior paints provide better washability and durability in lived-in spaces.
  • Latex vs. Oil-Based Paint: Latex paints are water-based, easier to apply, and clean up with water. Oil-based paints are more durable but require paint thinner for brush cleaning.
  • Paint Finishes: The sheen level impacts durability and ease of cleaning. Common options include flat, eggshell, satin, semi-gloss, and high-gloss.
  • Color Selection: Factor in lighting, existing décor, personal preferences, and resale value when selecting paint colors. Neutrals and lighter shades open up spaces.

Gathering Supplies and Tools

Painting requires some essential supplies and tools. Be sure to gather:

  • Drop cloths, painter’s tape, and masking paper to protect floors and surfaces
  • Sandpaper, spackle, putty knives, and caulk for prep work
  • Paintbrushes, paint rollers, paint trays, and paint can openers
  • A ladder, extension pole, and scaffolding for reaching high areas
  • Safety gear like glasses, gloves, and face masks

Preparing Surfaces

Proper surface preparation ensures paint adheres well to surfaces. Steps include:

  • Cleaning walls, trim, and surfaces with mild soap and water
  • Repairing cracks and holes with spackle; sanding rough areas
  • Applying painter’s tape around trim, windows, outlets, and switches
  • Covering floors, furniture, and fixtures completely with drop cloths

Following these planning and preparation tips will provide the foundation for a smooth, effective painting project.

Key Techniques for Painting Your Home’s Interior

When tackling an interior painting project, utilize these techniques for great results:

Ceiling Painting

Paint ceilings first before walls using these tips:

  • Use a roller with an extension pole to reach ceilings without climbing ladders
  • Divide ceilings into sections using painter’s tape; paint each section completely before moving on
  • Apply paint in “W” or zig-zag motions, working methodically from one end to the other
  • For flat ceilings, apply two coats; textured ceilings may only need one

Wall Painting

Employ these strategies when painting interior walls:

  • Use angled brush to “cut in” along edges, corners, and trim
  • Roll walls using up and down strokes, then finish with downward strokes
  • Work in sections, cutting in edges before rolling middle, and blend areas together
  • Apply multiple coats allowing proper drying time between coats

Trim Painting

Trim requires careful brushwork for best results:

  • Use a high-quality trim brush for smooth, precise application
  • Keep brush strokes with the grain of the wood for a smooth finish
  • Paint slowly and carefully to avoid getting paint on walls and surfaces
  • Apply two coats of paint for complete coverage and protection

Painting Your Home’s Exterior

Outdoor painting requires some specialized preparation and application methods:

Power Washing

Thoroughly clean exterior surfaces using a power washer before painting to remove:

  • Dirt, mildew, mold, and grime
  • Chalky paint or loose, flaking paint
  • Grease, oil stains, and other contaminants

Protecting Windows and Doors

Avoid painting windows, doors, and trim by:

  • Covering glass panes completely with painter’s tape
  • Taping around frames, handles, hinges, and hardware
  • Drape plastic over doors and windows for further protection

Painting Siding and Trim

Use these tips when painting exterior siding:

  • Use extension poles to reach soffits and eaves without climbing ladders
  • Apply paint in smooth, overlapping strokes to evenly coat siding
  • Use airless sprayer to paint siding that is high off the ground
  • Carefully brush paint trim, fascia, posts, and railings

Painting Doors and Windows

Employ special care when painting exterior doors and windows:

  • Lightly sand surfaces before painting
  • Use a high-quality exterior paintbrush
  • Paint slowly and carefully, following the wood grain
  • Apply at least 2-3 thin, even coats of exterior paint

Finishing Touches for Painting Your Home

Adding finishing touches will complete your paint job properly:

Applying Multiple Coats

For a durable finish:

  • Allow at least 2-4 hours of drying time between coats
  • Sand lightly between coats for a smooth, even finish
  • Apply at least 2-3 coats for proper coverage and protection

Removing Painter’s Tape

To avoid damaging fresh paint:

  • Pull tape away slowly when paint is dry to the touch
  • Use a utility knife to score edges of tape before removing
  • Touch up any spots as needed after tape is removed

Cleaning Up

Proper cleanup preserves tools and removes mess:

  • Rinse brushes and rollers thoroughly until water runs clear
  • Seal and store any leftover paint for future use
  • Dispose of paint cans, thinner, and drop cloths properly
  • Open windows to ventilate paint fumes from interior spaces

Conclusion

Painting your home is a satisfying project that adds beauty, protects surfaces, and increases your home’s value. Follow these tips for planning, preparation, application, and cleanup to achieve professional-looking results. Painting your own home allows you to customize décor, save money, and enjoy the fruits of your labor. With proper planning and technique, you can successfully paint your home’s interior and exterior.


How to Repair Drywall?

0
Drywall

Drywall, also known as gypsum board or plasterboard, is one of the most common interior building materials used in construction. Over time, drywall can become damaged from things like accidental impacts, shrinking building foundations, or moisture issues. Learning how to properly repair drywall is an essential skill for any homeowner. With the right tools, materials, and techniques, repairing drywall can be a straightforward DIY project.

What is Drywall?

Drywall is composed of a layer of gypsum plaster sandwiched between two layers of heavy paper. Gypsum is a soft mineral that is extremely fire-resistant and absorbs sound efficiently. The paper facings provide additional strength and allow the drywall to be easily cut and installed.

Drywall panels are available in various sizes and thicknesses. The most common size is 4 x 8 feet sheets that are 1/2 inch thick. Drywall is installed on the interior framing of walls and ceilings and then finished with joint compound and corner beads to create a seamless surface that can be primed and painted.

Why is it Important to Repair Drywall?

There are several reasons why it’s important to repair damaged drywall in a timely manner:

  • Prevent Further Damage – Small holes or cracks can expand over time and lead to larger repairs. Fixing problems early prevents more extensive damage.
  • Maintain Fire Resistance – Drywall contains fire-resistant gypsum that helps contain fires. Breaches in drywall reduce its fire-resistant properties.
  • Improve Appearance – Damaged or cracked drywall is unsightly. Repairing it improves the aesthetic look of walls and ceilings.
  • Increase Home Value – Fixing drywall damage keeps your home looking its best and can help maintain property value when it comes time to sell.
  • Reduce Pests/Drafts – Cracks or holes allow unwanted air flow and can provide entry points for pests. Timely repairs prevent these issues.

What are the Signs that Drywall Needs Repair?

Here are some common signs that indicate drywall damage that requires repair:

  • Holes – Holes of any size that go through the drywall indicate a weak spot that needs patching. Holes are often caused by accidental impacts.
  • Cracks – Cracks form when drywall panels shift or settle. They often occur at corners or seams between panels.
  • Nail Pops – Over time, nails or screws can work loose and push up against the drywall surface, creating a small protrusion or “pop”.
  • Water Damage – Water stains, warped drywall, or soft spongy areas indicate water damage, which can compromise the integrity of the drywall.
  • Dents – Dents are depressions in the drywall’s surface that are often caused by impacts from furniture or other objects.

Tools and Materials Needed

Repairing drywall requires a few standard tools and materials that can be easily found at any hardware store:

Drywall Tools:

  • Utility Knife – for cutting and scoring drywall.
  • Drywall Saw – for cutting patches or holes to size.
  • Putty Knife – for applying joint compound.
  • Sandpaper – for smoothing repairs between coats.
  • Sander – power sanders make smoothing drywall much easier.
  • Drywall Taping Knives – for embedding tape and feathering edges.

Drywall Materials:

  • Drywall Patch – available in various sizes to match repair areas.
  • Joint Compound – used to seal joints and create a smooth finish.
  • Drywall Tape – paper or mesh tape applied over seams.
  • Primer – seals repairs prior to painting.
  • Paint – matches existing wall color.

Step-by-Step Guide on How to Repair Drywall

The process of repairing drywall varies slightly depending on the size and type of damage. Here is a step-by-step overview of how to fix common drywall problems:

Small Holes:

Small holes less than 3 inches wide are the easiest drywall repairs. Follow these steps:

  • Cut a drywall patch slightly larger than the hole. Ensure it is square or rectangular.
  • Use a putty knife to apply a coat of joint compound to the back of the patch.
  • Press the patch over the hole, adhering it to the joint compound.
  • Apply joint compound over the patch, feathering the edges to blend with the wall.
  • Let the joint compound fully dry, then sand the area smooth.
  • Prime and paint the patched area.

Large Holes:

For larger holes up to a few feet wide, a more involved process is required:

  • Measure the hole and cut a piece of drywall to fit, making it slightly larger.
  • Using drywall screws, secure wood studs around the hole’s edges.
  • Screw the drywall patch to the wood stud frame.
  • Tape the seams with drywall tape and apply joint compound over all seams and screw heads.
  • Feather the edges of the joint compound wider than the patch.
  • Let dry completely, then sand until smooth.
  • Prime and paint the area.

Cracks:

For hairline cracks, use the following method:

  • Widen the crack slightly using a utility knife to create a “V” shape.
  • Fill the crack with joint compound using a putty knife.
  • Embed drywall tape into the joint compound over the crack.
  • Apply a second coat of joint compound over the tape, feathering the edges.
  • Sand smooth when fully dry.
  • Prime and paint to match the existing wall color.

Tips and Tricks

  • When cutting drywall patches, make sure edges are straight to minimize seam visibility.
  • Use lightweight joint compound for the initial layers to prevent sagging.
  • Apply thinner coats of joint compound and allow proper drying time between layers.
  • Carefully match drywall texture using techniques like brushing or stippling if needed.
  • Consider applying painter’s tape along repair edges for cleaner paint lines.
  • Keep a sample of wall paint to ensure color matching with the original wall color.

Conclusion

Learning how to properly repair drywall damage is a handy skill for any homeowner. With some basic tools and materials, drywall repairs can be completed successfully as DIY projects. Carefully following the steps for identifying damage, preparing the materials, and making the repairs is crucial for seamless fixes. Proper drywall repair keeps your home looking its best while maintaining the integrity of the important fire-resistant interior walls.


Maximize Space with Smart Storage Solutions

0
Smart Storage

Living in a small home can feel cramped and cluttered at times. Between limited closet space, tiny bedrooms, and a lack of storage options, it’s easy for mess to accumulate and make rooms feel even more crowded. Implementing smart storage solutions is the key to maximizing every inch of space in a small home. With some decluttering, creative thinking, and functional furniture, you can unlock hidden storage potential and enjoy an organized, spacious interior.

Declutter and Assess Your Storage Needs

The first step toward maximizing space is to declutter. Take some time to honestly evaluate each item in your home and identify things that are no longer needed or used. Create separate piles for donating, selling, recycling, and trash. Be ruthless in your assessments – if you haven’t used something in over a year, it’s unlikely you’ll need it in the future. Decluttering not only frees up physical space, it also provides mental clarity and reduces stress. With all your belongings sorted and pared down, you gain a better perspective of your actual storage needs.

As you declutter, take notes on the types of items and quantities you need to store. This will help guide your storage solutions. For example, if you need to store a lot of books and office supplies, wall-mounted shelves or a desk hutch could be useful. If you have extensive clothing, consider maximizing closet space with organizers and storage containers. Analyzing your belongings and requirements is a vital step toward selecting functional storage solutions.

Harness the Power of Vertical Space

In a small home, it’s essential to take advantage of vertical storage space. Floor space comes at a premium, so look up instead of just looking around. Floating shelves are ideal for placing decorative items and books up out of the way. Mount them high to utilize vertical room. For a kitchen, mounted spice racks, knife blocks, and pot racks keep cooking necessities organized while saving precious cabinet space.

Wall-mounted organizers like pegboards and slat systems provide vertical storage for tools, sporting goods, craft supplies, and more. Install them in the garage, mudroom, laundry room, or any area that needs practical organization. Vertical space can also be leveraged in the closet with the installation of a second rod for hanging clothes. Double your hanging capacity without claiming any additional floor space.

Get creative with vertical storage solutions. A ladder turned on its side and equipped with hooks provides vertical storage for towels, scarves, and bags. Repurpose the back of interior doors by adding hanging racks for shoes, hats, or purses. The walls are full of potential storage real estate if you think beyond the horizontal plane.

Embrace Multifunctional Furniture

For small spaces, multifunctional furniture pulls double or triple duty to save space. An ottoman with interior storage provides extra seating when needed, while tucking away blankets, toys, or anything else you need to organize. Look for ottomans with lift-off tops or flip up lids to keep contents easily accessible. A sofa that folds out into a bed is ideal for accommodating overnight guests without needing a dedicated guest room.

Desks and tables with built-in storage are practical options. Look for a writing desk with drawers to store office supplies or a console table with shelving underneath. Multifunctional furniture works best when selected intentionally, so consider your lifestyle and storage needs. Aim for pieces with multiple purposes that suit your specific requirements. This ensures they earn their keep and contribute to your optimized living space.

Utilize Under-the-Bed Storage

The space under your bed is valuable real estate that often gets overlooked. Containers and boxes designed to slide neatly under the bed will allow you to utilize this out-of-sight space. It’s ideal for storing extra linens, clothing, shoes, or seasonal items that only need occasional access.

For easy access, install pull-out drawers under the bed frame. Some models sit directly on the floor, while others mount between the box spring and mattress to maintain your bed’s height. These drawers maximize under-bed storage while keeping contents organized and simple to access.

If your bed frame doesn’t accommodate built-in drawers, try rolling under-bed storage carts. These caster wheel carts roll out for access then tuck away out of sight. Select carts sized to fit into the space under your particular bed frame to maximize the storage potential.

Embrace Hidden Storage Solutions

Hidden storage solutions allow you to stow away clutter while maintaining a clean, visually pleasing living space. Baskets, trunks, and ottomans with lidded storage compartments can be used to hold anything from toys to linens. When not in use, these decorative containers conceal their contents while serving as tables, additional seating, or accent pieces.

Build or purchase furniture with discreet storage worked into the design. Coffee tables or benches with hidden storage under the lift-up tops offer additional places to tuck away items. Floating wall shelves with concealed rear storage compartments are another space-saving option. The key is selecting attractive furnishings that don’t visibly reveal their storage capabilities at first glance.

Label and Organize for Efficiency

No matter what storage solutions you implement, organization is key to maintaining an optimized space. Clearly label boxes, bins, baskets, and shelving with their contents. Use color-coded labels if that system works better for you. This prevents you from opening multiple containers while searching for one particular item.

Divide storage bins and drawers with compartments, shelves, or trays to separate and organize contents. Designate specific zones in cabinets or closets for certain categories of items. For example, contain kitchen gadgets to one shelf while allocating another for mixing bowls. An organized system cuts down on the time spent searching and ensures items remain in their proper homes.

Maintaining consistency in your labeling and organization enables you to locate belongings quickly while keeping your home tidy. Put everything back in its designated spot after use so items don’t end up strewn about and lead to a disorganized space.

Conclusion

A small living space doesn’t need to feel cramped and chaotic. Implementing smart storage solutions allows you to fully utilize every inch of available space. By decluttering your belongings, embracing vertical storage, and selecting multifunctional furniture, you can transform even the tiniest home into a model of organization. Your optimized living space will provide the comfort and relaxation you deserve.

As you discover innovative ways to maximize your square footage, share your solutions with family and friends. Providing smart storage inspiration for small spaces benefits everyone. With some creativity and strategic thinking, you can join the ranks of those enjoying the many benefits of compact, clutter-free living.


Organizing Your Kitchen for Efficient Cooking and Meal Prep

0
Kitchen

Having an organized kitchen can make a world of difference when it comes to cooking and meal preparation. A well-organized kitchen reduces stress, saves time, and allows you to enjoy the cooking process more. With the right layout, storage solutions, tools, and regular maintenance, you can optimize your kitchen for efficiency. This article explores various tips and strategies for organizing your kitchen to promote smooth and seamless cooking.

Kitchen Organization Basics

Kitchen organization refers to the deliberate structuring of your kitchen space and items to promote order and efficiency. The main goal is to make everything easily accessible so that cooking and meal prep feel effortless. Effective kitchen organization depends on principles such as decluttering, proper zoning, utilizing vertical space, and investing in functional storage solutions.

When organizing your kitchen, you must first start with the basics – declutter and get rid of anything you don’t need. Sort through gadgets, utensils, and containers. If you haven’t used an item in over a year, it’s probably safe to give it away or throw it out. Proper zoning entails placing items in logical areas based on usage. For example, pans should be near the stove while plates and cups near the dishwasher. Make use of vertical space by installing racks, shelves, and pegboards. Finally, incorporate storage solutions like cabinets, pantries, and drawers to house essentials.

Decluttering and Organizing Your Kitchen

Decluttering is the first critical step in any kitchen organization project. It entails clearing out all unnecessary items taking up precious space. Here are some tips for decluttering your kitchen:

  • Take everything out of your cabinets, drawers, and pantries. Get a full view of what you actually have.
  • Discard expired food items and containers you no longer use. Recycle or donate usable items.
  • Group similar items together – utensils, cookware, appliances, etc.
  • Purge items you have duplicates of or haven’t touched in over a year. Be ruthless.
  • Clean cabinets, drawers, and shelves before returning items.

When organizing, categorize items into zones – food storage, dishes, cooking tools, appliances, etc. Label containers and shelves for easy identification. Utilize vertical space through hanging racks and wall-mounted shelves. Install organizing units inside cabinets to maximize usable space. Maintain this system through regular purging and tidying. An organized kitchen takes effort to maintain.

Optimizing Kitchen Layout for Efficiency

An efficient kitchen layout allows you to seamlessly move between key zones – the sink, stove, and refrigerator. This space is called the kitchen work triangle. Optimizing the angles and distance between these three points streamlines food preparation and cooking. Here are some kitchen layout tips:

  • The three work zones should be adjacent with clear pathways between them.
  • If possible, the triangle should be a shape where each leg is between 4 to 9 feet.
  • Avoid placing the stove directly opposite the refrigerator to prevent traffic congestion.
  • Ensure good lighting over the sink, stove, and other prep areas.
  • Keep high-use items easily accessible. Install pot racks, knife strips, and spice racks.
  • Have a garbage zone for food scraps and compost near the prep area.

Pay attention to how you move through the kitchen during cooking. Adjust the layout to minimize excessive movements that slow you down. Maintaining organized work zones also promotes efficiency.

Maximizing Kitchen Storage

Storage plays a huge role in kitchen organization. Maximize every inch of available space through cabinets, drawers, shelves, and pantries. Consider these tips for optimal kitchen storage:

  • Install floor-to-ceiling pantry cabinets or shelving units. Use lazy susans in corner cabinets.
  • Use vertical space on walls for mounted spice racks, knife holders, and pot racks.
  • Dedicate drawers near the stove for utensils and near the fridge for food storage.
  • Purchase drawer organizers and turntables to maximize vertical storage.
  • Use lid racks, pan organizers, and hanging racks for awkward cookware.
  • Label everything clearly so items can be returned to their designated spots.

Take time to organize your pantry and fridge. Group like items together and use organizers to prevent a jumbled mess. Investing in functional storage solutions tailored to your space helps maximize usage.

Essential Kitchen Tools and Gadgets

Having the right kitchen tools and gadgets can greatly improve cooking efficiency. Equip your kitchen with these essential items:

  • Good knives – chef’s knife, paring knife, serrated knife, and knife sharpener
  • Cutting boards (at least 2) – plastic for meat and wood for produce
  • Mixing bowls – small, medium and large
  • Dry and liquid measuring cups
  • Measuring spoons
  • Spatulas, slotted spoons, tongs, and ladles
  • Whisks, turners, and wooden spoons
  • Can opener, vegetable peeler, grater, and zester
  • Mixer or food processor
  • Bakeware – muffin tins, cake pans, baking sheets
  • Colanders and strainers
  • Salt and pepper mills
  • Kitchen scissors and kitchen timer

Specialized gadgets like air fryers, slow cookers, rice cookers, and instant pots also improve efficiency for frequent meals. Invest in quality tools that make cooking easier and more enjoyable. Properly organizing them also optimizes your meal prep time.

Maintaining an Organized Kitchen

Creating an organized kitchen is half the battle – maintaining it is key for long-term success. Here are some tips for keeping your kitchen clutter-free:

  • Put items back in their designated storage spots after using them.
  • Do quick tidy-ups during and after cooking – wash used dishes, wipe counters, take out trash.
  • Do a deep clean weekly to keep everything dust-free and organized.
  • Regularly purge unused items and food to prevent clutter accumulation.
  • Designate zones like counters and tables for temporary storage during cooking.
  • Consider recycling and composting systems to reduce waste sustainably.

Developing the habit of cleaning as you go and putting things away immediately eliminates mess. Maintaining organization is easier with consistent maintenance and sticking to the system.

Conclusion

A functional, clutter-free kitchen minimizes stress and makes cooking enjoyable. Use these kitchen organization tips to optimize your layout, storage, and tools. Invest time upfront to implement an efficient system. Maintain the organization through regular tidying, purging, and deep cleaning. With some effort, you can create a kitchen that maximizes productivity and minimizes effort. What are you waiting for? Get organizing!


Creating a Tidy and Functional Entryway

0
Entryway

The entryway is the first space guests see when entering your home, so making a great first impression here is essential. A tidy and functional entryway not only looks welcoming, but also helps keep your home organized by providing smart storage solutions. With some planning and organization, you can create an entryway that is both aesthetically pleasing and highly practical, whether you have a small or large space to work with.

The Importance of a Tidy and Functional Entryway

A well-designed entryway serves several important purposes. First impressions matter, so a tidy and organized entryway immediately gives guests a sense that the rest of the home will also be clean and tidy. An entryway that is free of clutter with everything in its place presents a welcoming environment right from the start.

In addition to aesthetics, a functional entryway also provides necessary storage. Keys, bags, shoes, coats, umbrellas and other items need a designated spot to prevent clutter from accumulating right inside the front door. Sufficient storage such as hooks, shelves, baskets and cabinets helps keep the entry looking neat and makes it easy for you to stay organized.

Finally, the entryway sets the tone for the rest of the home. If the first thing you see is disorder, it can feel stressful and make the home feel smaller. A thoughtfully organized entryway creates a sense of calm and order, allowing you to start your day off right as you move through the home.

Essential Elements of a Tidy and Functional Entryway

Several design elements come together to create an entryway that is both attractive and highly functional. Key features to include are:

Storage

This is likely the most essential element to make any entryway tidy and usable. There should be a spot for shoes, coats, umbrellas, keys, bags, mail, etc. Built-in storage like cabinets, lockers and cubbies keep items organized and out of sight. Freestanding furniture like benches, racks and consoles also provide storage while serving as decorative focal points.

Lighting

Proper lighting is important for both aesthetics and function. Accent lighting highlights architectural details or artwork to make the space feel welcoming. Adequate overhead lighting lets you see clearly when coming and going. Consider layering ambient, task and accent lighting.

Seating

Having a place to sit while removing shoes or getting ready to head out is useful. Benches and stools give you a spot to perch in the entryway. Make sure to allow enough clearance so the area doesn’t feel cramped.

Flooring

The flooring should be durable and easy to clean since the entryway sees a lot of traffic. Tile, wood, vinyl, concrete and other hard surfaces hold up well. Provide an area rug or mats for removing wet or muddy shoes.

Mirrors

Strategically placed mirrors visually expand the entryway. They also let you do a final check of your appearance before heading out the door.

Wall Organization

Use the wall space to hang frequently used items like keys on hooks or a decorative coat rack. Baskets and wall shelves hold other small items to keep them off the floor.

Entryway Design Ideas for Different Spaces

Entryway layouts vary greatly depending on the size and architectural style of your home. Here are some great design ideas to make the most of your unique entryway.

Small Entryways

  • Built-in cabinetry: Use every inch of wall space for narrow custom cabinets to hide clutter.
  • Multi-purpose furniture: Opt for benches or stools with storage inside to save space.
  • Coat racks: Hang coats vertically on a rack mounted to the wall.
  • Wall-mounted storage: Shelves and racks keep bags, shoes and other items off the floor.
  • Mirrors: Hang a full length mirror to make the entry appear larger.

Large Entryways

  • Console table: A long narrow console provides storage and style. Top it with decor and a lamp.
  • Seating area: A bench, chairs or stools create a place to pause when entering.
  • Display table: Show off decorative items on an entryway table behind the front door.
  • Rug: Define the entryway area with a large area rug.
  • Artwork: Fill wall space with oversized artwork to make a statement.

Entryways with Unique Layouts

  • Corner storage: Use a corner coat rack or cabinet to take advantage of angled layouts.
  • Narrow table: A skinny console, wall-mounted shelf or floating shelf fits in tight spaces.
  • Half wall: Create separation from the living room with a half wall and pass-through.
  • Pocket doors: Install sliding doors to hide clutter while saving floor space.
  • Multi-purpose furniture: Ottomans and benches with storage customize small or irregular layouts.

Entryway Storage Solutions

There are many creative storage solutions to keep your entryway free of clutter while also adding style.

Entryway Benches

Benches provide seating and often have storage space inside. Some designs have lift-up lids or slide out drawers to stash items out of sight. Place a bench near the door to sit while removing shoes.

Coat Racks

Coat racks mounted to the wall or placed on the floor provide designated spots to hang outerwear. Choose racks with shelves above or below to also store hats, bags and shoes. For small entryways, opt for space-saving fold down racks.

Consoles

The long narrow shape of console tables fits perfectly in entryways. Their tabletop provides a spot to drop keys and other items when coming inside. Look for consoles with built-in drawers or cabinets for concealed storage.

Cubbies and Lockers

Cubbies or lockers give each family member a personalized storage spot. They are great for stashing shoes, hooks for coats, shelves for smaller items and rods for hanging bags. Built-in cubbies maximize unused space.

Wall Rails and Shelves

Take advantage of vertical wall space with rails and floating shelves. Rails with S-hooks allow bags and coats to slide across the length of the rail. Shelves are ideal for baskets to corral smaller items like gloves and scarves.

Entryway Organization Tips

A few habits and home organization tricks will help you maintain a tidy entry over time:

  • Declutter frequently – Do a quick purge of accumulated items every week. Donate unused coats and shoes, recycle junk mail and shred old documents.
  • Assign a “home” for items – Ensure everything has a designated spot so items don’t end up randomly placed.
  • Use baskets and bins – Contain loose items like scarves, gloves and mail in baskets to hide clutter.
  • Hang items – Use wall space to hang coats, keys and bags so surfaces stay clear.
  • Deal with items immediately – Put away shoes and hang up coats as soon as you walk in the door.
  • Add a drop zone – Have a small table or tray to toss keys, sunglasses and other items when entering.
  • Consider traffic flow – Ensure your layout allows for a clear path entering and exiting.

Conclusion

The entryway sets the tone for the rest of your home, so investing some time to organize and decorate this space is well worth it. Follow the design principles and organizational tips outlined here to create a tidy and functional entryway. Your guests will be impressed and you’ll reap the benefits of an organized, uncluttered space every time you come home. A few simple upgrades like new lighting, storage furniture and some wall organization can make a huge impact. With an inviting, well-designed entryway you’re sure to start each day off on the right foot.


Organizing Your Home Office for Productivity

0
home office

Having an organized and productive home office is becoming increasingly important for remote workers and entrepreneurs. With more people working from home, setting up an efficient and distraction-free workspace is essential. Proper home office organization can boost productivity, reduce stress, and set you up for success. This article will provide helpful strategies and tips for organizing your home office to maximize productivity.

Choosing the Right Location

The first step in home office organization is selecting the right location. Consider setting up your office in a quiet, private area of your home to minimize distractions. An unused guest room or basement space works well. Opt for a location with natural lighting to reduce eye strain. Make sure there are ample electrical outlets in your chosen workspace. Position your desk near an outlet so you don’t have to deal with tangled extension cords. Proximity to windows can provide natural light and views of nature while also allowing for adequate ventilation. Separating your work zone from the rest of the household activities creates clear physical and mental boundaries.

Investing in Essential Furniture and Equipment

Outfitting your home office with functional furniture and equipment enhances organization and productivity. Investing in an ergonomic desk and office chair designed for extended sitting improves comfort and focus. Standing desks are also popular options that allow you to alternate between sitting and standing throughout the day. Proper office lighting is also critical. Use lamps with adjustable brightness and position them to avoid glare on screens. Organization experts recommend incorporating plenty of storage space like file cabinets, shelves, and closet storage. This keeps paperwork and supplies organized when not in use. Finally, equip your home office with essential technology like a laptop, external monitor, wireless keyboard and mouse, printer/scanner etc. Choose equipment tailored to your needs. Adequate furniture and equipment improves workflow and minimizes physical strain.

Regularly Decluttering Your Workspace

Decluttering your home office on a regular basis frees up physical and mental space for productivity. Schedule time each week to sort through paperwork, files, and office supplies. Be ruthless in deciding what to keep and what to discard or store elsewhere. Maintaining organized file and document storage ensures you can find what you need, when you need it. Experts recommend touching paper only once – either file it, respond to it, or discard it immediately. Unsubscribe from email newsletters and delete old messages to clear out your inbox. Remove unused apps and programs from your devices. Develop consistent decluttering habits so clutter doesn’t build up over time.

Implementing Effective Storage Solutions

Incorporate storage solutions to organize office supplies, paperwork, and electronics. Use drawer organizers and trays to store pens, highlighters, notepads and other desk items. Mount shelves on walls to maximize vertical storage space. Store reference materials in magazine files. Use storage cabinets with doors to conceal printers, scanners, extra monitors and electronics. Label bins, shelves, cabinets and drawers with their contents for easy identification. Store infrequently used items like extra paperwork or seasonal supplies in lidded containers. Utilize space efficiently by going vertical with wall mounted shelves and racks. Reduce desk clutter by keeping frequently used items nearby.

Keeping Your Desk Clutter-Free

Your desk surface should contain only essential items needed for your current projects or tasks. Strive for a clean, clutter-free desk to maximize productivity. Use trays or desktop organizers to store the items you use most like pens, sticky notes and chargers. Invest in a desk stand, docking station or vertical laptop holder to keep devices upright and accessible. Position your computer monitor directly in front of you to avoid excessive twisting. Use drawers to store paperwork and supplies out of sight. Place non-essential decorative items elsewhere like photos, plants and knick-knacks. Limiting desk distractions helps you stay focused on work tasks.

Creating Work-Life Boundaries

Establishing physical and mental boundaries between work and personal life is key for productivity. Create clear separations between your home office and living spaces. Set specific work hours and stick to them as much as possible. Don’t work in pajamas – get ready for your workday as you would for an office. Resist the urge to do household chores during work hours. Silence digital notifications on your devices to minimize disruptions. Use apps like FocusMe to block distracting websites when you need sustained focus. Shut down your devices and close the office door at the end of your workday. These boundaries support your productivity and mental wellbeing.

Customizing Your Workspace

Personalizing your office boosts productivity by creating a motivating and inspiring environment. Incorporate meaningful artwork, pictures and accessories that bring you joy. Use your favorite colors when choosing desk accessories, storage bins and office supplies. Position your desk near a window to provide natural light and views of nature while you work. Add greenery like succulents or small plants to enhance air quality and provide visual interest. Use an essential oil diffuser with energizing scents like citrus, peppermint or pine. Play your favorite music at low volume to make mundane tasks more enjoyable. A customized workspace you look forward to using keeps you engaged.

Utilizing Productivity Tools and Technology

Take advantage of technology tools designed to improve organization, collaboration, and productivity. Apps like Trello, Asana and Todoist help you manage projects and track deadlines. Time tracking software provides visibility into how you spend your days. Video conferencing platforms like Zoom facilitate remote meetings and collaboration. Chrome extensions like OneTab and Pocket save and organize links for later reading. Noise-cancelling headphones block ambient noise when you need to focus. Set up automatic backups so you never lose important documents. Experiment with different software, apps and tools to determine which boost your productivity.

Conclusion

Organizing and optimizing your home office space is one of the best investments you can make in your productivity and career success. By choosing an ideal location, outfitting it with functional furniture and equipment, keeping it decluttered, and establishing work-life boundaries, you can create an environment conducive to focused work. Personalize your workspace and take advantage of technology to enhance your productivity even further. Use the strategies in this article to set up a home office tailored to your needs and work style. An organized office clears the way for productivity.


Practical Storage Solutions for Small Spaces

0
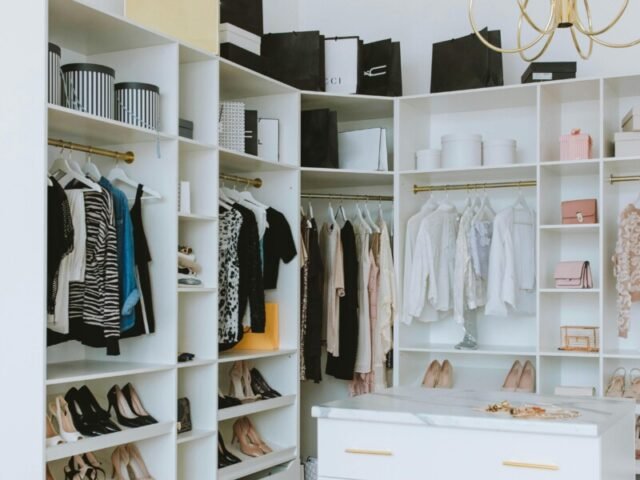
storage, wardrobe

Living in a small space can feel cramped and cluttered without proper organization. However, with some clever solutions, you can maximize every inch to keep your belongings tidy and your rooms feeling spacious. This article will explore practical storage ideas to help make the most of your small home.

Embrace Vertical Space

One of the best ways to maximize storage in a small home is to utilize vertical space. Install floating shelves, mount tall bookshelves on walls, or hang vertical pegboards to take advantage of vertical real estate.

Use Wall Space for Shelving

Wall-mounted shelving is ideal for stacking items vertically while keeping them within arm’s reach. Floating shelves are available in various lengths and can be installed in virtually any room. Use them in the kitchen for cookbooks, in the bathroom for towels, or in the bedroom for displaying photos. For a cohesive look, opt for matching shelves in the same finish and style throughout the home.

Incorporate Tall Storage Furniture

Another excellent way to optimize vertical storage is through tall furniture pieces. A floor-to-ceiling bookcase can house books, decor items, baskets, and bins. Meanwhile, a tall linen cabinet adds neatly tucked away storage for extra bedding and towels in the bathroom. Place these storage solutions in underutilized corners or narrow wall spaces.

Install Vertical Pegboards

Pegboards allow you to hang tools, pots and pans, or other items with hooks to keep things organized. Mount them vertically in the kitchen, craft room, laundry room, or garage to maximize space efficiency. Use pegboard hooks to customize the storage to your needs.

Uncover Hidden Storage Gems

Small spaces often have untapped storage potential in overlooked areas. Get creative and uncover every possible storage nook and cranny throughout your home.

Under-Bed Storage Containers

Lift up your mattress and discover wasted space perfect for extra storage. Plastic under-bed containers slide effortlessly on wheels to access seasonal clothing, extra linens, or rarely used items. Some even have dual-opening lids for grabbing items from the side or top.

Over-the-Door Organizers

Most household doors have empty space ready for storage solutions. Over-the-door organizers with shelves or pockets are ideal for stashing bathroom essentials, pantry goods, cleaning tools, and more while freeing up drawer and cabinet space. Hang them on closet doors, pantry doors, or the back of bedroom and bathroom doors.

Furniture with Hidden Storage

When selecting furniture, opt for pieces with secret built-in storage. An ottoman or bench with a lift-up lid reveals a hidden compartment perfect for storing blankets. Meanwhile, a coffee table or end table with interior shelves or drawers provides extra storage space.

Embrace Multifunctional Furniture

Multifunctional furniture pulls double duty as both storage solutions and functional pieces. Opt for storage beds, ottomans, and tables suited to your small home’s needs.

Storage Beds

Beds with built-in drawers are extremely useful for keeping clothes, linens, and other bedroom essentials organized while reclaiming floor space. Depending on the size and style, storage beds can have up to six large drawers to maximize hidden storage.

Ottoman Storage

Ottomans seamlessly provide extra seating and discreet storage space. Lift the padded lid to reveal a spacious interior for blankets, pillows, entertainment accessories, or anything you want out of sight. Use storage ottomans in living rooms, family rooms, bedrooms, and nurseries.

Tables with Hidden Storage

Coffee tables and end tables with lift-up tops or drawers blend storage with surface space. Look for tables with multiple drawers or shelves to hold remote controls, books, coasters, and more. The hidden storage helps reduce clutter while keeping items handy.

Declutter and Organize with Purpose

An organized, clutter-free home seems more spacious, no matter the actual square footage. Make decluttering and organization a regular habit. Go through belongings frequently and eliminate unnecessary items. Give everything a designated storage spot using practical organizational tools.

Implement a “One In, One Out” Rule

To avoid a gradual buildup of clutter, adopt a one in, one out system. Every time you bring a new item home, something else must be donated, recycled, or sold. This stops overflow and forces you to evaluate each purchase.

Use Labels and Bins for Organization

Proper labeling ensures everything has an organized spot. Apply labels to bins, shelves, drawers, and storage containers. Use clear plastic bins to easily identify contents. For shared spaces, assign each person a bin or drawer just for their belongings.

Invest in Storage Furniture

Sometimes the key to an uncluttered home is storage furniture suited to your space. A console table with baskets for entryway clutter, a hall tree for hanging coats, or a set of matching stackable drawers for the closet can provide specialized storage.

Embrace Creative Storage Solutions

In small spaces, you need to get creative when it comes to storage. Repurpose everyday items for unique and eye-catching ways to stash belongings.

Repurpose Household Items

Give old items new purpose as storage solutions. For example, a ladder turned on its side becomes a towel rack. Vintage crates or boxes act as rustic shelving for books. Leftover glass jars store small items like office supplies.

DIY Wall-Mounted Storage

Take advantage of vertical space with DIY wall storage. A photo ledge mounted horizontally becomes a floating mail and key caddy. Individual spice jars on mounted boards create a space-saving spice rack. Wall-mounted dowels or pegs provide places to hang hats, belts, and handbags.

Multipurpose Furniture

Tables like a bench seat with storage cubbies underneath or a kitchen island with shelving maximize space. An upholstered ottoman does triple duty as a coffee table, extra seating, and storage. Even the space under your sofa can be used for lidded baskets to stash items.

Final Thoughts on Small Space Storage Solutions

No matter how tiny your home, there are many innovative ways to maximize your square footage through practical storage solutions. Use vertical space efficiently, uncover hidden storage potential, embrace multifunctional furniture, and get creative with repurposed items. With some strategic organization and decluttering, you can make even the smallest home feel open and livable.

Focus on solutions that streamline clutter and create smart, accessible storage suited to your lifestyle and space. With these tips, you can enjoy the coziness of small space living without feeling cramped by belongings.


How to create a cozy and inviting living space?

0
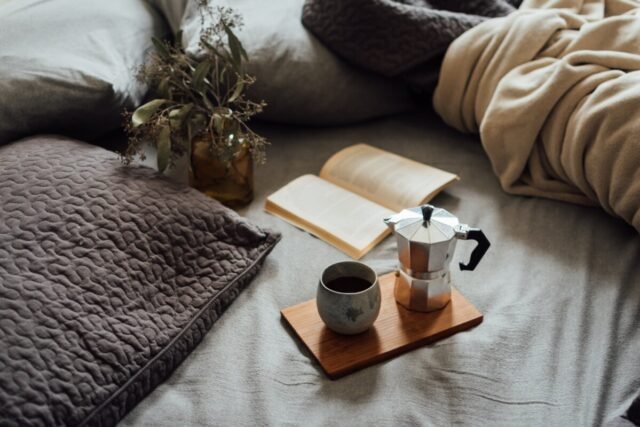
cozy space, coffee

Creating a warm, cozy, and inviting living space is an important step towards making your home feel like a comfortable haven. A cozy living space immediately envelops you in a sense of tranquility when you walk through the door, providing respite from the stresses of everyday life. Whether you want to relax after a long day or host friends and family in a welcoming environment, transforming your living room into a cozy sanctuary is easier than you may think. With some simple tips and tricks, a bit of creativity, and a few personal touches, you can cultivate a living space with undeniable charm and comfort.

Embracing Warmth and Comfort in Your Cozy Living Space

A cozy living room evokes a sense of snugness and warmth. Incorporating tactile elements, ambient lighting, and natural fragrances are all powerful ways to make a living space feel genuinely welcoming and serene.

Layer Up with Cozy Textiles for a Warm and Inviting Living Room

Plush, soft textiles add instant texture and warmth to a living room. Rugs, blankets, pillows, and cushions in natural materials like wool, cotton, linen or cashmere create irresistible coziness and comfort underfoot as well as on furniture.

Layer rugs over carpets or hardwood floors to provide sound dampening and a literal sense of warmth. Go for plush pile rugs or woven wool styles. Then adorn your sofas, chairs, and beds with an abundance of cushy throw pillows and blankets in coordinating colors and patterns.

Create dimension by mixing different textiles and experimenting with texture. A chunky knit blanket paired with smooth velvet cushions makes for an ultra-inviting tactile experience. The more layers of cozy softness the better.

A warm and inviting living room with soft textiles

Harness the Allure of Lighting for a Cozy Living Room

Strategic lighting transforms a living space by creating ambiance, visual interest, and a warm glow. Incorporate natural light whenever possible, and supplement with a combination of general, task, and accent lighting as needed.

Maximize sunlight by keeping window treatments light and airy. Sheer curtains that filter light are ideal. Position chairs and sofas near windows to capitalize on natural light.

For evenings and overcast days, install dimmable overhead fixtures along with task lighting like adjustable floor and table lamps. Don’t underestimate the power of accent lighting. Strategically placed sconces, picture lights, and accent lamps with warm bulbs cast a cozy glow.

Finally, incorporate candles of varying heights for a touch of flickering ambiance. The warm, dancing glow of a candle flame instantly increases coziness.

A cozy living room with warm and inviting lighting

Infuse Natural Scents for a Soothing Cozy Living Room

Incorporating natural fragrances enhances the welcoming atmosphere of a living space. Try diffusing essential oils like lavender, eucalyptus, or orange to promote relaxation.

Strategically place scented candles, reed diffusers, or bowls of potpourri filled with dried flowers and herbs to gently scent the air. For longer lasting aroma, display vases of fresh flowers like jasmine, garden roses or peonies.

Herb gardens, such as windowsill planters of mint, rosemary or lemon thyme, also impart pleasant fragrance along with visual appeal. Allowing the natural scents of your living space to mingle creates an irresistibly soothing environment.

A living room with candles and essential oil diffusers

Cultivating a Sense of Inviting Charm in Your Living Space

Making a space feel genuinely welcoming goes beyond just being physically comfortable. Incorporating personal touches, natural elements, and cohesive color palettes infuses a living room with charm. Display your treasures, add life with plants, and embrace color psychology to create an environment with inviting appeal.

Infuse Personality into Your Cozy Living Room with Meaningful Decor

Fill your living space with pieces that showcase your personality, interests, and cherished belongings. This creates a home filled with endearing charm that is uniquely you.

Display travel mementos, family photos, favorite books, collections, and artwork that brings you joy. Create a gallery wall or shelving to highlight these personal touches.

Anchor the room with a statement piece like a fireplace, large bookshelf, or comfy chair in a vibrant hue. This instantly becomes a focal point.

Surround yourself with pieces that tell your story. Visitors will get a sense of who you are, making them feel immediately at ease in your home.

A living room with personal touches and a statement fireplace

Welcome Nature Indoors for a Cozy Living Room

Plants, flowers, and natural materials infuse living spaces with life and vibrancy.

Strategically place leafy green plants like pothos, ferns, or philodendrons to purify the air while adding organic charm. Flowering plants like orchids or bromeliads add pops of color.

Add warmth with natural accents like woven baskets, stone table tops, wood furniture, jute rugs, or a stacked stone fireplace. Rustic charm creates an inviting atmosphere.

Bring the outdoors in by displaying natural elements like dried flowers, potted herbs, branches, stones, or seashells. Their organic beauty enhances the coziness.

A living room with indoor plants and natural wood accents

Embrace Color Psychology for a Warm and Inviting Living Room

Color profoundly impacts mood and atmosphere. Paint walls or accent the room with hues known to promote feelings of comfort and tranquility.

Earthy tones like cream, taupe, brown, and olive green have a grounding effect perfect for cozy spaces. Soft blues and greens emulate serenity. Salmon, peach, and terracotta add warmth.

Boost your color palette with pops of brighter accent colors via artwork, pillows, flowers or other décor. This prevents blandness while still maintaining a soothing ambiance.

Keep the overall palette low-contrast and harmonious. Limit colors to 3 or 4 complementary hues. A cohesive scheme makes a space feel intentionally designed.

A living room with a warm and inviting color palette

Achieving Cozy Functionality in Your Living Space

Beyond visual appeal, ensure your living room layout promotes relaxation and everyday functionality. Smart furniture arrangements, adequate storage, and multi-purpose pieces allow you to truly enjoy the space.

Create Conversation-Friendly Seating Areas in Your Cozy Living Room

Arrange seating to spur connection. Face chairs and sofas inward to promote interaction. Ottomans and side tables provide convenient surfaces for drinks and snacks when socializing.

Place chairs adjacent to create intimate seating vignettes for reading nooks and conversation areas.

Leave enough space around and between furnishings so the room feels open and breathable. Avoid cluttering the center of the room.

A living room with comfortable and inviting seating arrangements

Design Your Cozy Living Room for Practicality

A space should function as flawlessly as it looks. Ensure your cozy living room works for real life.

Incorporate storage like baskets, cabinets, shelving, and ottomans to stow clutter out of sight. Prioritize durable, stain-resistant fabrics to handle spills and daily use.

Position floor and table lamps for ample task lighting. Install dimmers to control brightness and ambiance.

Choose family-friendly furniture with washable slipcovers. Select pieces proportionate in size to your room to allow comfortable flow. A pragmatic living room stays cozy.

A living room with smart storage solutions and functional furniture

Tailor Your Cozy Living Room to Your Lifestyle

Consider how your family uses the living space. Then customize it to maximize comfort.

Do you need play areas for kids? Add cushy floor pillows and toy storage. Is it your relaxation retreat? Place a plush recliner by a reading nook.

Incorporate conveniences like chargers near seating, a beverage station, or media storage. Add lighting and surfaces for hobbies. A living room designed for your unique needs says “make yourself at home.”

A living room tailored to the needs and preferences of its occupants

Create Lasting Coziness and Curb Appeal in Your Living Space

Whether you crave a sanctuary after a long day or a place to connect with loved ones, a cozy living room provides comfort. Lush textiles, strategic lighting, and personal décor infuse spaces with welcoming charm. Purposeful furniture arrangements maximize functionality.

Begin envisioning the cozy living room of your dreams. Experiment with textural layers, play with color and lighting, and incorporate meaningful pieces until you achieve a space that soothes and inspires. Your home will become a beloved haven you look forward to relaxing in.

So cozy up on the sofa with a warm cup of tea and start making your living room the ultimate inviting retreat. Your friends and family will be eager to share in its heartwarming appeal.

Share Your Cozy Living Room Ideas and Creations

I would love to see photos of your warm, inviting living rooms! Please tag me on social media using #CozyLivingSpaces so I can share in the inspiration. Let’s create cozy sanctuaries, one living room at a time.


Using color palettes in interior design

0
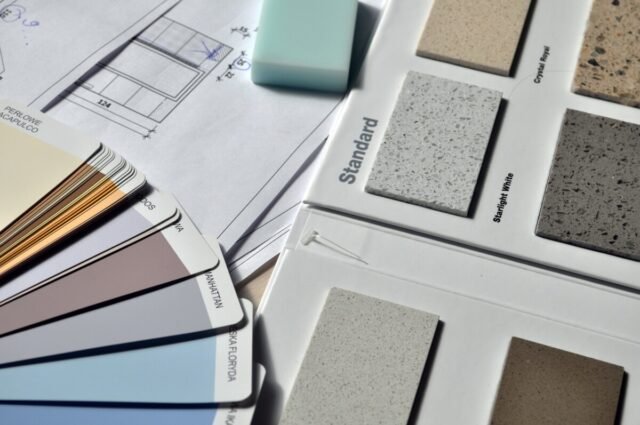
color palette

Interior design is both an art and a science. One of the key elements of creating an aesthetically pleasing and functional living space is choosing a cohesive color palette. The thoughtful use of color palettes in interior design can transform the look and feel of a room, evoking specific moods and emotions. Understanding color psychology and learning how to effectively implement color schemes is essential for amateur designers and seasoned professionals alike.

The Importance of Color Palettes in Interior Design

A color palette refers to a selective and intentional combination of hues used throughout a space. The colors should complement each other and work together to create a unified aesthetic. Color palettes are one of the most impactful interior design tools for establishing the overall atmosphere of a room.

The right color palette can make a space feel energizing and lively or soothing and serene. On the other hand, a disjointed or haphazard application of colors can make a room feel chaotic and uncomfortable. Using a strategic color palette lends harmony and visual interest to any interior. It also serves as the foundation upon which other elements like furniture, lighting, and decor are layered.

The Psychology Behind Color Selection

In order to choose a color palette that aligns with your vision, it helps to have a basic understanding of color psychology. While reactions to color can be highly subjective, general patterns exist. Warm hues like red, orange, and yellow are known to stimulate the senses and evoke feelings of excitement, enthusiasm, and cheer. Cool colors like blue, green, and purple promote relaxation and calm.

Neutral colors like white, gray, black, and brown are versatile and great for creating balance. They act as a blank canvas that allows accent colors to really pop. Bright, saturated shades tend to energize and vivid pastels have a softening effect. Darker shades can make a space feel intimate and cozy. Being mindful of these psychological impacts can inform your color choices.

Factors to Consider When Selecting a Color Palette

There are several key factors to take into account when choosing a color scheme for your interior design:

Natural Lighting

The quality and quantity of natural light in a space should guide your color selection. North-facing rooms with cool, blue-toned light call for warm color palettes. Southern exposures with ample sunlight can handle darker, cooler hues without feeling dreary. Rooms with bright light and reflections off water warrant light, neutral palettes.

Existing Furniture and Features

Look at furniture, flooring, tile, countertops, and any other fixed elements that are staying put. Choose accent colors that complement these existing features. If you have warm wood tones, incorporate some analogous earthy hues. Cool grays and stainless steel elements pair well with icy blues and silvers. Avoid clashing.

Personal Preference and Purpose

Consider the mood you want to cultivate in each room, as well as your own color preferences. A nursery often works well with cheerful pastels while a home office calls for stimulating shades to boost focus. If you’re not sure where to begin, look for inspiration images that appeal to you.

Size of Space

In smaller rooms, limit your palette to 2-3 colors to avoid looking busy. Larger spaces can handle more varied color schemes with 4-5 hues. Large open concept spaces still need a cohesive palette so the eye flows easily from one area to the next.

How to Select a Harmonious Color Palette

Once you’ve considered the unique needs of your space, follow these steps to choose a harmonious color palette:

Select a Dominant Hue

Begin by choosing a dominant color that sets the tone for your whole palette. This will be the most prevalent shade in the space. Opt for a neutral, muted tone that serves as a solid background. Gray, beige and tan are popular neutral base colors.

Add Complementary Accent Colors

Next, identify 2-3 accent colors to pair with your neutral base. Look at a color wheel to find analogous shades, triadic color combinations, or complementary colors that work well together. Accent colors should play off each other and the dominant hue.

Include Pops of Vibrancy

Add a vibrant secondary color to provide visual interest through contrast. These bright pops of color will make accent walls, artwork, pillows, and accessories really stand out against your neutral backdrop.

Repeat Colors Throughout the Space

Use your color palette cohesively throughout the space on walls, furniture, fixtures, textiles, art and accessories. Repeat colors in different shades and intensities. This repetition creates harmony and flow.

Popular Color Palettes for Interior Design

Certain color combinations have proven to be reliably pleasing and versatile for interior spaces. Here are some of the most popular color palettes to inspire your own creation:

Monochromatic

Monochromatic palettes use different tones, shades and intensities of one single color. This creates a very soothing, cohesive look. Grayscale is a common monochromatic scheme. Adding black and white counts as long as gray remains dominant.

Analogous

Analogous palettes utilize hues that sit next to each other on the color wheel, such as blue, blue-green, and green. They are harmonious and easy on the eyes.

Complementary

Complementary palettes pair contrasting colors from opposite sides of the color wheel, like red and green or yellow and purple. This creates vibrant visual tension. Use complementaries sparingly to avoid overwhelming the space.

Triadic

Triadic palettes use three colors equally spaced on the color wheel, such as red, yellow and blue. The contrast between the colors creates a dynamic, energetic ambiance.

Neutral

Neutrals like white, gray, black and brown serve as excellent base colors to build upon with bold accents. Crisp white paired with pops of color is clean and contemporary.

Tips for Incorporating Color Palettes

Here are some top tips for effectively planning and implementing a color palette:

  • Start by collecting inspiration images, fabric swatches, paint color cards, etc. to hone in on your desired look.
  • Limit your palette to 3-5 core colors for cohesion, adding other accent shades sparingly.
  • Use 60-30-10 ratio, with your dominant color taking up 60% of space, secondary colors 30%, and accent colors 10%.
  • Employ your accent colors strategically in small doses to draw attention, such as on ceilings, doors, or as artwork backdrops.
  • Repeat your palette colors throughout the space for continuity but vary textures and patterns to add visual interest.
  • Display your inspiration images and material swatches in one place to refer back to as you design the space.
  • Purchase removable samples of paint, fabric, flooring, etc. to test your palette before fully committing.
  • If you have fixed warm wood furniture, incorporate warm earth tones. Cool metals and grays pair well with icy blue and silver hues.

Achieving the Ideal Interior Color Palette

Strategically wielding color is an impactful tool for interior designers to shape the look, feel, and functionality of living spaces. An ideal color palette emerges from a thoughtful process of assessing the needs of the room, the psychology of color, and the interplay between all the design elements.

Experimenting with color mixing and pattern layering allows you to put your personal stamp on a space. Balancing neutrals and saturated hues keeps the palette soothing. Repeating colors ties everything together. With a foundational understanding of color theory and some trial and error, you can curate the perfect color palette for your interior design vision.


Recent Posts