Home Blog Page 4

DIY Interior Design Projects on a Budget

0
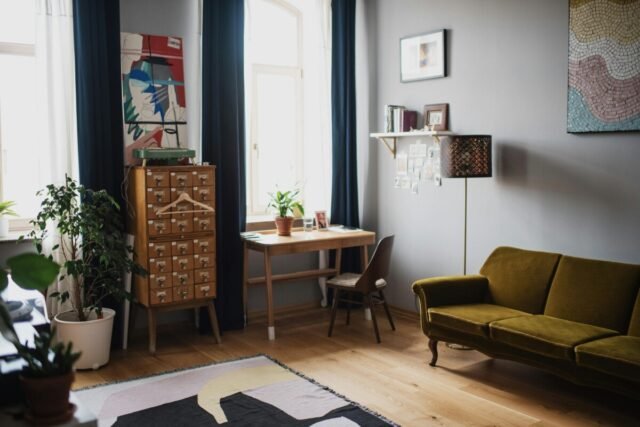
Interior Design furniture

Interior design can seem daunting, especially when working with a limited budget. However, with some creativity and resourcefulness, you can give any space a stylish makeover without breaking the bank. From upcycling thrift store finds to repurposing everyday items, there are many ways to implement cheap home decor and pull off a DIY home makeover. With a bit of imagination, you can create a gorgeous interior design on a budget.

Embrace the Thrill of Thrifting and Upcycling

One of the best ways to save money on interior design is to thrift used furniture and home decor. Check out local thrift stores, garage sales, Facebook Marketplace, and Craigslist for hidden gems. You can find everything from couches and armchairs to lamps, rugs, artwork, and accessories for a fraction of retail prices.

Upcycling thrifted items is also a great budget interior design strategy. With a little bit of paint, new hardware, or creative alterations, you can give old furniture and decor new life. Sand and refinish a used coffee table, turn a vintage suitcase into wall storage, or cut up an old sweater and sew a statement pillow. The possibilities are endless! Upcycling not only saves money but also reduces waste and allows you to add unique, one-of-a-kind elements to your home.

Upcycled coffee table

An upcycled thrift store coffee table adds character to this living room.

When thrifting, keep an eye out for pieces with good bones that just need a little TLC. Solid wood furniture with good construction can be revived with sanding, staining, painting, or new hardware. Don’t overlook items with minor flaws like scratches or missing knobs. These imperfections can usually be fixed with basic DIY skills.

Unleash Your Inner Artist with DIY Wall Art

One of the easiest ways to make a big impact without spending much is by creating your own wall art. DIY wall art allows you to add personal flair and visual interest to your space. Best of all, you can make art tailored exactly to your taste and decor style.

Painting is an accessible DIY wall art medium. Try using a canvas or wood panel as your base. Acrylic paints are affordable and easy to use. Create abstract paintings by layering colors and shapes. Faux finishes like sponging, stippling, or dragging paint across the surface also create beautiful effects.

Another option is to use stencils to create eye-catching designs. Use stencils on walls or canvas to make geometric patterns, inspirational quotes, or botanical silhouettes. You can also cut your own stencils from cardboard.

Beyond painting, you can craft 3D wall art from everyday items. Some ideas include:

  • Photo collages using printed photos in thrifted frames
  • Silhouette art from black paper or vinyl
  • Shadow boxes displaying collected items like shells or ticket stubs
  • String art made from nails and yarn or string
  • Repurposed object installations like utensils, windows, or bike parts

The possibilities for DIY wall art are endless! Not only will it spruce up bare walls, but it will also showcase your creativity.

Transform Your Space with a Fresh Coat of Paint

Paint is one of the most cost-effective ways to makeover a room. A fresh coat of paint can give walls, furniture, and accessories an instant facelift. Painting allows you to change the entire vibe of a space by altering the color palette.

When choosing paint colors, be sure to consider the size of the room and the amount of natural light it receives. Dark, bold colors tend to make small spaces feel more cramped. Softer tones like light blue or gray open up the space. In rooms with ample natural light, you can get away with deeper, more saturated hues.

Semi-gloss or high-gloss paint finishes add a hint of shine and are perfect for using on trim, doors, and furniture. Matte finishes hide imperfections and are ideal for walls. You can also experiment with paint finishes like chalk paint or textured paints for unique effects.

Look for quality paint brands that offer paint and primer-in-one formulas. This eliminates the need to prime first and can help paint adhere and cover better. Always prep surfaces properly by cleaning, sanding, and filling holes before painting. Use painter’s tape for clean edges and apply two coats for best coverage.

DIY painted furniture

Give old furniture new life with a fresh coat of paint.

Painting worn furniture or flea market finds is one of the easiest ways to transform them. Sand and clean the surface first, then use spray paint or regular paint to change the color and finish. This is a budget-friendly way to make old furniture look brand new.

Add Personality and Texture with DIY Textiles

Incorporating textiles like throw pillows, rugs, curtains, and wall hangings is an easy way to add visual interest, texture, and a cozy feel to any space. Luckily, many textile projects can be DIYed even by total beginners.

Sewing your own pillow covers allows you to pick fun fabrics that show off your personality. You don’t even need a sewing machine – you can easily hand sew pillow covers or use iron-on hem tape. For an easy update, use fabric glue to adhere bold patterned fabric over existing pillows.

Macrame, a type of knotted rope craft, is trending for its boho aesthetic. You can hang macrame wall hangings or plant holders using simple knots and cotton rope. Pom-pom fringe trim also adds texture and color when adorning throw pillows or draped across a headboard.

Beginner sewers can try their hand at making simple curtains, tablecloths, or wall tapestries. Pick solid fabrics or basic prints to keep projects easy. Add interest with details like contrasting trims or banding. You can also embellish store-bought textiles with decorative touches like embroidery, fabric paint, or appliques.

Not only are DIY textiles budget-friendly, but they also allow you to control the colors, patterns, and textures in your space. Start small with a few handmade pillows or a macrame wall hanging to add a handcrafted touch.

DIY Lighting Solutions for a Brighter and More Ambiant Home

Proper lighting can make or break an interior design. The good news is there are many budget-friendly ways to upgrade lighting in your home through DIY projects.

One easy fix for ugly overhead fixtures is to replace lampshades. Choose a lampshade style and fabric that fits your room’s decor. Make sure the new shade’s size and shape works with the existing fixture. Neutral shades like white, beige or gray allow the fixture itself to shine.

For rooms with boring boob lights, replace them with a statement pendant light made from unexpected DIY materials like baskets, colored glass bottles, or painted buckets. Spray paint and distressing can transform a flea market find into a chic pendant. Suspend with a pendant cord kit.

DIY sconces are another unique lighting option. Attach wall mount brackets to salvaged wood, mirrors, or metal trays. Wire them with battery-powered puck lights or string lights. Paint and stencil the base to complement your color scheme.

For ambiance, use smart bulbs to create color-changing, dimmable lighting. Set the mood with automatic lighting schedules and scenes. Use voice controls or smart speakers for hands-free convenience.

With a little creativity, you can craft lighting fixtures that provide both function and wow-factor to your interior design. DIY your own stylish lamps, sconces, pendants and lampshades that align with your budget.

Conclusion

With some resourcefulness and DIY spirit, you can absolutely create a beautiful, personalized interior design while on a tight budget. Focus on the key elements that make the biggest impact – paint, wall art, textiles and lighting. Take advantage of upcycling, repurposing, thrifting and simple homemade projects to cut costs. Don’t be afraid to get creative and make something your own. The process can be just as rewarding as the finished result. The possibilities for budget interior design are truly endless!


How to Choose the Right Lighting for Your Home?

0
lighting in room

Selecting the proper lighting for your home is key to creating an inviting and functional space. The right lighting can set the mood, make a design statement, and ensure your home is optimized for activities like reading, cooking, and entertaining. By understanding lighting fundamentals, choosing fixtures for specific rooms, and layering lighting effectively, you can design a lighting plan that enhances your home’s ambiance.

Understanding the Fundamentals of Home Lighting

When deciding on lighting for your home, it’s important to understand the three main types of lighting and how they work together to illuminate a space.

Ambient Lighting

Ambient lighting provides overall illumination to a room. It’s the base layer of light that enables you to move comfortably through the space. Ambient lighting is often accomplished with ceiling lights, chandeliers, pendant lights, and wall sconces. For most rooms, the goal is soft, uniform ambient lighting that avoids harsh shadows.

Task Lighting

As the name suggests, task lighting focuses light on specific work areas where you need extra illumination for activities like reading, cooking, grooming, and working on hobbies. Task lighting can be provided by portable lamps, under-cabinet lighting, track lighting, and recessed cans. Properly positioned task lighting prevents eye strain.

Accent Lighting

Accent lighting adds drama to a space by illuminating architectural details, artwork, collections, and decorative elements. Accent lighting creates visual interest in a room. Spotlights, picture lights, and directional lighting provide focused beams ideal for accent lighting.

In addition to type of light, you’ll also want to consider the color temperature and brightness.

Color Temperature

Color temperature is measured in Kelvins (K) on a scale from warm to cool. Lower Kelvin temperatures like 2700K-3000K produce a warm, cozy light. Neutral white light is between 3500K-4000K. Cooler color temperatures above 5000K create a more energizing vibe. Select bulbs based on the ambiance you want to achieve.

Brightness

Brightness is measured in lumens, indicating the total amount of light produced by a bulb or fixture. Match the lumens to the size of the room and its lighting needs. For example, brightly lit kitchens and bathrooms need 2000+ lumens while dim accent lights can be as low as 400 lumens.

By mixing lighting types and adjusting color and brightness, you can design a layered lighting plan tailored to your home.

Choosing Lighting for Specific Rooms

The lighting needs of every room depend on its size, functions, and aesthetic. Evaluate how each space will be used when selecting fixtures.

Living Room Lighting

Living rooms require a variety of lighting. For overall illumination, opt for layered ambient lighting from ceiling fixtures, lamps, and sconces. Make sure to have accessible wall switches or dimmers to adjust the lighting for both energetic gatherings and cozy nights in. Position adjustable task lighting next to seating areas to accommodate reading or hobbies. Use accent lighting on architectural details, artwork, shelves, and collections to add character.

Bedroom Lighting

Bedrooms demand both general and specific lighting. For overall illumination, ceiling lights and table lamps work well. Be sure to have variable controls from bright light for cleaning to dim mood lighting. Position adjustable bedside lamps to provide directed task lighting for reading without disturbing your partner. Relaxing accent lighting, such as wall sconces or cove lighting, creates a serene vibe.

Kitchen Lighting

Kitchen lighting must meet the demands of food preparation. Bright overhead lighting is ideal over workstations, while under-cabinet lighting illuminates countertops. Use pendant lights or recessed cans to provide ambient lighting for the whole kitchen. Task lighting under cabinets and over the sink facilitates cooking tasks. For dining areas, chandeliers, pendant lights or wall sconces allow you to adjust the brightness.

Bathroom Lighting

Bathroom lighting serves both function and ambiance. Bright overhead lighting is essential at vanities for grooming. Waterproof ceiling lights work well in showers and above bathtubs. Under vanity strip lighting illuminates legroom without shadows. Use accent lighting to create a spa-like environment with wall sconces or cove lighting.

Layering Lighting for a Balanced Effect

When designing your home’s lighting, it’s important to layer multiple types of lighting to create ambiance, meet functional needs, and provide visual interest. Follow these tips for layering lighting effectively:

  • Combine overhead ambient lighting from fixtures like chandeliers or ceiling lights with portable lamps for flexible illumination.
  • Flank windows with sconces or pendant lights to make the most of natural light.
  • Use recessed and track lighting to spotlight artwork, collections, and architectural details.
  • Install under-cabinet lighting along with pendant lights over work areas in kitchens.
  • Place table and floor lamps in seating areas to provide adjustable task lighting for reading.
  • Set matching bedside table lamps on both sides of the bed for reading comfort.
  • Mix the color temperatures of bulbs, using warmer lights for ambiance and cooler lights for tasks.
  • Control lights with dimmers, smart technology, and multiple switching zones for easy adjustments.

By thoughtfully combining varied lighting sources, you can create the perfect balance of illumination for both aesthetics and function.

Selecting Lighting Fixtures that Complement Your Style

Beyond function, lighting fixtures also serve as part of your home’s décor. Selecting styles and finishes that align with your interior design enhances the overall look of each room. Consider the following tips when choosing fixtures:

  • For traditional décor, opt for elegant chandeliers, sconces, and table lamps in finishes like antique brass or crystal.
  • Contemporary spaces shine with modern fixtures like linear pendants, track lighting, and LED strips.
  • Rustic designs incorporate wrought iron, stained wood, and Edison bulb pendants and table lamps.
  • Coastal decors look best with nautical-inspired fixtures featuring materials like woven rope, seashells, and weathered wood.
  • Farmhouse lighting includes galvanized metal pendants, exposed Edison bulbs, and vintage-style filament lamps.
  • Industrial interiors feature matte black or nickel pendant lights, cage lamps, and bare bulb fixtures.
  • For glamorous spaces, choose sparkling crystal chandeliers, gilded sconces, and ornate table lamps.

Scale also matters when selecting fixtures. Make sure new lighting is proportionate to your ceiling height and furniture. An interior designer can help you choose fixtures that complement your décor.

Energy Efficient and Sustainable Lighting Solutions

When upgrading your home’s lighting, it’s wise to invest in energy-efficient options that will save on electricity costs and reduce environmental impact. Here are some solutions to consider:

  • LED bulbs last 10-25 times longer than incandescents and use at least 75% less energy, making them the top choice.
  • Look for ENERGY STAR rated fixtures which meet strict energy efficiency guidelines set by the EPA.
  • Install dimmers, timers, motion sensors, and smart lighting controls to further cut electricity use.
  • Choose fixtures made from sustainable materials like recycled metal, FSC-certified wood, and natural fiber shades.
  • Dispose of old bulbs properly to keep mercury out of landfills. Many retailers recycle CFLs and fluorescent tubes.

By selecting efficient and eco-friendly lighting, you can reduce your home’s carbon footprint and lower your utility bills while still enjoying beautiful illumination. Consult with electricians and lighting designers to plan upgrades tailored to your needs and lifestyle.

Conclusion

The lighting in your home has a profound impact on how each space looks, feels, and functions. By understanding fundamental lighting concepts and carefully choosing fixtures suited to your decor and activities, you can craft lighting that elevates your home’s design and creates the perfect ambiance for relaxation or entertaining. Planning your lighting room-by-room and layering multiple sources allows you to balance both practical needs and aesthetic appeal. Taking advantage of energy-efficient options also allows you to cut costs and reduce environmental impact. With the right lighting design, you can make every part of your home more inviting and comfortable while reflecting your personal style.


Creating a home that reflects your personal style

0
interior design

Your home is your sanctuary. It’s a reflection of who you are and what you love. From the colors on the walls to the art on display, your décor tells a story about your unique personality and passions. Creating a space that truly embodies your personal style takes thoughtfulness and care, but the payoff is immense. A home that feels genuinely “you” can lift your spirits and bring joy every single day.

Discovering Your Decorating Style

The first step in creating a home that reflects your personal style is identifying what that style actually is. Taste in interior design is deeply personal, influenced by your interests, experiences, and personality traits. Start the style discovery process by asking yourself some introspective questions:

  • What colors make you happy? Are you drawn to bold hues like emerald green and cobalt blue or prefer muted tones like dove grey and blush pink?
  • What patterns and textures do you lean towards? Do you love the coziness of cable knit blankets or the sleekness of polished marble surfaces?
  • Do you have favorite eras or cultures that inspire you? Victorian architecture or midcentury modern design, for example.
  • Which rooms in your home do you spend the most time in? Focus on creating an amazing decor sanctuary for the spaces you use daily.
  • How would you describe your lifestyle and personality? Casual and laidback or formal and elegant?

Once you’ve reflected on your interior design preferences, consider how they fit into some of the most popular decorating styles:

Minimalist

The minimalist style is all about simplicity. It focuses on clean lines, plenty of open space, and a limited color palette. Key elements in minimalist rooms include neutral furniture, multipurpose pieces, and lots of natural light.

Boho Chic

Bohemian or “boho” style embraces freedom of expression. This look features rich textures like velvet and leather, eye-catching patterns like paisley and ikat, and an eclectic mix of furnishings from different eras and cultures.

Modern

Modern decor emphasizes sleek, contemporary pieces. You’ll see solid colors, geometric shapes, and natural materials in a modern home. The look leans towards functionality and flexibility over ornamentation.

Farmhouse

The farmhouse style is inspired by practical country living. It focuses on natural materials like wood and stone with distressed finishes. Airy, open floor plans and floral accents are farmhouse trademarks.

Traditional

Traditional design draws inspiration from classical European styles. This elegant look often features decorative molding, rich colors like burgundy and navy, and luxurious furnishings. Symmetry and order are emphasized in traditional décor.

Once you’ve narrowed down the style categories you’re drawn to, it’s time to dive deeper into choosing the specific elements that will make your home distinctly “you”.

Laying the Foundation: Color Palettes and Textures

Color is one of the most impactful design elements. The hues you choose for your walls, furnishings, and accents set the entire mood for each room. When selecting a color palette, consider the purpose of each space along with your personal preferences.

The psychology of color also greatly influences how certain hues make us feel. For example:

  • Blues and greens foster relaxation and tranquility. Perfect for bedrooms and spas.
  • Neutrals like beige and gray promote concentration and clarity. Ideal for offices or studies.
  • Vibrant shades like crimson and gold evoke excitement and cheer. Great for dining rooms and living areas.

Don’t be afraid to use color to create defined spaces within a larger room. A bold blue accent wall in a neutral living room immediately draws the eye, becoming a focal point.

Texture adds visual and tactile interest to your décor. Incorporate a range of textiles to keep rooms from feeling flat and one-dimensional. Play with different textural combinations like:

  • Plush wool rugs underfoot and silky curtain panels framing windows
  • Sturdy jute placemats contrasting sleek marble tabletops
  • Cozy cable knit throws atop smooth leather sofa cushions

Vary textures throughout the home to define each space while still creating a cohesive feel.

Furniture Selection: The Art of Curating Pieces

Furniture forms the foundation of any interior design scheme. Scale and proportion are key considerations when selecting pieces. Make sure furnishings fit the room properly and don’t overwhelm the dimensions. Other tips for choosing furniture include:

Consider Your Lifestyle

Your furniture should suit how you actually live. If you entertain often, prioritize cozy seating and spacious tables. For a busy family, focus on durable, easy-care pieces.

Choose Timeless Over Trendy

Quality furnishings that reflect your authentic style won’t date your home. Seek out classics like a leather Chesterfield sofa or mid-century modern credenza.

Mix Old and New

Give rooms more depth by blending antique or vintage finds with modern designs. An industrial metal coffee table looks striking beside that tufted vintage armchair.

Multifunctional is Best

Make the most of your space with furniture that serves more than one purpose. An ottoman that opens into storage or a bench that folds out into a guest bed.

Curate Slowly

You don’t have to furnish an entire home all at once. Thoughtfully collect special pieces over time for a layered, collected look.

By keeping functionality and your personal taste top of mind, you’ll end up with a home full of furniture you’ll cherish for years to come.

Accessorizing with Personality: The Finishing Touches

Accessories are the jewels that take your design scheme from basic to beautiful. These are the items that inject your personality into a space, telling visitors a story about who you are.

When accessorizing, first take note of what’s missing in a room. If a bookshelf looks bare, add framed family photos or potted plants. If a fireplace mantel seems empty, arrange artful ceramic vases on top. Address the blank spaces.

Next, think about your interests and what makes you uniquely “you”. Music lover? Display vintage records and a guitar. Avid traveler? Group souvenirs from different countries together on a console table. Showcase what you love.

Some other ways to accessorize with personality:

  • Artwork – Hang pieces that speak to you or even your own creations. Mix mediums like photography, paintings, and prints.
  • Textiles – Roll out a vibrant rug, hang cozy macrame wall hangings, or display beautiful fabric swatches.
  • Sculptures – Add visual interest with carved wood or molded metal sculptures in corners or recessed wall niches.
  • Plants – Greenery instantly livens up any space. Cluster potted plants on shelves or hang trailing vines.

The beauty of accessories is you can easily change them up whenever the mood strikes. Have fun with it!

Lighting: Illuminating Your Style

Lighting completes a room, creating the perfect ambiance to match your personal style. There are three main types of lighting to factor in:

Ambient: This is the soft, general illumination for the whole room. Overhead ceiling fixtures or table and floor lamps often provide ambient lighting.

Task: As the name implies, this is targeted light for completing specific tasks like reading or cooking. Under-cabinet kitchen lighting is a great example.

Accent: Accent lighting highlights specific design elements or areas. Picture a beam of light over a piece of art or wall sconces framing a mirror.

Choose fixtures and bulbs that complement your decorating style. For modern spaces, sleek track lighting and LEDs give a streamlined vibe. In cozy farmhouse rooms, wrought iron chandeliers and Edison bulbs set a welcoming mood.

Don’t underestimate natural light either. Maximize sunlight by hanging mirrors across from windows to amplify the brightness. Install sheer curtains to filter light softly into rooms.

Proper lighting illuminates your home in the best possible way, highlighting the design details you’ve so thoughtfully selected.

Final Touches for a Home That Reflects You

Creating a space that truly reflects your personal style requires self-awareness, patience, and a bit of experimentation until you land on what feels “just right”. But the payoff is priceless – your home becomes a direct representation of what inspires you, what you cherish, and who you are.

A few final tips for infusing personality into your décor:

  • Display, don’t hide away pieces with emotional significance. The antique clock inherited from your grandmother or the hand-woven wall hanging purchased on your honeymoon, for example.
  • Redesign rooms over time as your tastes evolve. You should never feel stuck with a look you’ve outgrown.
  • Break the “rules” if certain guidelines don’t align with your vision. You don’t have to follow trends if mid-century modern is your spirit style.
  • Have fun and don’t stress small stuff! Remember, this is your personal sanctuary. Make bold choices that bring you joy.

The most important takeaway? Decorate based on your own definitions of beauty, comfort, and style. With your unique stamp on every room, you’ll create a home that truly feels like you.


How to Paint Your Walls Like a Pro?

0
painting a wall

Painting your walls may seem like a simple weekend project, but achieving a professional-quality paint job requires careful planning and execution. With the right supplies, preparation, and techniques, you can transform any room in your home with a flawless, pro-grade finish. This comprehensive guide will walk you through each step of the wall painting process, from start to finish.

Gathering Your Supplies: Essential Painting Tools for a Pro Finish

The key to efficient and effective wall painting lies in having the right tools for the job. Arm yourself with these essential supplies before getting started:

  • Paint brushes – Angled sash brushes are ideal for cutting in edges and painting trim. wider bristle brushes work well for painting larger wall areas. Select high-quality nylon or polyester bristle brushes for smooth coat application.
  • Paint rollers – A 9-inch roller with a 3/8 or 1/2 inch nap is optimal for smoothly coating most wall surfaces. Keep extra roller sleeves handy for speedy paint application.
  • Paint trays – Use a deep paint tray with angled sides to hold a generous amount of paint and allow easy roller loading. Disposable tray liners simplify cleanup.
  • Drop cloths – Canvas drop cloths protect floors and furnishings from paint drips and splatters. For large rooms, tape plastic sheeting below your working area.
  • Painter’s tape – Gentle, low-tack tapes like blue painter’s tape create sharp paint lines without damaging surfaces.
  • Paint primer – Priming ensures better paint adhesion. Opt for a primer suited to your wall material.
  • Interior paint – Choose a durable, zero-VOC latex paint in your desired finish (flat, eggshell, etc). Purchase enough paint to cover all wall areas.

Investing in high-quality painting tools will make achieving professional results quick and easy.

Preparing Your Workspace: Setting Up for a Mess-Free Painting Experience

Carefully preparing your workspace is one of the most important steps to ensure an efficient, mess-free painting experience. Follow these pro tips when setting up:

  • Clear the room of all furniture, wall hangings, and outlet covers. Move furniture to the center of the room and cover with plastic sheeting.
  • Cover floors with canvas drop cloths. Overlap edges by 6 inches and secure with painter’s tape.
  • Tape plastic sheeting below your painting area to protect floors and baseboards from drips.
  • Seal off doorways and windows with painter’s tape and protective plastic to prevent paint transfer.
  • Cover and seal air vents, lighting fixtures, and switches with painter’s tape and plastic bags.
  • Set up your painting supplies in an easily accessible area protected by a drop cloth.
  • Have a wet rag, paint-removing wipes, and mineral spirits on hand to quickly clean up spills and messes.

Taking time to properly prepare your space will allow you to paint efficiently and prevent time-consuming cleanup of floors, furnishings, and fixtures.

Ensuring a Smooth Canvas: Surface Preparation for a Professional Finish

Proper surface preparation is crucial for achieving smooth, professional painting results. Follow these steps before applying primer and paint:

  • Clean walls thoroughly with a mild detergent solution to remove grease, dirt and grime. Rinse with clean water and allow to fully dry.
  • Fill any cracks, holes, or imperfections with spackle or drywall joint compound. Allow filler to dry completely and sand smooth.
  • Remove any loose paint by scraping or sanding. Feather edges smooth with sandpaper.
  • Use painter’s tape and plastic sheeting to mask off baseboards, crown molding, windows, and trim. This prevents paint bleeding.
  • Lightly sand glossy surfaces to dull the sheen and improve paint adhesion. Wipe away dust with a tack cloth.
  • Spot prime unpainted areas like spackled patches with appropriate primer before applying paint.

Taking time to properly prepare surfaces will provide the ideal smooth, clean canvas for painting. This allows paint to adhere evenly for a flawless professional finish.

Priming Your Walls for Optimal Paint Adhesion

Applying a quality primer is one of the best secrets of professionals for achieving optimal paint coverage and durability. Follow these tips when priming:

  • Always use primer on new drywall or when changing colors dramatically. Primer enhances adhesion.
  • For repainting similar colors, you may be able to skip priming by cleaning walls thoroughly and sanding glossy areas.
  • Select an appropriate primer for your wall surface – latex for drywall, masonry primer for concrete, etc. Oil-based primers provide the best adhesion.
  • Use a brush, roller, or sprayer to apply primer in thin, even coats according to manufacturer directions.
  • Extend primer onto trim areas. This creates a uniform foundation for paint application.
  • Allow primer to dry fully before painting – usually 1-2 hours. Primer should feel smooth and matte, not tacky.

Priming before painting is an essential step for professionals to lock in paint and achieve flawless results. Take the time to apply primer properly.

Cutting In: A Pro’s Secret to Sharp Paint Lines

Painting a crisp, defined edge where walls meet trim or ceilings is called “cutting in” and it’s a hallmark of professional painters. Follow these tips to cut in like an expert:

  • Use a high-quality angled sash brush sized around 2-3 inches wide. The angled brush simplifies edging.
  • Hold the brush at a 45 degree angle to the trim or ceiling line. Use your opposite hand to brace yourself.
  • Dip just the tip of the angled brush in paint. Tap lightly against the side of the can to remove excess.
  • Apply the paint in smooth, thin strokes right along the trim or ceiling line.
  • Gently feather out the paint from the line to blend it onto the wall area.
  • Use a steady hand and avoid overbrushing, which can leave visible brush marks.

Cutting in with precision results in super sharp paint lines and a polished, professional look. Take it slow and don’t rush this important technique.

Rolling Like a Pro: Achieving a Smooth, Flawless Finish

While cutting in defines the edges, using a roller allows you to efficiently coat large wall areas with a smooth, consistent finish. Follow these professional roller techniques:

  • Use a roller sized appropriately for your wall area. A 9-inch roller works for most medium-sized walls.
  • Load the roller evenly by dipping it into the paint tray, then rolling it back and forth across the ridged areas.
  • Start rolling in a 3′ by 3′ section, making “W” or “M” shaped strokes from ceiling to floor.
  • Move onto adjacent sections, blending and feathering the paint as you go to avoid lap marks.
  • Finish each section with vertical strokes from ceiling to floor to smooth out roller patterns.
  • Avoid pressing too hard or over-rolling, which can create excess texture.
  • Periodically reload the roller with paint. Blend in new paint by feathering and crisscrossing strokes.

Mastering proper rolling technique is key for achieving a smooth, seamless professional finish on your walls.

Achieving Color Depth and Coverage: The Art of Layering Paint

While it may be tempting to apply one thick coat of paint, professionals rely on multiple thin layers to build up rich, even color and a durable finish.

  • For most rooms, plan on applying two to three coats of quality latex paint. Dark colors may require an extra coat.
  • Allow each coat to dry fully before adding another layer, usually 1-2 hours between coats. Test paint by touching it gently with your knuckle.
  • Use an angled brush to spot paint and cut in edges before applying the next roller coat. This ensures sharp lines.
  • Apply each layer in opposing directions – horizontally, then vertically, for example. This ensures even coverage.
  • Check walls for missed spots and uneven sheen under adequate lighting. Touch up before moving onto the next coat.

Applying paint in multiple sheer layers avoids drips, sags, and visible roller marks for a smooth, professional finish.

Putting on the Finishing Touches: Cleanup and Touch-ups

The way you finish a paint job is just as important as the prep and application. Follow these pro tips for flawless final touches:

  • Clean brushes, rollers, and other tools thoroughly after painting using the appropriate solvent. This prevents drying and preserves equipment.
  • Wipe down paint cans and seal tightly for storage. Dispose of used drop cloths, trays, and roller sleeves.
  • Reinstall outlet covers, switch plates, fixtures and hardware using painter’s tape to protect freshly painted walls.
  • Touch up any final imperfections like drips or uneven coverage using a small paintbrush. Allow paint to dry fully before applying touch ups.
  • Remove painter’s tape around trim and baseboards within 24 hours of painting to prevent peeled edges.
  • Allow fresh paint to cure fully before hanging anything on walls or cleaning – usually 2-3 weeks.

Proper cleanup and finishing touches protect your hard work and complete the professional paint job.

Achieving a flawless, polished look when painting walls is within your reach by following these techniques used by the pros. Invest in quality tools, thoroughly prepare surfaces, apply paint in thin layers, and take time with final details. With this comprehensive guide, you can tackle painting your walls like an expert. Transform any room in your home with a smooth, durable professional finish that you can be proud of.


How to Install a Ceiling Fan?

0
Ceiling Fan

Installing a ceiling fan can help improve air circulation, reduce energy costs, and add style to any room. With some basic tools and materials, you can install a ceiling fan yourself, even if you don’t have electrical experience. This guide will walk you through the entire DIY ceiling fan installation process step-by-step.

Adding a ceiling fan to a room that doesn’t have one is an excellent way to improve comfort. Ceiling fans help circulate the air, making it feel cooler in the summer and warmer in the winter. This air circulation allows you to raise your thermostat in the summer and lower it in the winter without sacrificing comfort. By optimizing your HVAC system’s efficiency in this way, ceiling fans can reduce your energy costs.

Ceiling fans also provide aesthetic benefits. They come in a wide variety of styles, finishes, blade shapes, and sizes to complement any decor. Flush mount fans can be installed close to the ceiling in low-profile rooms. Downrod fans suspend down from the ceiling for more airflow in rooms with high ceilings.

Installing a ceiling fan is a manageable DIY project for most homeowners if the proper safety precautions are taken when working with electrical equipment. This guide will walk you through the entire ceiling fan installation process, including tools needed, wiring, mounting, and blade attachment. Follow these steps to successfully install a ceiling fan yourself.

Tools and Materials Needed

Before getting started, ensure you have all the necessary tools and materials:

  • Stepladder
  • Wire strippers
  • Voltage tester
  • Phillips screwdriver
  • Flat head screwdriver
  • Electrical tape
  • Wire nuts
  • Ceiling fan mounting bracket
  • Downrod
  • Ceiling fan
  • Blades
  • Light bulbs and glass shades (if installing a light kit)
  • Safety glasses and work gloves

Make sure to turn off the power at the circuit breaker before proceeding with installation. Double check that the power is off by testing the wires with a voltage tester.

Preparing the Installation Location

Choose the location for your ceiling fan based on the room layout. Make sure the blades will be at least 7 feet above the floor and 18 inches from any wall or obstruction.

Before mounting the bracket, locate the ceiling joists that will support the fan’s weight. If there is an existing light fixture, remove it. Identify where the electrical wiring comes into the junction box. Ensure the box is securely attached to the joists. Most ceiling fans weigh between 35-50 pounds. The junction box and joists must be capable of holding at least 50 pounds.

If the junction box is not rated for ceiling fans, it must be replaced with a new ceiling fan-rated junction box. This will require some basic electrical work.

Installing the Mounting Bracket

With the power turned off, install the ceiling fan mounting bracket directly to the junction box or a structural ceiling beam. The bracket must be able to support the ceiling fan’s weight. Use the screws provided with the mounting kit.

  • Position the mounting bracket over the junction box so it is aligned with a joist. Mark the screw holes.
  • Drill pilot holes if going into wood.
  • Insert mounting screws through bracket holes into the ceiling joist or junction box.
  • Make sure all screws are tight and bracket is firmly secured. It should not wobble.

Attaching the Downrod

The downrod suspends the ceiling fan from the mounting bracket down into the room.

  • Remove the pre-assembled pin from the downrod.
  • Feed the wires from the fan motor through the downrod.
  • Insert the downrod into the mounting bracket opening.
  • Align the holes and reinsert the pin removed earlier.
  • Tighten set screws on mounting bracket around downrod to hold it in place.

Wiring the Ceiling Fan

Making the electrical connections is the most important step in the installation process. Always follow the manufacturer’s instructions.

  • Inside the ceiling junction box, you will find black (hot), white (neutral), ground, and possibly a second hot wire for separate light and fan control.
  • Connect the black (hot) wire from the ceiling to the black and blue wires from the fan with a wire nut.
  • Connect the white (neutral) wire from the ceiling to the white wire from the fan with a wire nut.
  • Connect the ground wire from the ceiling to the green ground wire from the fan.
  • Connect all ground wires to each other and secure them with a wire nut.
  • After making connections, wrap electrical tape around wire nuts to create a more secure connection.
  • Carefully tuck connected wires into the ceiling junction box.

Attaching the Ceiling Fan Blades

  • Attach blades to blade irons using the provided screws and washers. Follow the manufacturer’s guide for correct placement and orientation.
  • Ensure all screws are tight.
  • Repeat for all blades.

Installing Light Kit

If your ceiling fan comes with an integrated light kit, follow these steps:

  • Connect the wires from the light kit to the wires from the fan motor according to the manufacturer’s wiring diagram.
  • Attach the light kit mounting plate to the bottom of the ceiling fan motor assembly using the screws provided.
  • Install light bulbs, then attach the glass light shades.

Finishing the Installation

  • Double check that all connections are secure.
  • Attach the ceiling fan motor assembly onto the mounting bracket.
  • Align the slots in the downrod ball with the tabs in the mounting bracket.
  • Turn the entire fan counterclockwise to lock it into place.
  • Insert a pin or screw through the hole in the downrod support to prevent the fan from rotating.
  • Turn on the power at the circuit breaker.
  • Test the fan speeds with the remote or pull chains.
  • Reverse the fan direction if needed to achieve proper airflow.

That covers the key steps for how to install a ceiling fan. Always refer to the manufacturer’s instructions for specific details. With the proper materials, safety precautions, and wiring connections, you can install a ceiling fan to enhance comfort and style in any room.


How to Caulk and Seal Around Windows and Doors?

0
window

Caulking and sealing around windows and doors is an important part of weatherproofing your home. Proper caulking and sealing can help prevent drafts, reduce energy costs, and improve the overall comfort of your living space. This DIY home improvement project is easy to do with the right materials and techniques.

Why Caulk and Seal Around Windows and Doors?

There are several benefits to caulking and sealing around windows and doors:

  • Prevent Air Leaks: Gaps and cracks around windows and doors allow conditioned air to escape and unconditioned air to enter your home. This can lead to higher energy bills as your HVAC system works harder to maintain the desired temperature. Caulking and sealing minimizes air leaks.
  • Improve Energy Efficiency: Studies show sealing air leaks can reduce heating and cooling costs by up to 30%. Preventing drafts with proper caulking and sealing leads to a more energy efficient home.
  • Enhance Comfort: Drafts from windows and doors can make your home feel cold and uncomfortable. Caulking and sealing reduces drafts and helps maintain steady indoor temperatures.
  • Protect Against Moisture: Air leaks allow moisture intrusion which can lead to mold, mildew, and rotting trim. Caulking and sealing protects your home.
  • Reduce Noise: Caulking and sealing reduces outdoor noise entering through windows and doors. Your home will be quieter.
  • Improve Appearance: Caulking and sealing provides a seamless look around windows and doors for better aesthetics.

Materials Needed for Caulking and Sealing

Caulking and sealing around windows and doors is easy to do yourself with a few key supplies:

  • Caulk: Use a high-quality exterior-grade silicone or latex caulk recommended for windows and doors. Silicone provides the most flexibility.
  • Weatherstripping: Adhesive-backed foam or rubber weatherstripping can seal gaps along door frames.
  • Caulk Gun: A caulk gun allows you to evenly dispense the caulk.
  • Caulking Knife: A caulking knife helps smooth out the caulk for a seamless finish.
  • Masking Tape: Masking tape keeps the area clean from excess caulk.
  • Clean Rags: Have some clean rags ready to wipe away any messes.
  • Utility Knife: A utility knife helps remove old caulk or weatherstripping.

Preparing to Caulk and Seal

Proper preparation is key to achieving good results when caulking and sealing:

  • Remove existing caulk or weatherstripping: Use a utility knife or caulk remover tool to remove any old caulk or weatherstripping.
  • Clean the surfaces: Wipe away any dirt, dust or debris with a damp cloth. Ensure the areas are dry before applying new caulk.
  • Read manufacturer’s instructions: Check the caulk tube or weatherstripping backing for any special instructions.
  • Work in mild temperatures: Ideal application temperature is between 50-90°F. Avoid extreme cold or heat.
  • Work in sections: Caulk in smaller sections so the caulk does not dry too quickly before smoothing.
  • Use masking tape: Apply masking tape along the edges for clean caulk lines. Remove the tape immediately after smoothing the caulk.

How to Caulk Around Windows

Follow these steps to seal around windows with caulk:

Choose the Right Caulk

For window caulking, use a high-quality exterior grade silicone caulk which offers long-lasting flexibility to accommodate expansion and contraction of the building materials. Latex or acrylic caulks are not as durable for the weather extremes around windows.

Cut the Tip and Load the Tube

Cut the caulk tube tip at a 45° angle to allow for a wider opening. Insert the tube into the caulking gun. Cut the tip further if needed to allow for the proper sized bead of caulk.

Apply Masking Tape

Apply masking tape along the window sill and sides, laying it just far enough from the edge to leave space for the caulk bead. This helps for straight caulk lines.

Dispense the Caulk

Hold the caulking gun at a 45° angle and smoothly guide it along the gap between the window frame and siding or trim. Maintain an even pressure on the trigger to dispense a consistent bead size.

Tool the Caulk

Once applied, use a caulking tool or plastic spoon to smooth the caulk into the gap. Apply firm pressure with the tool to spread the caulk evenly. Remove any excess caulk outside of the tape edges.

Remove Tape and Allow Drying

Carefully remove the masking tape immediately after smoothing the caulk. Follow the manufacturer’s recommendations for cure time before exposing the caulked area to weather or water.

How to Seal Around Doors

Sealing around doors can be done with caulk or weatherstripping:

Caulking Around Doors

Caulking around door frames follows a similar process as caulking windows. Use a silicone or latex caulk and apply it in the gap between the door frame and the wall or threshold. Smooth into place with a caulking tool and allow time to cure.

Installing Door Weatherstripping

To make doors more energy efficient, apply weatherstripping:

  • Clean the door jambs thoroughly and ensure they are dry.
  • Measure each side of the door frame to cut the weatherstripping to the proper lengths.
  • Peel the adhesive backing and press the weatherstripping firmly onto the door frame.
  • Use a utility knife to trim off any excess weatherstripping.
  • Seal the corners by cutting the weatherstripping at 45° angles and overlapping the pieces.

Tips for Successful Caulking and Sealing

Follow these tips to properly caulk and seal around windows and doors:

  • Always use the right product for the job – exterior silicone caulk for windows and either silicone caulk or weatherstripping for doors.
  • Thoroughly clean and dry all surfaces before applying caulk or weatherstripping.
  • Follow the manufacturer’s instructions for application temperature range and cure time.
  • Apply caulk in small sections and tool smoothly before moving on.
  • Use masking tape and remove immediately after tooling for straight caulk lines.
  • Take your time and don’t rush the caulking and sealing process.

Conclusion

Caulking and sealing around windows and doors is an easy DIY project that can make your home more comfortable and energy efficient. With the right materials and proper techniques, you can seal air leaks and prevent drafts. Just remember to use exterior-grade caulk or weatherstripping and allow adequate drying time. Properly sealing your windows and doors will help you save on energy costs while keeping your home’s interior at the right temperature.


How to Replace a Doorknob or Handle?

0
doorknob

Doorknobs and handles are some of the most frequently used items in any home. Over time, these can become loose, damaged, or just look outdated. Replacing a worn out or outdated doorknob or handle is an easy DIY project that can completely transform the look and feel of a room. With a few tools and basic skills, you can install a new doorknob or handle in less than an hour.

Gather the Necessary Tools and Materials

Before starting any doorknob or handle replacement project, you’ll need to gather a few essential tools and materials. Having these items on hand will make the installation process smooth and efficient.

Tools Needed

  • Screwdriver – You’ll need either a Phillips head or flat head screwdriver depending on the type of screws used on your existing doorknob/handle.
  • Tape measure – To accurately measure for placement of the new doorknob/handle.
  • Pencil – To mark the measurements.
  • Cloth or paper towels – For cleaning up any mess.
  • Power drill (optional) – A drill can speed up the screw removal and installation process.

Materials Needed

  • New doorknob/handle – Make sure to buy one that fits your door properly. Measure the backset and hole positions of your existing hardware before purchasing a replacement.
  • Screws – Often provided with new doorknobs and handles. If not, bring the old screws to the hardware store to find replacements.

Remove the Old Doorknob or Handle

Once you’ve gathered the necessary tools and new hardware, it’s time to remove the old doorknob or handle.

  1. Locate the screws on the interior side of the door. There are typically two screws on the knob/lever and two on the latch/lockset.
  2. Use your screwdriver to remove all the screws and carefully pull the interior doorknob/lever off.
  3. For exterior hardware, look for a small hole or slot on the side of the handle. Insert a thin tool like a paperclip into the hole to press down the release mechanism. This will allow you to pull the exterior handleset off.
  4. Remove both halves of the old doorknob/handle and set them aside. You can now see the latch mechanism in the door edge.
  5. Use a paper towel or cloth to clean away any dirt or debris around the now exposed latch and screw holes.

Prepare the Door for a New Doorknob/Handle

Before installing the new hardware, you’ll need to make sure the door is prepped properly. This involves marking new screw hole positions if needed and making any necessary adjustments to the latch mechanism.

  1. Use a tape measure to determine the backset of your old doorknob/handle. Backset is the distance from the door edge to the center of the knob/lever. Standard backsets are 2 3⁄8” or 2 3⁄4”.
  2. Measure and mark the same backset distance on your new hardware. Use a pencil to mark the new screw positions.
  3. For round knobs, also measure the horizontal distance between the old screw holes. Transfer these measurements to the new hardware.
  4. If your new doorknob/handle is a different shape or size than the old one, you may need to enlarge the screw holes in the door edge. Use a drill or chisel to open them up.
  5. Make any necessary adjustments to the latch mechanism so your new hardware will align properly.

Install the New Doorknob or Handle

Once all measurements are transferred and holes are drilled, you’re ready for installation. Follow these steps:

  1. Insert the latch mechanism into the door edge, being sure it is centered and straight.
  2. Position the exterior handleset on the surface of the door, aligning the handle with your pencil marks.
  3. Insert the screws through the new holes on the exterior hardware. Tighten them with your screwdriver.
  4. Place the interior assembly against the other side of the door, again lining it up with your measurements.
  5. Insert the interior screws and tighten them gradually until snug. Be careful not to overtighten.
  6. If there is a striker plate on your door frame, make sure it aligns properly with the new latch mechanism. Adjust if needed by loosening the striker plate screws, repositioning, and tightening again.
  7. Install any additional components like lock cylinders and turn buttons as directed by the manufacturer.

Test the Newly Installed Doorknob/Handle

Before considering your doorknob replacement project complete, test it out.

  1. Close the door and turn the knob/lever multiple times from both sides to ensure smooth operation.
  2. Open and close the door to see if there are any issues with alignment or catching.
  3. Make sure the latch extends and retracts properly, creating a consistent reveal between the door edge and frame.
  4. Tighten any loose screws or make adjustments as needed until the hardware operates correctly.
  5. Give the knob/lever a firm tug from both sides to confirm it is tightly secured.
  6. Consider adding thread locking fluid to the screws to prevent loosening over time.

With a few simple tools, some careful measurements, and proper installation, you can successfully replace the worn or outdated doorknobs/handles in your home. Just follow these step-by-step instructions for smooth and easy DIY doorknob replacement.

Choosing the Right Doorknob or Handle

Selecting new doorknobs or handles for your home goes beyond just appearance. You’ll need to consider a few important factors to ensure your new hardware fits properly and functions as it should.

Measure the Backset

As mentioned earlier, backset is the distance from the door edge to the center of the knob/handle. This is one of the most important measurements when selecting new hardware. Standard backsets are:

  • 2 3⁄8” – Most common backset for interior doors
  • 2 3⁄4” – Typical for exterior doors and some bathrooms
  • 3” – Seen in custom homes or older construction
  • 3 1⁄2” – Used for ADA compliant commercial doors

Measure your existing doorknob’s backset before shopping.

Know Your Door Thickness

Interior doors are usually 1 3⁄8” while exterior doors are 1 3⁄4”. New hardware must match the thickness of your doors.

Consider the Shape

Will you be installing round knobs or lever-style handles? Measure the existing hole positions and spacing to find replacement hardware that will fit.

Finish

Select a finish that matches your existing décor and hardware. Most common options are satin, polished, antique, oil-rubbed, and matte metals.

Added Features

Determine if you need additional functions like keyed locks, touchpads, or automatic openers. These will require special modifications to the hardware.

With all these considerations in mind, you can select the perfect new doorknobs or handles for a successful installation.

Doorknob and Handle Installation Tips

Replacing old, worn out doorknobs and handles around your home can give rooms a quick facelift. For the best results, keep these additional installation tips in mind:

  • When buying new hardware, purchase a full set with matching knobs/levers and strike plates. Mixing and matching can lead to alignment issues.
  • Pay attention to the door hand. Hinges on the left means it’s a left-handed door. Right hinges indicate a right-handed door.
  • Use a drill for installing and removing screws to speed up the process. Just be sure to set it to a low torque setting to avoid damage.
  • If holes are too large or loose, wrap screws with toothpicks or wooden matches to tighten the fit before installing new hardware.
  • When dealing with pre-drilled doors, use tapered wood screws for a sturdy hold.
  • For added security, apply thread locking fluid to the screws after tightening them during installation.
  • If the alignment is slightly off, loosen screws on the strike plate to adjust it until the latch inserts cleanly.
  • When installing exterior hardware, apply silicone caulk around the edges to protect from water damage.
  • Consider hiring a locksmith if dealing with specialized security hardware and locks.
  • Ask a helper to hold the opposite side of the door when installing hardware to ensure proper alignment.

With attention to detail and proper techniques, you can achieve an expert looking doorknob or handle installation that will stand the test of time.

Frequently Asked Questions About Doorknob/Handle Replacement

Replacing a doorknob or handle is one of the simplest DIY upgrades you can do in your home. To make the process even easier, here are answers to some frequently asked questions:

How do I remove the old doorknob?

Locate the screw covers on both sides of the knob/handle. Pry off the covers with a flathead screwdriver to expose the screws. Use the appropriate screwdriver to remove the screws and take off the old hardware.

What tools do I need?

You’ll need a screwdriver, pencil, tape measure, drill/chisel (if enlarging holes), and possibly a hammer. Have a cloth and cleaning solution ready too.

How do I measure for the new hardware?

Use a tape measure to determine the backset (distance from door edge to knob center) and width between the screw holes. Transfer these measurements to the new hardware.

What if the new knob doesn’t align with the old screw holes?

You may need to enlarge the existing holes slightly with a drill bit or chisel. Don’t make them too large.

My door sticks after replacing the knob – why?

The alignment between the latch and strike plate is off. Loosen the striker plate screws and adjust until the door latches cleanly.

Can I upgrade my existing knobs to lever handles?

Yes, as long as you select new levers with the same backset. The handle’s baseplates will conceal the old holes.

How do I tighten a loose knob?

Remove the knob, fill holes with toothpicks/wood shims, cut flush, and re-install. Apply thread locking fluid on screws.

Do I need to hire a locksmith?

Only if you’re installing high-security locks. For basic knob or handle replacement, no locksmith is needed.

With the right information and preparation, you can tackle doorknob or handle replacement like a pro. The improvement it makes to your home’s look and function is well worth the effort.

Conclusion

Replacing worn out or outdated doorknobs and handles is one of the simplest ways to improve the look and functionality of your home. With some basic DIY skills and the right tools, this is a project you can easily tackle in just an hour or two.

Follow the step-by-step process outlined here for smooth doorknob/handle removal and installation. Be sure to properly measure your existing hardware and door thickness when selecting replacements. Added features like locks, finishes, and shapes also need consideration before purchasing new knobs or handles.

Achieve an expert, upgraded look by taking your time to ensure proper alignment and operation. Test the newly installed hardware by opening and closing the door multiple times from both sides. Your patience will pay off with long-lasting, quality hardware that gives your home a fresh new feel.


How to install a new light fixture?

0
light fixture

Installing a new light fixture can seem like a daunting task, but with the right tools, materials, and safety precautions, it can be a straightforward DIY project. Proper light fixture installation not only illuminates your space, but also adds style and value to your home. This comprehensive guide will walk you through the entire process of replacing or installing a new light fixture, from gathering supplies to mounting and wiring the fixture. With these tips and steps, you’ll be able to hang a light fixture and light up any room with confidence.

Gather the Essential Tools and Materials

Before starting any electrical project, it’s important to have the proper tools and materials on hand. Attempting to install a light fixture without the right equipment can lead to mistakes, injury, or damage. Here are the must-have tools and supplies for a safe and successful light fixture installation:

Tools:

  • Screwdrivers: Flat head and Phillips head screwdrivers in various sizes to remove old mounting screws and connect wires.
  • Pliers: Both standard and needle nose pliers to grab, twist, and cut wires.
  • Wire strippers: To strip away the plastic insulation coating on wires.
  • Voltage tester: To confirm power is off to the circuit before working.
  • Ladder: A sturdy ladder or step stool to reach the ceiling junction box.
  • Safety glasses: For eye protection while working with electrical parts.

Materials:

  • New light fixture: Carefully inspect new light fixture prior to installation. Ensure it is compatible with your junction box.
  • Mounting hardware: Screws, anchors, brackets specific to your new light fixture for mounting.
  • Wire nuts: To connect exposed wires by twisting them together.
  • Electrical tape: Used to insulate wires and connections.
  • Bulbs: Applicable bulbs for the new light fixture. Check manufacturer guidelines.

Gathering these DIY light fixture installation essentials before getting started will make the process smoother and safer. Always check local regulations before attempting any home electrical work.

Shut Off Power to the Circuit

Once you have all your tools and materials prepped, it’s time to take the crucial first step – turning off power to the circuit. Working on a light fixture while the power is still on can result in electrocution. Here are the proper steps to cut power:

  • Locate the circuit breaker panel: Typically located in the basement, garage, or laundry room. The panel box will be clearly labeled.
  • Identify the correct circuit: Circuit breakers should have labels indicating which room or outlet they control. If unlabeled, turn off circuits one by one to identify.
  • Switch the circuit breaker to OFF: The switch should clearly move from ON to OFF. Double check it is the correct circuit.
  • Test that power is off: Use a voltage tester or multimeter to confirm the power is off at the light fixture before moving forward.

Ensuring the circuit is dead and cannot electrocute you while working is the most crucial safety step in any electrical DIY project. Never take shortcuts when it comes to shutting off power.

Remove the Existing Light Fixture

If you are replacing an existing light fixture, it will need to be fully removed prior to installing the new one. Here are the steps:

  • Disconnect wires: There will be wires connected to the existing light fixture. Carefully disconnect and unwrap them.
  • Unscrew mounting screws: Use a screwdriver to remove any screws securing the fixture to the ceiling junction box.
  • Carefully remove fixture: Once unsecured, gently maneuver the light fixture down from the ceiling. Take care not to tug wires.
  • Inspect wires and junction box: Examine the exposed wires from the ceiling for any damage. Check that the junction box is securely attached.
  • Dispose/recycle fixture: Make sure to properly dispose of or recycle the old light fixture at an approved facility. Do not simply throw in household trash.

Working slowly and methodically will allow you to remove the old fixture without leaving loose wires or damaging the junction box. Your space should now be ready for the new light.

Prepare for New Light Fixture Installation

With the old fixture removed, inspecting the junction box and prepping the wires are key steps before installation. This will ensure compatibility and a smooth wiring process.

  • Inspect junction box: Make sure the junction box is securely fastened to a ceiling joist and shows no damage. It must be able to hold the weight of the new fixture.
  • Reinforce if needed: If the junction box is loose or unsuitable, you may need to replace it or add bracing prior to installation.
  • Gather and prep wires: Have the junction box wires ready. Strip away 1/2 inch of insulation from wire ends using wire strippers.
  • Check compatibility: Ensure the new light fixture will work with your junction box in regard to wiring, size, and mounting.

Taking these preparatory steps will facilitate connecting the wires and mounting the new fixture properly. Pay close attention to the junction box condition to avoid issues down the line.

Connect the Wires

Connecting the new light fixture wires to the junction box wires is a crucial step. Proper wiring ensures the fixture functions safely and as intended. Follow these guidelines closely:

  • Match wire colors: The black (hot), white (neutral), and green or copper (ground) wires must connect to their respective matching wire.
  • Twist wires together: Twist the like-colored wires together clockwise using pliers. Apply wire nuts over the twisted ends and tighten securely.
  • Insulate connections: Wrap electrical tape around the wire nuts and connections to prevent exposed wire.
  • Tuck wires into box: Arrange the connected wires neatly into the junction box to clear room for mounting the fixture.
  • Double check: Confirm the wires are matched correctly and the connections are very secure. Loose wires can cause electrical issues.

Adhering to proper electrical wiring standards is paramount. If you are unsure about working with electrical wires, consult an electrician before proceeding. Take your time connecting the wires correctly.

Mount the New Light Fixture

Once the electrical connections are made safely, it’s time to mount the new light fixture to the ceiling. Follow all manufacturer instructions for proper mounting:

  • Align fixture: Carefully lift the new fixture up to the ceiling, guiding the mounting bracket holes to align with the junction box screw holes.
  • Insert mounting screws: Insert the mounting screws through the bracket holes and into the pre-drilled junction box holes.
  • Secure screws: Use a screwdriver to tighten the mounting screws until the fixture bracket is flush to the ceiling. Do not over tighten.
  • Check stability: Verify that the light fixture is mounted securely and is stable. It should not wobble or shift when touched.
  • Adjust position if needed: If the fixture is not straight, slowly loosen the screws and adjust to the desired angle before re-tightening.

Taking care to properly mount the light fixture will ensure it remains fixed and stable for the long term. Avoid putting strain on the wiring connections when lifting the fixture into place.

Install Bulbs and Test the Light

You’re almost done! The final steps are to install the light bulbs and restore power to test for proper operation:

  • Review bulb requirements: Check the fixture specs and manufacturer guidelines for compatible bulb shapes, sizes, and wattages.
  • Insert bulbs: Screw bulbs into their sockets securely. Take care not to touch the bulbs with bare hands to avoid fingerprints and residue.
  • Restore power: Turn the circuit breaker back ON at the panel box. Use a voltage tester to confirm it is live.
  • Test the light: Turn on the light switch. Ensure the new fixture and all bulbs are working correctly.
  • Adjust if needed: Make any adjustments to the light direction. Most fixtures have swivels and hinges to angle the light properly.

When the new light fixture illuminates correctly, the hard work is done! Install a bulb shield if included. Reference the manual for any special instructions.

Conclusion

While the process may seem complicated, installing a new light fixture is very manageable as a DIY project. The keys are having the right tools and materials, following safety procedures, properly wiring connections, and adhering to the manufacturer’s instructions. Taking the time to correctly install a fixture will provide beautiful, functional lighting for years to come. Always exercise caution when working with electrical systems and consult an electrician if any issues arise. With the helpful information in this guide, you can confidently light up any space in your home with a stunning new fixture.


Gardening Tips for Beginners

0
garden flowers

Starting a garden for the first time can seem like an intimidating task, but with a bit of planning and preparation, even novice gardeners can cultivate a thriving, productive outdoor space. Follow these gardening tips for beginners to get your green thumb growing in no time.

Embark on Your Gardening Journey: Setting the Stage for Success

Gardening begins with dreaming and planning. Before you start digging in the dirt, take some time to consider the basics – from choosing the perfect location to understanding your soil’s needs. With the right groundwork, you’ll set your garden up for success from the very start.

Choosing the Perfect Location: Unearthing the Ideal Spot for Your Garden

When scouting locations for your first garden, look for a spot that receives at least 6 hours of direct sunlight daily. Vegetables, herbs, and flowering plants all need sufficient sunlight to grow and produce. South-facing areas often provide the best exposure.

Make sure your garden site has access to a water source for irrigation. Situating your garden bed near a hose bib or spigot will make watering simple. If needed, use soaker hoses or drip irrigation to bring water to garden beds located further from a water source.

Consider proximity to your house when selecting a site. Having your garden close by makes tending to it easier. A location visible from inside will allow you to keep an eye on your plants’ progress.

Understanding Soil Basics: Assessing Your Soil’s Composition and Nutrient Needs

The quality of your soil significantly impacts how well plants will grow. Before planting, learn about your native soil structure and pH. Soil tests through your local extension service can provide valuable information to guide amendments.

In general, most plants thrive in loamy, well-draining soil with a neutral pH around 7.0. Clay soils often need organic matter like compost worked in to improve texture. Sandy soils may require water-retentive amendments.

Based on your soil test results, add amendments like compost, manure, or peat moss to enrich the soil. Target a soil depth of at least 8-12 inches for adequate root development in garden beds. Thoroughly mix amendments into the top several inches of native soil.

Selecting the Right Plants: Matching Plants to Your Climate and Preferences

One of the joys of gardening is choosing which plants to cultivate. Consider your local growing conditions, available space, and how you want to use your harvest when selecting plants.

Choose vegetable varieties suited to your climate’s growing season. Check seed packets for maturity dates and plant according to your region’s last frost dates. Opt for heat-tolerant varieties if summers are extremely hot.

Select herbs and flowers that reflect your personal preferences – try basils for pesto, zinnias for cut flowers, or cherry tomatoes for salads. For variety, plant a mix of annuals (one season) and perennials (return each year).

Match plants to your site’s sunlight, soil, and drainage. Place sun-lovers like tomatoes in the brightest beds. Shade-tolerant plants like hostas thrive under trees. Check tags for water and soil needs.

Cultivating Easy-to-Grow Plants: A Beginner’s Delight

Starting with easy-to-grow plants boosts beginners’ confidence while also producing quick results. Herbs, vegetables, and flowers suited for garden novices provide early success and inspiration to continue growing.

Herbs: Mint, Basil, and Chives – Culinary Companions for Your Garden

Many popular culinary herbs happen to be great choices for starter gardens. Their versatility, productivity, and forgiving nature make herbs ideal for beginners.

Mint spreads vigorously, making it incredibly easy to grow – just be sure to contain its growth. Its refreshing flavor enhances drinks, desserts, and more. Plant mints in partial shade for best results.

Genovese basil produces abundant leaves perfect for homemade pesto. Pinch off flower buds to keep leaves growing. Site basil in full sun and provide regular water.

Chives send up round after round of grassy leaves that lend mild onion flavor to dishes. Snip leaves as needed. Chives grow well in containers too!

Vegetables: Lettuce, Tomatoes, and Peppers – Nourishing Additions to Your Table

Satisfy your appetite for homegrown produce with a harvest of lettuce, tomatoes, and peppers from your starter vegetable garden.

Looseleaf and oakleaf lettuce varieties thrive in spring and fall, while heat-tolerant romaine tolerates summer warmth. Sow seeds directly in garden beds.

Cherry and grape tomatoes offer prolific fruit on compact vines. Stake plants and prune suckers to keep them tidy. Full sun and regular water keeps tomatoes happy.

Bell peppers produce crunchy, sweet fruits in an array of colors. Sow indoors and transplant seedlings after frost danger passes. Peppers need warm soil and full sun.

Flowers: Marigolds, Sunflowers, and Zinnias – Vibrant Blooms for a Colorful Display

No garden is complete without flowers! Choose easy-to-grow annuals like marigolds, sunflowers, and zinnias to add vibrant color from spring until frost.

Marigolds bloom brightly all season with little fuss. Plant in full sun nearly anywhere – beds, borders, containers. Deadhead spent flowers for more blooms.

Towering sunflowers with cheerful faces follow the sun across the sky. Sow seeds directly in garden beds after the last spring frost. Provide support for heavy flower heads.

Brilliant zinnias light up gardens in every hue. Sow seeds outdoors after danger of frost, or start earlier indoors. Deadhead to prolong bloom time.

Flower Gardening: Unveiling the Secrets of Floral Splendor

Flower gardening brings beauty, joy, and imagination to your landscape. Follow these tips to plan, plant, and maintain showstopping flower gardens that flourish from season to season.

Planning and Design: Creating a Harmonious Arrangement of Colors and Textures

A thoughtfully planned flower garden pleases the eye by combining colors, heights, and textures in pleasing, cohesive arrangements.

Group plants with similar needs together – full sun lovers, shade dwellers, heavy feeders, drought tolerant, etc. This makes care easier.

Balance bold plants like tall sunflowers with lower-growing borders of marigolds and creeping thyme. Repeat colors to unify the design.

Contrast fine, ferny foliage like asparagus ferns with broad, bold leaves like hostas. Mixing textures adds visual interest.

Planting Techniques: Ensuring Your Flowers Flourish from Seed to Bloom

Proper planting gives flowers the healthy start they need to grow vigorously and produce waves of gorgeous blooms.

Prepare soil by mixing in several inches of compost or other organic matter to improve drainage and nutrition. Rake beds smooth before planting.

Sow large seeds directly in prepared garden beds once danger of frost has passed. Or start indoors 4-6 weeks before last frost date.

Space transplants according to mature plant size. Set out when soil is warm, hardening off first. Water new transplants daily for a week.

Care and Maintenance: Nurturing Your Blossoms for a Season of Beauty

Keep your flowers looking their best all season long with proper care and maintenance. Set your garden up for ongoing success.

Water thoroughly after planting and then regularly throughout growth. Established plants need about 1 inch of water per week.

Apply a balanced fertilizer monthly or according to package directions to fuel growth and flowering. Compost and manure also feed plants.

Deadhead spent blooms by pinching or cutting off faded flowers. This encourages further flowering on many plants.

Monitor for pests like aphids, mites, and caterpillars. Remove by hand or use insecticidal soap sprays. Prevent disease with good air circulation.

Herb Gardening: Culinary Delights from Your Own Backyard

One of the simplest ways for beginners to start gardening is by growing herbs. These aromatic plants are generally unfussy, productive, and immensely useful for seasoning homemade meals.

Choosing the Right Herbs: Selecting Herbs That Suit Your Culinary Preferences

With so many herbs to choose from, gardeners should grow varieties they’ll actually use in the kitchen. Consider how you like to cook.

Basil, oregano, thyme and rosemary are perfect for pizza, pasta, and Mediterranean dishes. Mint and lemon balm lend flavor to drinks, desserts, and teas.

Chives, cilantro, dill, and parsley add fresh flavor to salads, vegetables, eggs, fish and more. Sage brings robust flavor to hearty bean and meat dishes.

Don’t forget medicinal herbs! Chamomile, echinacea, and calendula have soothing properties and beautiful flowers.

Container Gardening for Herbs: Cultivating Herbs in Pots for Convenience and Portability

Herbs happen to thrive in containers, making them the perfect plants for apartment gardeners or anyone short on space.

Choose large pots with drainage holes, using quality potting mix. Add slow-release fertilizer at planting time to feed plants for several months.

Good herb choices for containers include oregano, thyme, sage, basil, parsley, and chives. Mint does well too, but isolate it or it will spread.

Situate containers in a sunny spot. Water whenever soil dries out, taking care not to overwater. Trim plants regularly to encourage bushy growth.

Harvesting and Preserving Herbs: Maximizing the Flavor and Versatility of Your Homegrown Herbs

One of the joys of growing herbs is having their fresh flavor ready to harvest right outside your door. Here are tips for harvesting and preserving that goodness.

Snip leafy herb sprigs as needed once plants are established. Take no more than one-third of the plant at once.

Harvest woody herbs like rosemary and sage by cutting stems just above leaf nodes. Only take a few stems per plant at a time.

Preserve herbs by air-drying, freezing, or steeping in oil or vinegar. Process soon after harvest to maximize flavor.

Store dried herbs in airtight containers out of sunlight. Freeze leaves in ice cube trays with water or oil for longer storage.

Container Gardening: A Garden in Every Corner

Limited on space? Container gardening allows you to cultivate plants on patios, balconies, doorsteps, and anywhere you have sunlight. Follow these tips for success.

Selecting the Right Containers: Choosing Pots That Complement Your Plants and Décor

Almost any type of vessel can be turned into a plant container with proper drainage. Consider size, material, and aesthetics when selecting pots.

Match pot size to the mature plant’s root mass. Bigger is generally better to avoid frequent watering and provide stability.

Use containers with drainage holes or drill your own in the bottom. Elevate pots to improve drainage. Add gravel at the base for extra water flow.

Choose durable materials like plastic, concrete, wood, or terracotta. Paint or stain pots to coordinate with your color scheme.

Growing Vegetables in Containers: Cultivating a Bountiful Harvest from Limited Space

Don’t let small spaces deter you from vegetable gardening. Many veggies thrive in containers with proper care.

Focus on compact varieties of plants like tomatoes, peppers, eggplant, bush beans, lettuce, spinach, carrots, beets, and more.

Use large pots at least 12 inches wide and deep. Fill with a quality potting mix enriched with compost or fertilizer.

Situate containers in full sun. Water when soil dries out, draining excess water. Feed plants monthly with a balanced fertilizer.

Creative Container Gardening Ideas: Vertical Gardening, Herb Spirals, and Miniature Gardens

Make the most of small spaces by gardening vertically, in layers, or on a miniature scale in containers.

Hang trailing tomato plants upside down from balconies in mesh slings. Train vining crops like beans or cucumbers up vertical supports.

Plant an herb spiral with cascading herbs like thyme surrounding upright basils and mints in a coil pot.

Create a fairy garden of miniature plants like succulents, small ferns, and pixie peonies with tiny accessories.

Indoor Gardening: Nurturing Greenery Within Your Home

Bring the benefits of gardening indoors by growing plants that thrive inside your home. Follow these indoor gardening tips for success.

Ideal Indoor Plants: Selecting Low-Maintenance Plants That Thrive Indoors

Certain houseplants are well-adapted to the warm, dry conditions found in most homes. Focus on these easy-care varieties.

Succulents like jade, aloe vera, and echeveria need minimal watering and thrive in bright, sunny windows.

Peace lilies, pothos, philodendrons, and dracaena tolerate low light and humidity, making them perfect beginner plants.

Herbs like basil, oregano, thyme, and rosemary grow well indoors and provide fresh flavor for cooking.

Creating Indoor Conditions: Controlling Light, Temperature, and Humidity for Healthy Plants

While indoor plants are low-maintenance, they still require the right environment tailored to their needs.

Maximize natural light by placing plants on bright, south-facing windowsills or using grow lights. Rotate plants periodically so all sides receive light.

Maintain indoor temperatures between 65-75°F for most houseplants. Keep plants away from hot and cold drafts.

Increase humidity around plants by misting leaves, using a humidifier, or placing pots on pebble trays filled with water.

Pest and Disease Management: Protecting Your Indoor Garden from Common Threats

Indoor plants fall prey to pests like spider mites, mealybugs, and scale. Prevent and control infestations with these tactics.

Isolate new plants and inspect thoroughly before introducing to your existing indoor garden. This prevents pest spread.

Prune off affected leaves and stems. Remove insects by hand or use horticultural soaps and neem oil.

Prevent diseases like botrytis, powdery mildew, and root rot with proper watering, ventilation, and humidity control.

Sustainable Gardening: Cultivating an Eco-Conscious Oasis

Gardening goes hand-in-hand with environmental stewardship. Employ earth-friendly practices to make your garden a haven for you and Mother Nature.

Composting: Transforming Food Scraps into Nutrient-Rich Soil Amendment

Composting turns household and garden waste into “black gold” for your garden beds. Follow these tips for composting success.

Build or purchase a compost bin fitting for your space. Site your compost pile in a shady, convenient area.

Layer nitrogen-rich “greens” like plant debris and food scraps with carbon-rich “browns” like leaves or cardboard.

Turn or stir the compost pile weekly to mix contents and speed decomposition. Moisten if needed.

Finished compost is dark, crumbly, and earthy-smelling. Spread and mix into garden beds to fertilize plants.

Water Conservation Techniques: Efficient Watering Practices for a Sustainable Garden

Wise watering cuts waste while keeping plants healthy. Utilize these methods to get the most from every drop.

Water early in the morning or evening to reduce evaporation loss. Avoid watering during the heat of day.

Install soaker hoses, drip irrigation, or micro-sprayers for slow, targeted watering. Use timers to automate the system.

Let soil dry between waterings; avoid overwatering. Check soil moisture before watering.

Mulch beds to reduce watering needs. Direct downspouts into rain barrels to collect free rainwater.

Natural Pest Control Methods: Utilizing Safe and Effective Alternatives to Chemical Pesticides

Keep your garden thriving without harsh pesticides. Control pests with these safe, eco-friendly strategies instead.

Attract beneficial insects like ladybugs and lacewings with pollen and nectar-rich companion plants. They prey on pests.

Hand pick larger pests like slugs, caterpillars, and beetles. Knock off insects with blasts of water from the hose.

Make natural pesticides by blending ingredients like garlic, hot peppers, and soap. Spot treat affected plants only.

Use row covers as barriers against insects. Remove weeds that harbor pests. Rotate crops to disrupt pest life cycles.

Conclusion: Reaping the Rewards of Your Gardening Adventures

As a beginner gardener, you now have the basic techniques, tips, and inspiration to get growing! Gardening is a lifelong learning experience that brings abundant rewards.

The Joy of Gardening: Celebrating the Beauty, Tranquility, and Satisfaction of Cultivating Your Own Garden

Few things compare to the joy, relaxation, and sense of accomplishment that comes from growing your own garden. Each season brings new delights.

Sharing the Harvest: Gifting or Donating Your Homegrown Produce to Spread the Joy of Gardening

Your bountiful harvest is meant for sharing. Spread the wealth and bring joy to others by gifting or donating your garden’s delicious yields.

Continuous Learning: Embracing the Ever-Evolving World of Gardening with Passion and Curiosity

Gardening has so much to offer over a lifetime. Continue building your skills by taking classes, reading, joining clubs, and simply growing your garden year after year.

Follow these gardening tips for beginners to get started on the right foot. Don’t be afraid to get your hands dirty and make mistakes as you gain experience. The pleasure and taste of homegrown fruits, herbs, and vegetables straight from your own garden makes it all worthwhile. Happy gardening!


How to Start a Garden: Planting, and Maintaining a Successful Home Garden

0
gardening

For many people, starting a home garden is a dream that conjures images of lush tomato vines, sweet-smelling herbs, and bountiful harvests of fresh fruits and vegetables. However, transforming this vision into a reality can seem daunting for beginners. Gardening may appear complicated, time-consuming, and reserved for those with innate “green thumbs”. Fortunately, with proper planning, preparation, and care, even novice gardeners can create a productive, thriving garden oasis.

Gardening provides a range of benefits beyond just producing food. Starting a garden for beginners can reduce stress, provide gentle exercise, connect you with nature, and give you a sense of accomplishment as you nurture your plants from seed to harvest. The satisfaction of growing your own healthy, organic fruits, vegetables, and herbs is a reward in itself.

While gardening does require an investment of time and effort, the basics are quite simple to learn. With the right guidance on gardening tips for beginners, anyone can discover the joy and satisfaction of growing their own food. This article will provide essential information on how to plant a garden for the first time, from choosing a spot to preparing the soil to planting, maintenance, and harvesting. Follow these simple gardening tips for beginners, and you’ll be on your way to garden success.

Section 1: Planning Your First Garden

Careful planning is the foundation of any thriving garden. Before rushing out to buy seeds and plants, take time to consider these key factors in designing your ideal garden space.

Choosing the Right Location

One of the most important gardening tips for beginners is selecting an optimal location. Make sure your garden site:

  • Receives at least 6 hours of direct sunlight daily. Most edible plants require substantial sunlight.
  • Has good drainage and fertile soil. Amend poor soil with compost or other organic matter to improve texture and nutrient content.
  • Is near a water source. Hose access simplifies watering chores.
  • Is away from trees and shrubs. These can shade your garden and compete for water and nutrients.
  • Is close to your house for convenience. You’ll tend the garden more often if it’s readily accessible.

If your yard lacks a suitable spot, consider creating raised garden beds that provide you full control over soil quality, drainage, and placement.

Selecting Plants

When planning your first edible garden, it’s wise to start small. Focus on easy-to-grow vegetables and herbs that even beginning gardeners can succeed with. Consider these simple options:

  • Leafy greens – Lettuce, spinach, kale, chard
  • Root crops – Carrots, radishes, beets
  • Herbs – Basil, parsley, cilantro, dill
  • Tomatoes – Cherry or bush varieties
  • Peppers – Jalapeno, bell, sweet banana
  • Beans – Bush green beans

Also check that the vegetables and herbs you select are suited to your climate zone. Cool weather crops like spinach and kale thrive in fall and spring, while tomatoes and peppers prefer summer heat.

Finally, pay attention to the mature size of each plant and space accordingly. This prevents overcrowding.

Gathering Gardening Supplies

Before planting, assemble the basic gardening tools and materials every beginner needs:

  • Gardening tools – Trowel, shovel, rake, hoe, pruners, watering can/hose
  • Seeds or starter plants – Purchase quality seeds or starters from reputable garden centers or seed catalogs.
  • Soil amendments – Compost, manure, worm castings to enrich soil nutrients and texture.
  • Fertilizer – Organic granular fertilizers provide nutrients for optimal plant growth.
  • Mulch – Shredded bark, leaves, straw retains soil moisture and suppresses weeds.

Investing in high-quality tools and building up your soil from the start will make gardening easier and more successful.

Section 2: Preparing Your Garden Site

Once you’ve selected the perfect spot, it’s time to prepare the space for planting. Proper soil preparation sets the foundation for a prolific, healthy garden.

Clearing and Tilling the Soil

Start by removing any weeds, rocks, roots, or debris in your planting area, using a shovel, garden fork, or hoe. This creates a clean slate for preparing planting beds.

Next, loosen and aerate the soil using a rototiller or garden fork, at least 8-12 inches deep. Breaking up any compacted soil improves drainage and creates space for plant roots to grow.

Mix in any organic soil amendments like compost, manure, or peat moss as you till. These add nutrients, boost soil structure, and help retain moisture.

Building Raised Beds

In locations with poor drainage, compacted soil, or contamination, raised garden beds present an excellent gardening solution.

Raised beds provide:

  • Better drainage and warmer soil for early spring planting
  • Loose, fertile soil that’s easier to work with
  • Protection from pests and diseases
  • Reduced weed problems
  • Less bending for easier maintenance

Build your raised beds 2-4 feet wide to allow easy access from both sides. Use rot-resistant wood, bricks, or stones to frame them, and fill with a quality potting mix.

Testing and Amending Soil pH

Soil pH indicates whether soil is acidic, neutral, or alkaline. Most vegetables thrive in slightly acidic soil with a pH between 6.0-6.8.

Use a soil test kit to determine your garden’s pH. If it’s too high or low, add amendments like lime (to raise pH) or sulfur (to lower pH) according to package directions.

With your garden site cleared, soil prepared, and pH adjusted, it’s finally time to start planting!

Section 3: Planting Your First Garden

Here are some key gardening tips for beginners to help you plant and care for your new garden:

Planting Seeds and Starters

Refer to your seed packets or plant tags for the recommended planting depth, spacing, and sunlight needs for each variety. Follow these tips:

  • Plant seeds at the proper depth – usually 2-3x the width of the seed.
  • Space seeds and plants appropriately so they have room to mature.
  • Water gently after planting seeds to settle the soil.
  • Transplant seedlings on a cloudy day or in evening to avoid transplant shock.
  • Harden off seedlings for 7-10 days before transplanting them outside.

Providing Consistent Water

Vegetable gardens require about 1-2 inches of water per week from rain or watering. Established plants need deep, infrequent watering, while seeds and seedlings need light, frequent watering.

Use soaker hoses or drip irrigation to apply water directly to the soil. This conserves water and prevents fungal diseases. Avoid overhead watering.

Add 2-4 inches of organic mulch around plants to retain soil moisture and reduce watering needs.

Controlling Weeds and Pests

Weeds compete with your vegetables for water, space, and nutrients. Stop them before they spread by:

  • Applying mulch to block light and suppress weed seeds from germinating
  • Hand-pulling weeds, including the roots, while plants are small
  • Cultivating gently around plants with a hoe or garden fork

Pests like aphids, beetles, and caterpillars can quickly damage vegetable plants. Practice organic pest control by:

  • Removing pests by hand and dropping them in soapy water
  • Using floating row covers as a barrier against insects
  • Applying organic insecticidal soap or neem oil
  • Inviting beneficial insects like ladybugs and lacewings

By taking a proactive approach, you can keep your garden lush and productive while avoiding chemical pesticides.

Section 4: Harvesting and Enjoying Your Bounty

After weeks of tending your garden, it’s time to reap the rewards! Follow these tips for harvesting produce at peak flavor.

Harvesting Vegetables at Their Prime

It takes patience and observation to harvest vegetables at the perfect stage of ripeness.

  • Pick lettuce, kale, and other leafy greens when leaves are young and tender.
  • Harvest broccoli, cauliflower, and cabbage heads while they are fully formed but before flowering.
  • Pull carrots, radishes, and beets when the shoulders break through the soil surface.
  • Pick tomatoes, peppers, beans, and other fruits when fully colored but still firm.

Storing Your Freshly Picked Produce

Proper storage keeps freshly harvested produce fresher longer:

  • Store tender greens like lettuce in a bowl with a damp paper towel. Refrigerate.
  • Set root crops like carrots in a container with damp sand. Store in a cool basement or cellar.
  • Keep tomatoes, peppers, and eggplant at room temperature out of direct sunlight.

Preserving Your Bountiful Harvest

Consider these easy methods for preserving extra produce to enjoy year-round:

  • Canning – Sterilize glass jars then hot pack chopped vegetables and boiling water or sauce.
  • Freezing – Blanch vegetables, cool, pack into containers, and freeze.
  • Drying – Use a food dehydrator or oven to dry herbs, tomatoes, peppers, and more.

Conclusion

Starting a garden for beginners may seem intimidating, but with the right guidance it can be simple, fun, and incredibly rewarding. Follow the steps in this article—from planning your garden layout to preparing the soil, planting, and maintaining your new garden—and you’ll be harvesting homegrown fruits and veggies in no time.

Gardening is a journey of continuous learning. Be patient with yourself, enjoy the process, and don’t be afraid to get your hands dirty! The satisfaction of nurturing your own plants and gathering fresh, organic produce is well worth the effort. So grab your trowel and let’s start gardening!


Recent Posts