Home Blog Page 2

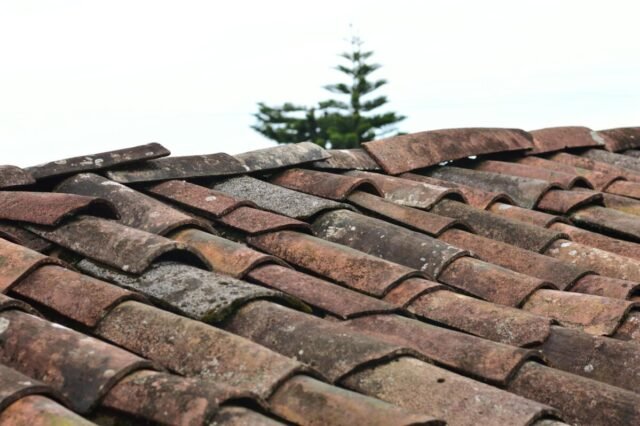
How to fix a roof leak?

0
How to fix a roof leak?

A dripping ceiling, water stains on the wall, the pitter-patter of uninvited raindrops… a roof leak can send shivers down the spine of any homeowner. But before you succumb to despair, know this: fixing a roof leak doesn’t always require an emergency roofer and a hefty bill. With some basic knowledge, tools, and safety precautions, you can tackle many leaks yourself, saving money and experiencing the satisfaction of a DIY victory.

Why Address a Roof Leak Immediately?

Ignoring a roof leak is like ignoring a ticking time bomb. The longer it goes unaddressed, the more extensive the damage becomes. Water ingress can lead to:

  • Structural damage: Rotting wood, weakened beams, and potential foundation issues.
  • Mold growth: A health hazard that can exacerbate allergies and respiratory problems.
  • Interior damage: Ruined walls, ceilings, and belongings.
  • Higher repair costs: The longer you wait, the more extensive and expensive the repairs become.

By acting swiftly, you can minimize the damage and potential health risks, often saving yourself significant money in the long run.

Can You Fix the Leak Yourself?

Whether you conquer the leak yourself or call in the professionals depends on several factors:

  • Leak complexity: Simple repairs like replacing shingles or sealing minor cracks are DIY-friendly. Complex leaks near chimneys, valleys, or involving extensive flashing work might require professional expertise.
  • Your comfort level: Are you handy and comfortable working on ladders and heights? If not, seeking professional help is wise.
  • Safety concerns: Working on a roof carries inherent risks. If you’re unsure about your safety or lack the proper equipment, prioritize your well-being and call a professional.

Sherlock Holmes Your Leak: Identifying the Culprit

Before tackling the repair, it’s crucial to locate the source of the leak. Grab your detective hat and head to the attic:

  • Inspect for visible signs: Look for water stains, mold growth, or damp areas on the underside of the roof deck. These indicate the general leak location.
  • Follow the trail: Trace the water stains upwards to pinpoint the exact entry point. Common leak suspects include:
    • Shingles: Cracked, loose, or missing shingles are prime suspects.
    • Flashing: This waterproof material seals around chimneys, valleys, and other roof protrusions. Damaged or improperly installed flashing can be a culprit.
    • Valleys: The V-shaped intersections of two roof slopes are vulnerable to water accumulation and leaks.
    • Chimneys: Gaps between the chimney and roof, or damaged mortar joints, can allow water infiltration.
  • Simulate rain: If the leak isn’t readily apparent, enlist a helper. While you safely climb onto the roof with a garden hose, have your helper observe the attic for signs of water appearing. Systematically wet sections of the roof, starting from higher points, until the leak reveals itself.

Remember safety first! Ensure you wear proper footwear, use a sturdy ladder secured on level ground, and avoid power lines.

DIY Hero or Calling in the Cavalry: Repair Strategies

Once you’ve identified the leak’s source, it’s time to choose your repair approach:

DIY Champion:

  • Shingle repair:
    • Replacing: If the damage is minimal, carefully pry up the damaged shingle and replace it with a new one, ensuring proper overlapping and nailing.
    • Patching: For small tears or cracks, use shingle repair cement or specialized patching materials following the manufacturer’s instructions.
  • Flashing repair:
    • Resealing: Reapply sealant around chimneys, valleys, and other areas with flashing using high-quality roof sealant.
    • Replacing worn pieces: If the flashing is severely damaged or cracked, replace the affected sections with new flashing material.
  • Leak around chimney:
    • Seal gaps: Use high-temperature caulk or sealant to fill any gaps between the chimney and roof.
    • Repair mortar joints: If the leak originates from cracked or crumbling mortar joints, repoint the chimney with appropriate mortar mix.

Professional Help:

For complex leaks, extensive flashing repairs, or if your comfort level dictates, don’t hesitate to call in a qualified roofer. They have the expertise, equipment, and safety measures to handle challenging situations.

Important Note: When using any repair materials, always follow the manufacturer’s instructions for proper application and safety precautions.

Preventative Measures: Be a Leak-Free Superhero!

The best way to deal with roof leaks is to prevent them in the first place. Here are some proactive steps you can take:

  • Regular roof inspections: Schedule annual inspections by a qualified roofer or conduct your own visual inspections twice a year, once before winter and once after. Look for damaged shingles, loose flashing, clogged gutters, and any potential weak spots.
  • Clean your gutters: Eliminate the opportunity for water to pool and seep under shingles by regularly cleaning your gutters and downspouts. Aim for cleaning at least twice a year, especially after heavy rain or snowfall.
  • Trim overhanging branches: Trees close to your roof can pose a double threat. Falling branches can damage shingles, while leaves and debris can clog gutters and contribute to moisture buildup. Trim branches that hang over your roof, maintaining a safe distance.
  • Address minor issues promptly: Don’t ignore small problems like cracked sealant or loose shingles. Addressing them early prevents them from turning into major leaks and costly repairs down the line.
  • Consider professional maintenance: Depending on your roof type and age, investing in occasional professional maintenance can extend its lifespan and identify potential problems before they become leaks.

Tools and Materials for DIY Repairs: Be Prepared!

Having the right tools and materials on hand for small repairs can save you time and frustration when a leak strikes. Here’s a basic toolkit to consider:

  • Sturdy ladder with proper safety features
  • Roofing nails
  • Hammer
  • Utility knife
  • Shingle repair cement or patching materials
  • High-quality roof sealant
  • Caulk gun
  • Work gloves
  • Safety glasses

Remember, safety first! Always wear appropriate safety gear when working on your roof.

Don’t let a leaky roof dampen your spirits. By understanding the basics of leak identification and repair, you can tackle smaller leaks yourself, saving money and gaining valuable DIY skills. However, remember to prioritize safety and seek professional help when necessary. By implementing preventative measures, you can become a leak-free superhero, ensuring your roof protects your home for years to come.

How to fix scratches on wood floor?

0
How to fix scratches on wood floor?

Have you ever noticed an unsightly blemish marring the beautiful wood floors in your home? Scratches on wood floors are an unfortunate but common occurrence. From pet nails to furniture legs to high heels, it’s easy to accidentally damage hardwood floors.

When those inevitable scratches happen, don’t panic! There are several effective methods for repairing wood floor scratches yourself. With a little effort, you can make those pesky scratches disappear and restore your floors to their original glory. This guide covers everything you need to know, from assessing scratch severity to DIY repair techniques to preventative measures. Let’s get started reviving those wood floors!

Assessing the Wood Floor Scratch Damage

Before attempting scratch repair, it’s important to fully assess the type and extent of damage:

Types of Wood Floor Scratches

There are three main categories of wood floor scratches:

  • Superficial scratches – These affect only the floor’s clear top coat of polyurethane or lacquer.
  • Deep gouges – These cuts penetrate through the wood’s finish and into the wood itself.
  • Cracks – These are splits in the actual planks of wood.

The repair method will depend on whether the scratches have damaged the wood or just the finish.

Identifying the Wood Floor Finish

Knowing your existing floor finish is also key for effective scratch repair:

  • Polyurethane – Clear glossy coating that fully seals and protects the wood.
  • Lacquer – Similar to polyurethane but dries faster.
  • Oil-based finish – Penetrates wood pores for a natural look. Requires frequent reapplication.
  • Wax – Soft finish that requires regular buffing and reapplying.

The finish type determines the products and techniques used for flawless scratch repair.

Gather the Proper Tools and Materials

Arm yourself with the right scratch repair supplies for the job:

  • Sandpaper – 220 to 400 grit for sanding scratches.
  • Olive or mineral oil – For buffing out minor scratches.
  • Raw walnut – Rubbing walnut over scratches can help hide appearance.
  • Wood filler – For filling deeper gouges.
  • Putty knife – For applying wood filler.
  • Q-tips – For applying oils and polish.
  • Microfiber cloths – For buffing and rubbing scratches.
  • Furniture polish – Match polish to your floor’s finish.
  • Scratch repair markers – Color-matched for flawless touch ups.
  • Paint stir sticks – For mixing filler and matching colors.

With the right tools and materials for the scratch type and flooring finish, you’re ready to fix those blemishes!

DIY Wood Floor Scratch Repair Methods

The best method for repairing wood floor scratches depends on the type and extent of damage:

Repairing Minor Surface Scratches

For light surface scratches that only damage the finish coating:

Buffing Scratches Out With Olive Oil

Apply a small amount of olive oil to a microfiber cloth. Rub over scratches using circular motions applying light pressure. The oil helps “melt” the finish and buffs out imperfections. Wipe away excess oil and allow spot to dry completely.

Walnut Trick

Gently rub the meaty side of a walnut over scratches. The oil can help blur scratches, while the nut’s fine grit buffs the finish. Wipe with a dry cloth.

Use Furniture Polish

Apply a small amount of furniture polish made for your floor’s finish. Gently rub over scratches to blend the finish. Wipe away excess.

Repairing Moderate Scratches

For deeper scratches penetrating the finish coat:

Lightly Sand The Area

Use extra-fine 220 to 400 grit sandpaper to gently sand scratches and surrounding finish. Sand until scratches become less visible. Carefully vacuum and tack cloth the area to remove dust particles after sanding.

Apply Wood Filler

Scoop wood filler onto a putty knife and press into scratches, overfilling slightly. After drying, carefully sand flush with floor’s surface. Match stain marker to floor color. Allow to fully cure before walking on repairs.

Use A Scratch Repair Pen

Choose a marker labeled for use on wood floors that closest matches your floor color. Shake the pen well. Apply by gently squeezing the marker along the length of the scratches. Wipe away any excess.

Repairing Deep Gouges

For heavy scratches or gouges that penetrate through the wood flooring:

Consider Professional Repairs

Extensive damage may require replacing planks or sanding the floor for a full refinish. Consult a professional wood flooring contractor for the best solution to repair deep gouges.

Pro Tips for Wood Floor Scratch Success

Follow these expert tips and tricks for flawless DIY wood floor scratch repairs:

Matching Wood Stains

When using wood filler or touch up markers, color matching is critical. Collect several stain markers in similar oak, cherry, maple, pine etc. shades. Test colors on an inconspicuous spot to achieve the closest wood grain and color match. Apply touch ups sparingly in thin layers.

Maintain Floors With Regular Cleaning

Prevent future scratches and keep repairs looking fresh with proper floor maintenance. Routinely vacuum then damp mop wood floors using the appropriate cleaner for the finish. Over time, reapply protective finishes like polyurethane or wax.

Prevent Scratches With Protectors

Minimize future scratches by adhering felt pads to furniture legs and placing rugs under rolling chairs. Pet owners should trim nails regularly and keep floors swept. Simply being mindful and taking preventative measures can save that beautiful floor!

Inevitable scratches don’t have to permanently damage the beauty of wood floors. With some basic tools, materials, and techniques, many scratches can be repaired affordably with DIY methods. For best results, carefully assess scratches, match your flooring, and make repairs sparingly. Or leave extensive repairs to the professionals.

Follow these wood floor scratch repair tips, and you’ll have those blemishes blended and your floors looking like new again in no time! Be sure to take preventative measures as well to protect your floors from future damage. With a little TLC, you can keep your hardwood floors always looking their absolute best.

How to fix a clogged toilet?

0
How to fix a clogged toilet?

Dealing with a clogged toilet can be a messy, frustrating, and sometimes embarrassing ordeal. However, it's a common household issue that many people face. Fortunately, there are several methods you can try to fix a clogged toilet, even without professional tools. In this comprehensive guide, we'll explore various techniques to unclog a toilet, using both common household items and proper maintenance tips to prevent future clogs. By following these steps, you'll learn how to fix a clogged toilet efficiently and keep it running smoothly.

3 Simple Ways to Unclog a Toilet Without a Plunger

Sometimes you might find yourself in a situation where your toilet is clogged and, to make matters worse, there's no plunger in sight. Fear not, as there are still several methods you can use to unclog toilet without plunger.

Use Hot Water and Dish Soap

Steps Description
1. Boil a pot of water.
2. Squirt a generous amount of dish soap into the toilet bowl.
3. Carefully pour the hot water into the bowl from waist height to create pressure.
4. Allow the mixture to sit for several minutes.
5. Attempt a flush to see if the clog has loosened.

Try a Wire Coat Hanger

Steps Description
1. Unwind a wire coat hanger to create a long, straight piece of metal.
2. Wrap one end with a rag to prevent scratching the porcelain.
3. Insert the wrapped end into the toilet bowl and gently push into the clog.
4. Move it around to break up the clog.
5. Flush the toilet to clear the debris.

Use a Wet/Dry Vacuum

Steps Description
1. Put on gloves and empty the water from the bowl using the vacuum.
2. Place the hose into the drain and create a seal around it.
3. Turn on the vacuum to suck out the clog.
4. Once the clog is removed, flush the toilet to ensure it's clear.

DIY Toilet Repairs: How to Unclog a Toilet With Household Items

When your toilet clogged no plunger is available, and you need a fix clogged toilet no tools solution, look no further than your kitchen pantry. Here are some homemade toilet unclogger methods using household items.

Baking Soda and Vinegar Unclogging

Ingredients Amount
Baking Soda 1 cup
Vinegar 2 cups
  1. Pour the baking soda into the toilet bowl.
  2. Follow with the vinegar, pouring it in slowly.
  3. Allow the mixture to fizz and sit for 20 minutes.
  4. Try flushing the toilet to see if the clog has been dislodged.

Unclog with Salt and Hot Water

Ingredients Amount
Salt 1/2 cup
Hot Water 4 cups
  1. Pour the salt into the toilet bowl.
  2. Add the hot water and let it sit overnight.
  3. In the morning, flush the toilet to clear the clog.

Use Shampoo as a Homemade Drain Cleaner

  1. Squirt a generous amount of shampoo into the toilet bowl.
  2. Pour a bucket of very hot water from waist height into the bowl.
  3. Allow the solution to sit for a few minutes.
  4. Attempt to flush the toilet to move the clog through the pipes.

5 Quick and Easy Ways to Unclog a Toilet

For those looking for easy ways to unclog toilet or a quick toilet unclogger, here are 5 ways to unclog toilet fast.

Plunge the Toilet Correctly

  1. Use a flange plunger for better suction.
  2. Insert the plunger into the bowl and press down firmly.
  3. Pump the plunger up and down without breaking the seal.
  4. After several pumps, pull the plunger up sharply to dislodge the clog.
  5. Flush the toilet to clear the debris.

Use a Toilet Auger/Snake

  1. Insert the end of the auger into the toilet bowl.
  2. Crank the handle to extend the auger's cable into the drain.
  3. Once you feel resistance, crank in the opposite direction to break up the clog.
  4. Retract the cable, and flush the toilet to clear the debris.

Remove the Toilet and Inspect It

  1. Turn off the water supply and drain the toilet.
  2. Disconnect the water supply line and remove the mounting bolts.
  3. Lift the toilet and inspect the drain for obstructions.
  4. Remove any visible clogs and reinstall the toilet.

Replace Parts Like Flappers and Fill Valves

  1. Inspect the flapper and fill valve for wear or damage.
  2. Turn off the water supply and drain the tank.
  3. Replace any faulty parts with new ones.
  4. Turn the water back on and test the flush.

Call a Plumber for Severe Clogs

If all else fails, it's time to call a professional plumber. They have the tools and expertise to handle severe clogs that home remedies cannot fix.

How to Prevent Clogged Toilets and Ensure Proper Function

Prevent clogged toilets and ensure your toilet properly working by following these tips:

Only Flush Toilet Paper

Educate your household on what can and cannot be flushed. Only toilet paper should go down the drain.

Clean Toilets Regularly

Regular cleaning can prevent the buildup of minerals and other debris that can contribute to clogs.

Use a Toilet Tablet Cleaner

Drop a toilet tablet cleaner into the tank to help maintain cleanliness and prevent clogs.

Check Toilet Parts Like Seals and Valves

Regularly inspect the toilet's internal components for wear and tear, replacing them as necessary.

Know When to Call a Professional Plumber

Recognize when a clog is beyond your ability to fix and don't hesitate to call a professional for help.

By following these tips and tricks, you can tackle a clogged toilet with confidence. Remember to use the keyword phrases "how to fix" and "clogged toilet" naturally throughout your content to optimize for search engines. With informative and engaging content, you'll not only fix the immediate problem but also prevent future issues.

How fix hole in wall?

0
How fix hole in wall?

Have you ever accidentally put a hole in your wall? Don't stress! Fixing wall holes is easier than you think. This guide will walk you through easy steps to fix holes of any size, leaving your walls looking flawless.

Assess the Damage – What Type of Hole Do You Have?

The first step is to assess the damage. Holes in walls can range from tiny nail holes to large gaps. The tools, materials, and repair method will depend on the hole's size and type.

Small Nail and Anchor Holes

Small nail holes less than 1⁄4 inch wide are the simplest to fix. These miniature holes are typically caused by hanging pictures, shelves, curtain rods, and other décor. Slightly larger anchor holes may exist from installing hooks, wall mounts, or other heavy items.

Luckily, small holes like these can be repaired in just a few easy steps using basic filling materials like spackle or joint compound. We'll cover how a bit later.

Larger Holes

If the hole in your wall is over 2 inches wide, things get trickier. Large holes this size are usually caused by doorknob collisions, moving furniture, or taking down shelving units built into the wall.

Repairing bigger holes requires cutting and installing wallboard patches for stability, then using joint compound to blend everything seamlessly. Extra steps like adding mesh tape, texturing, and extensive sanding are also needed for seamless repairs.

What Tools Will You Need?

The specific tools and materials required depends entirely on the size and type of damage. Here’s a quick overview:

  • Small holes: putty knife, spackle, sandpaper
  • Medium holes: joint compound, putty knife, sanding sponge, paint
  • Large holes: drywall patch or scrap wallboard, joint compound, putty knife, mesh tape, texturing tools, sandpaper

For all repairs, you’ll also need common supplies like a drop cloth, primer, brushes, trays, and gloves. Having the right gear makes fixing wall holes much simpler.

Fixing Small Holes

For miniature nail holes and anchor holes under 2 inches wide, spackle or lightweight joint compound works wonders. Here’s a simple 5-step process:

Step 1: Clean and Prep

Use a damp sponge to wipe away any dirt or dust around the hole. This helps the filler adhere properly. For cleaner edges, you can scrape the inner hole edges with a utility knife.

Step 2: Apply Filler

Use a putty knife to apply spackle, lightweight joint compound, or drywall repair paste. Apply enough to slightly overfill the hole. Allow a few minutes for the filler to set slightly.

Step 3: Smooth the Surface

Drag the straight edge of your putty knife across the hole at a 45 degree angle to smooth the filler flat and remove any excess.

Step 4: Let Dry

Allow the filler to fully dry as directed on the package, usually 24 hours. The filled hole may shrink slightly as it dries.

Step 5: Sand and Paint

If needed, use fine-grit sandpaper to smooth out the area so it’s flush with the wall surface. Carefully prime and paint the patch with a small brush. Make sure to match the existing wall color.

Follow these simple spackle and joint compound fix steps, and those small annoying wall holes can disappear in no time! The smaller the damage, the easier it is to achieve seamless repairs.

Fixing Medium to Large Holes

For holes larger than 2 inches across, using filler alone is not effective. The hole must be patched with support materials first for stability. Here are step-by-step instructions for properly patching bigger wall holes:

Step 1: Cut a Wallboard Patch

Use a drywall saw to cut a rectangular or square patch at least 2 inches wider than the hole on all sides. Cut from scrap drywall or purchase pre-cut wallboard patches.

Step 2: Secure and Support

For weight-bearing holes or large gaps, use wood furring strips attached to wall studs with drywall screws. This provides a solid backing to install the drywall patch on.

Step 3: Apply Mesh Tape

Center the wallboard patch over the hole and secure with drywall screws. Cover all seams between the existing wall and patch with self-adhesive fiberglass mesh tape. This supports and strengthens the repair.

Step 4: Mud and Tape

Use a drywall knife to apply lightweight joint compound over all seams and mesh tape. Apply thin, smooth layers and allow each coat to fully dry 24 hours before adding more compound.

Step 5: Blend and Finish

Continue applying joint compound in thin layers until the patch is perfectly flush and smooth with the surrounding wall. Allow to fully dry between coats. Lightly sand if needed.

Step 6: Texture and Paint

Match wall texture using spray texture or hand texturing tools. Allow to dry fully, then use a small angled trim brush to prime and paint the patch. Blend into existing paint for a seamless look.

It takes precision, patience, and the right materials to achieve flawless repairs, but these steps make fixing even huge wall holes seem doable.

Fix Wall Holes and Prevent New Ones Too

With the right preparation and materials for each project, repairing wall holes is totally manageable. Follow these tips to restore flawless walls:

Assess the damage – Determine hole size and type to plan repair strategy.

Use the proper filler – Small holes under 2” wide can use spackle or lightweight joint compound. Larger holes require wallboard patches for support.

Take your time – Allow each layer of compound or filler to dry fully before adding more. Rushing leads to cracks and imperfections.

Blend textures and paint – Match surface textures and colors for invisible repairs.

And lastly, pay attention to open doors and furniture placement to help prevent new wall damage going forward. With these hole repair tips, you can fix imperfections and maintain beautiful walls for years to come.

How to grow asparagus?

0
How to grow asparagus?

Asparagus, a perennial vegetable belonging to the lily family, has captivated taste buds worldwide with its distinctive flavor and versatility in culinary applications. Its history dates back to ancient civilizations, with evidence of its cultivation in Greece, Rome, and Egypt. Today, asparagus is grown in various regions across the globe, with China, Peru, and the United States being the leading producers.

Asparagus is not only a culinary delight but also a nutritional powerhouse. It is an excellent source of vitamins A, C, and K, as well as folate, iron, and fiber. This verdant vegetable is low in calories and carbohydrates, making it an ideal choice for those seeking a healthy and balanced diet.

Culinary Versatility of Asparagus

Asparagus's culinary versatility is truly remarkable. Its tender spears can be enjoyed fresh, roasted, grilled, steamed, or sautéed. Asparagus pairs well with various ingredients, including eggs, cheese, bacon, and lemon. It can be incorporated into salads, pasta dishes, stir-fries, and even desserts.

Choosing the Perfect Planting Site for Asparagus Cultivation

Ideal Location for Asparagus Cultivation

Asparagus thrives in full sun exposure, receiving at least six hours of direct sunlight daily. It prefers well-drained soil with a pH between 6.0 and 7.0. Avoid planting asparagus in areas prone to flooding or waterlogging.

Preparing the Planting Site

Prior to planting asparagus, it is essential to prepare the planting site thoroughly. Begin by tilling the soil to a depth of 12-18 inches. Incorporate organic matter, such as compost or well-rotted manure, to improve soil structure and fertility. If necessary, adjust the soil pH to the desired range using agricultural lime or sulfur.

Raised Beds: An Alternative for Challenging Soil Conditions

For those with heavy or compacted soil conditions, raised beds offer an excellent solution. Raised beds provide better drainage and aeration, allowing asparagus roots to grow and spread more effectively. Additionally, raised beds make it easier to control soil temperature and moisture levels.

By following these guidelines, you can create an ideal environment for asparagus cultivation, ensuring a bountiful harvest of this delectable vegetable.

Planting and Establishing Your Asparagus Crop

Asparagus can be planted using either crowns or seeds. Crowns are the preferred method for home gardeners, as they are easier to handle and establish more quickly. Seeds, on the other hand, are less expensive and offer a wider variety of cultivars to choose from.

Planting Asparagus Crowns:

  1. Spacing and Depth: Dig trenches 6-8 inches deep and 18-24 inches apart. Place the asparagus crowns in the trenches, spacing them 12-18 inches apart. Cover the crowns with soil, leaving the tips exposed.

  2. Watering: Water the asparagus crowns thoroughly after planting. Keep the soil consistently moist, especially during the first year of growth.

Planting Asparagus Seeds:

  1. Seed Selection: Choose asparagus seeds that are fresh and disease-free. Soak the seeds in warm water for 24 hours before planting to improve germination.

  2. Germination: Sow the asparagus seeds 1 inch deep and 2 inches apart in a seedbed or container filled with well-drained potting mix. Keep the seedbed or container warm and moist until germination occurs.

  3. Thinning Seedlings: Once the seedlings have developed their first set of true leaves, thin them to a spacing of 6-8 inches apart.

Caring for Your Asparagus Crop

Asparagus requires regular watering, especially during the first year of growth. Water deeply once or twice a week, or more frequently during hot and dry weather.

Fertilize asparagus annually in the spring with a balanced fertilizer, such as a 10-10-10 NPK fertilizer. Avoid over-fertilizing, as this can lead to excessive fern growth at the expense of spear production.

Mulching and Weed Control

Mulching around asparagus plants helps to suppress weeds, retain moisture, and regulate soil temperature. Use organic mulch, such as straw, compost, or wood chips, to a depth of 2-3 inches.

Keep the asparagus bed free of weeds, as they can compete with the asparagus plants for water and nutrients. Hand-weeding or using a hoe are effective methods for weed control.

Common Pests and Diseases

Asparagus is susceptible to a few common pests and diseases, including asparagus beetles, aphids, and rust.

  • Asparagus Beetles: These beetles can be controlled by hand-picking or using insecticidal soap.

  • Aphids: Aphids can be controlled by spraying the plants with a strong stream of water or using insecticidal soap.

  • Rust: Rust is a fungal disease that can be prevented by avoiding overhead watering and providing good air circulation.

Harvesting and Preserving Asparagus

Asparagus is a perennial vegetable that requires a two-year rotation. During the first year, the plants are allowed to grow and establish their root systems. Harvesting is not recommended during this time.

In the second year, the asparagus plants will produce spears that can be harvested. Continue harvesting for 6-8 weeks, or until the spears become thin and fibrous.

Harvesting Asparagus Spears

  • Ideal Time to Harvest: The ideal time to harvest asparagus spears is when they are 6-8 inches long and the tips are tightly closed.

  • Harvesting Technique: Cut the spears at the base using a sharp knife or asparagus knife. Avoid pulling the spears, as this can damage the plant.

  • Proper Length of Spears: Cut the spears to a length of 6-8 inches, leaving at least 6 inches of the spear above the ground.

Preserving Asparagus

Asparagus can be preserved for extended enjoyment using various methods, including freezing, canning, and dehydration.

  • Freezing: Asparagus can be frozen for up to 1 year. Blanch the spears for 2-3 minutes before freezing.

  • Canning: Asparagus can be canned for up to 1 year. Follow a reputable canning recipe to ensure safe and proper preservation.

  • Dehydration: Asparagus can be dehydrated for up to 6 months. Dehydrate the spears at a temperature of 110-120°F until they are brittle.

How to Grow Pumpkins: A Comprehensive Guide for Gardeners of All Levels

0
How to Grow Pumpkins: A Comprehensive Guide for Gardeners of All Levels

Pumpkins, with their vibrant hues and captivating shapes, are a symbol of autumn's bounty. Growing pumpkins at home is a rewarding experience that yields delicious, versatile produce. Whether you're a seasoned gardener or a novice enthusiast, this comprehensive guide will equip you with the knowledge and techniques to cultivate thriving pumpkin plants and reap a bountiful harvest.

The Allure of Growing Pumpkins

  • Pumpkins are a nutritional powerhouse, packed with vitamins, minerals, and antioxidants.
  • Their culinary versatility shines in soups, pies, breads, and roasted dishes.
  • Growing pumpkins at home ensures freshness, flavor, and the satisfaction of homegrown produce.

Selecting the Right Pumpkin Variety

Choosing the ideal pumpkin variety is crucial for a successful harvest. Consider these factors:

Size:

  • Small pumpkins (1-3 lbs.) are perfect for individual servings or decorations.
  • Medium pumpkins (4-8 lbs.) are ideal for pies and baking.
  • Large pumpkins (10+ lbs.) are best for carving and festive displays.

Shape:

  • Round pumpkins are classic and versatile.
  • Flattened pumpkins are ideal for stacking and storage.
  • Unique shapes, like gourds, add a touch of whimsy to your garden.

Color:

  • Orange pumpkins are the traditional choice.
  • White, yellow, and green pumpkins offer a vibrant palette.
  • Multi-colored pumpkins add a striking visual element.

Flavor:

  • Sweet pumpkins are best for eating fresh or in desserts.
  • Savory pumpkins are ideal for soups, stews, and savory dishes.
Variety Size Shape Color Flavor
Butternut Squash Medium Elongated Tan Sweet, nutty
Hubbard Squash Large Round or oblong Green, orange, or blue Sweet, dense
Jack-O'-Lantern Large Round Orange Mild, stringy
Sugar Pie Pumpkin Medium Round Orange Sweet, smooth
Cinderella Pumpkin Medium Flattened Orange Sweet, moist

Planting and Seed Germination

Direct Sowing:

  • Choose a well-drained, fertile spot with full sun.
  • Plant seeds 1 inch deep and 4-6 feet apart.
  • Water thoroughly and keep the soil moist.

Starting Indoors:

  • Start seeds indoors 4-6 weeks before the last frost.
  • Sow seeds 1 inch deep in peat pots filled with seed starting mix.
  • Keep the pots warm (70-80°F) and moist.
  • Transplant seedlings outdoors when they have 2-3 true leaves.

Hand Pollination:

  • Pumpkins require pollination to produce fruit.
  • Transfer pollen from male flowers (with stamens) to female flowers (with pistils).
  • Do this early in the morning when the flowers are open.

Pumpkin Care and Maintenance

Watering:

  • Water regularly, especially during dry spells.
  • Aim for 1-2 inches of water per week.
  • Water deeply to encourage deep root growth.

Fertilizing:

  • Apply a balanced fertilizer every 4-6 weeks.
  • Use a fertilizer with a ratio of 10-10-10 or similar.
  • Follow the instructions on the fertilizer package.

Weed and Pest Control:

  • Keep the area around your pumpkin plants weed-free.
  • Use organic pest control methods, such as neem oil or insecticidal soap, to manage pests.

Harvesting, Storing, and Enjoying Pumpkins

Harvesting:

  • Pumpkins are ready for harvest when the rind is hard and the stem is dry and brown.
  • Cut the pumpkin from the vine, leaving a few inches of stem attached.
  • Handle pumpkins carefully to avoid bruising.

Storing:

  • Store pumpkins in a cool, dry place with good air circulation.
  • Pumpkins can be stored for several months under ideal conditions.

Culinary Uses:

  • Pumpkins can be baked, roasted, steamed, or fried.
  • They can be used in soups, stews, pies, breads, and desserts.
  • Pumpkin seeds can be roasted and enjoyed as a snack.

Planting and Seed Germination

Direct Sowing:

  • Choose a well-drained, fertile spot with full sun.
  • Prepare the soil by tilling and adding compost or fertilizer.
  • Plant seeds 1 inch deep and 4-6 feet apart.
  • Water thoroughly and keep the soil moist.

Starting Indoors:

  • Start seeds indoors 4-6 weeks before the last frost.
  • Sow seeds 1 inch deep in peat pots filled with seed starting mix.
  • Keep the pots warm (70-80°F) and moist.
  • Transplant seedlings outdoors when they have 2-3 true leaves.

Hand Pollination:

  • Pumpkins require pollination to produce fruit.
  • Transfer pollen from male flowers (with stamens) to female flowers (with pistils).
  • Do this early in the morning when the flowers are open.

Pumpkin Care and Maintenance

Watering:

  • Water regularly, especially during dry spells.
  • Aim for 1-2 inches of water per week.
  • Water deeply to encourage deep root growth.

Fertilizing:

  • Apply a balanced fertilizer every 4-6 weeks.
  • Use a fertilizer with a ratio of 10-10-10 or similar.
  • Follow the instructions on the fertilizer package.

Weed and Pest Control:

  • Keep the area around your pumpkin plants weed-free.
  • Use organic pest control methods, such as neem oil or insecticidal soap, to manage pests.

Harvesting, Storing, and Enjoying Pumpkins

Harvesting:

  • Pumpkins are ready for harvest when the rind is hard and the stem is dry and brown.
  • Cut the pumpkin from the vine, leaving a few inches of stem attached.
  • Handle pumpkins carefully to avoid bruising.

Storing:

  • Store pumpkins in a cool, dry place with good air circulation.
  • Pumpkins can be stored for several months under ideal conditions.

Culinary Uses:

  • Pumpkins can be baked, roasted, steamed, or fried.
  • They can be used in soups, stews, pies, breads, and desserts.
  • Pumpkin seeds can be roasted and enjoyed as a snack.

Creative Pumpkin Recipes:

  • Pumpkin Soup with Roasted Garlic and Sage
  • Pumpkin Risotto with Parmesan and Thyme
  • Pumpkin Pie with Gingersnap Crust
  • Pumpkin Bread with Chocolate Chips and Walnuts
  • Pumpkin Muffins with Maple Glaze

Pumpkin Decorating Tips:

  • Carve pumpkins into jack-o'-lanterns for Halloween.
  • Paint pumpkins with acrylic paints for a festive fall display.
  • Use pumpkins as centerpieces for your Thanksgiving table.
  • Create pumpkin topiaries by stacking pumpkins of different sizes.
  • Decorate pumpkins with glitter, ribbon, or other embellishments.

Growing pumpkins at home is a rewarding and enjoyable experience. With the right variety selection, proper care, and a bit of patience, you can cultivate a bountiful harvest of delicious, versatile pumpkins. Whether you're a seasoned gardener or a novice enthusiast, embrace the joy of growing your own pumpkins and savor the fruits of your labor.

Understanding Mushrooms and Mycology

0
Understanding Mushrooms and Mycology

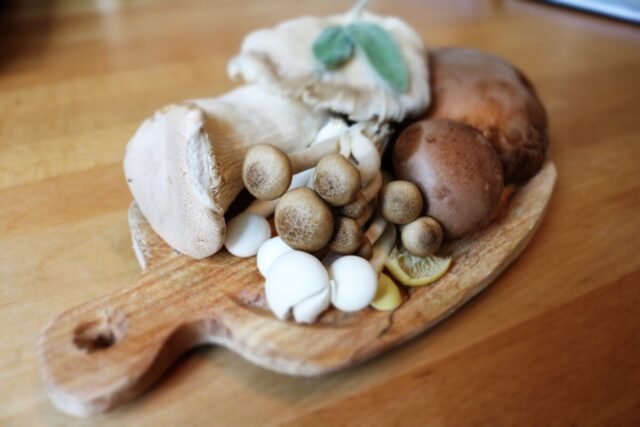
Mushrooms, the fleshy and often colorful fruiting bodies of fungi, have captivated human imagination for centuries. They play a crucial role in the Earth's ecosystems, performing essential tasks such as nutrient cycling, decomposition, and symbiotic relationships with plants.

Unveiling the Structure and Classification of Mushrooms

Mushrooms belong to the kingdom Fungi, a diverse group of organisms that includes yeasts, molds, and fleshy fungi. They possess a unique structure, consisting of a cap, gills, and a stem. Mushrooms are classified based on their spore-bearing structures, which can be gills, pores, or teeth.

Edible vs. Poisonous Mushrooms: A Critical Distinction

While some mushrooms are culinary delicacies, others can be deadly. It is crucial to distinguish between edible and poisonous mushrooms, as even a small amount of a toxic mushroom can cause severe illness or even death. If you are unsure about a mushroom's edibility, it is best to err on the side of caution and avoid consuming it.

Choosing the Right Mushroom Species for Home Cultivation

Choosing the right mushroom species for home cultivation is essential for success. Factors to consider include ease of growth, flavor, and nutritional value. Some popular edible mushroom varieties suitable for home cultivation include:

  • Oyster mushrooms: Known for their mild flavor and versatility, oyster mushrooms are easy to grow and can be cultivated on various substrates.

  • Shiitake mushrooms: Prized for their rich, umami flavor, shiitake mushrooms are a popular ingredient in Asian cuisine. They require a bit more care and attention during cultivation.

  • Button mushrooms: The most commonly consumed mushroom worldwide, button mushrooms are known for their mild flavor and adaptability to different cooking methods.

Sourcing Mushroom Spawn and Growing Kits

Mushroom spawn, the mycelium used to inoculate the substrate, can be purchased from reputable online retailers or suppliers. Growing kits, which include everything needed to start growing mushrooms at home, are also available. These kits typically contain spawn, substrate, and a fruiting chamber.

Ensuring a Successful Mushroom Cultivation Journey

Successful mushroom cultivation requires careful attention to environmental conditions, such as temperature, humidity, and air circulation. Maintaining a sterile environment is also crucial to prevent contamination. With patience and observation, you can enjoy a bountiful harvest of homegrown mushrooms.

Essential Equipment and Supplies for Mushroom Cultivation

Successful mushroom cultivation requires specific equipment and supplies to ensure optimal growth conditions. Here's a comprehensive list of what you'll need:

  • Grow bags or containers: These specialized bags or containers provide a sterile environment for mushroom growth.

  • Mushroom spawn: The mycelium used to inoculate the substrate, available from reputable suppliers.

  • Substrate: The nutrient-rich material on which mushrooms grow, such as straw, sawdust, or coffee grounds.

  • Fruiting chamber: A controlled environment where mushrooms can fruit and mature.

  • Spray bottle: Used to maintain humidity levels within the fruiting chamber.

  • Thermometer and hygrometer: To monitor temperature and humidity levels.

  • Gloves and face mask: To maintain a sterile environment and protect yourself from potential contaminants.

Maintaining Ideal Environmental Conditions

Mushrooms thrive in specific environmental conditions. Maintaining proper temperature, humidity, and air circulation is crucial for successful cultivation:

  • Temperature: Optimal temperatures vary depending on the mushroom species, but most grow best between 60°F and 80°F (15°C and 27°C).

  • Humidity: High humidity levels are essential for mushroom growth. Aim for a humidity level of around 80-90%.

  • Air circulation: Fresh air is necessary for healthy mushroom growth. Ensure adequate air circulation within the fruiting chamber.

Setting Up a Dedicated Workspace

To minimize the risk of contamination, it's best to set up a dedicated workspace for mushroom cultivation. This area should be clean, well-ventilated, and away from potential sources of contamination, such as pets or household chemicals.

The Comprehensive Mushroom Cultivation Process

Growing mushrooms at home involves a series of steps, from preparing the substrate to harvesting the mature mushrooms:

  1. Prepare the Substrate: Mix the substrate ingredients according to the recommended ratio and sterilize it to eliminate any contaminants.

  2. Inoculate the Substrate: Introduce the mushroom spawn into the sterilized substrate, ensuring even distribution.

  3. Incubate the Substrate: Place the inoculated substrate in a warm, dark place to allow the mycelium to colonize the substrate.

  4. Create the Fruiting Chamber: Set up the fruiting chamber and maintain the desired temperature, humidity, and air circulation conditions.

  5. Introduce Fresh Air: Once the mycelium has fully colonized the substrate, introduce fresh air into the fruiting chamber to trigger mushroom formation.

  6. Harvest the Mushrooms: When the mushrooms reach maturity, carefully harvest them by twisting or cutting them at the base.

Patience and Observation: Key Ingredients for Success

Mushroom cultivation is a process that requires patience and observation. It can take several weeks or even months from inoculation to harvest. Regularly monitor the growth conditions and make adjustments as needed.

Harvesting and Enjoying Your Homegrown Mushrooms

Identifying the signs of maturity is crucial for successful harvesting. Look for fully developed caps and gills. Harvest the mushrooms by gently twisting or cutting them at the base.

Storing and Preserving Your Mushroom Bounty

To maintain the freshness and flavor of your homegrown mushrooms, store them properly. Refrigeration is the most common method, but some mushrooms can also be dried or frozen for longer storage.

Culinary Delights with Homegrown Mushrooms

Homegrown mushrooms offer a versatile ingredient for culinary creations. Explore various cooking methods to showcase their unique flavors and textures. From sautéing and grilling to pickling and preserving, the possibilities are endless.

Garlic Cultivation: A Comprehensive Guide to Growing Garlic

0
Garlic Cultivation: A Comprehensive Guide to Growing Garlic

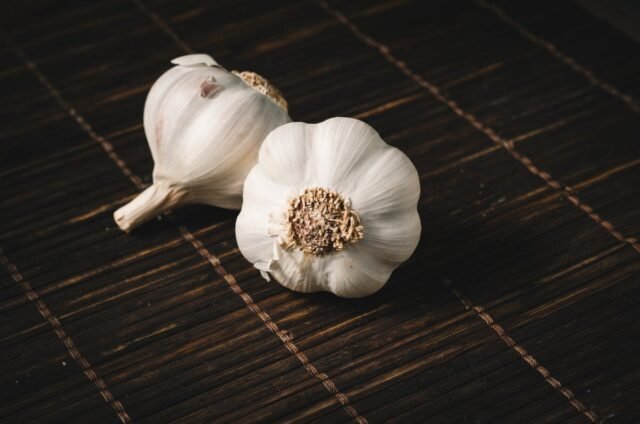
Garlic, a versatile and flavorful bulb, is a staple ingredient in many cuisines worldwide. Whether you're a seasoned gardener or just starting, growing your own garlic is a rewarding experience that offers fresh, organic produce right from your backyard. This comprehensive guide will take you through the essential steps of garlic cultivation, from selecting the right variety to harvesting and storing your bountiful crop.

Choosing the Right Garlic Variety

The first step in garlic cultivation is selecting the most suitable variety for your growing conditions and personal preferences. Garlic varieties are broadly classified into three main types: hardneck, softneck, and elephant garlic.

1. Hardneck Garlic:

  • Characteristics:

    • Produces a stiff central stalk (scape) that curls and forms bulbils (small cloves) at the top.
    • Known for its intense flavor and long storage life.
    • Typically planted in the fall and harvested in the early summer.
  • Flavor Profile:

    • Bold, pungent, and slightly spicy.
    • Ideal for roasting, sautéing, and adding to sauces and marinades.

2. Softneck Garlic:

  • Characteristics:

    • Lacks a central stalk and produces larger, more uniform cloves.
    • Generally milder in flavor compared to hardneck varieties.
    • Stores well for several months.
    • Typically planted in the spring and harvested in the late summer.
  • Flavor Profile:

    • Mild, mellow, and slightly sweet.
    • Versatile for use in a wide range of dishes, from stir-fries to soups and stews.

3. Elephant Garlic:

  • Characteristics:

    • Produces massive bulbs with large, mild-flavored cloves.
    • Not a true garlic variety but a member of the leek family.
    • Typically planted in the fall and harvested in the early summer.
  • Flavor Profile:

    • Mild, sweet, and slightly garlicky.
    • Often used in Asian cuisine and as a roasted vegetable.

Preparing the Soil and Planting Garlic:

  1. Soil Preparation:

    • Choose a well-drained, fertile soil with a pH range of 6.0 to 7.0.
    • Incorporate organic matter, such as compost or well-rotted manure, to improve soil structure and fertility.
    • Ensure the soil is free of weeds and large stones.
  2. Planting Garlic:

    • Break the garlic bulb into individual cloves, leaving the papery skin intact.
    • Plant the cloves pointy side up, 2-3 inches deep and 4-6 inches apart.
    • Cover the cloves with soil and water thoroughly.
    • Apply a layer of mulch to conserve moisture and suppress weeds.

Garlic Care and Maintenance:

  1. Watering:

    • Water regularly to keep the soil consistently moist but not waterlogged.
    • Avoid overhead watering to prevent fungal diseases.
  2. Weeding:

    • Regularly weed the garlic bed to prevent competition for nutrients and moisture.
  3. Mulching:

    • Apply a layer of organic mulch, such as straw or compost, around the garlic plants to retain moisture, suppress weeds, and regulate soil temperature.

Harvesting and Storing Garlic:

  1. Harvesting:

    • Hardneck garlic: Typically ready for harvest in early summer when the leaves start to turn brown and the scapes begin to curl.
    • Softneck garlic: Usually harvested in late summer when the leaves have completely died back.
  2. Curing:

    • After harvesting, allow the garlic bulbs to cure in a warm, dry, and well-ventilated area for 2-3 weeks.
    • This process helps the bulbs develop their full flavor and extend their storage life.
  3. Storing:

    • Store cured garlic in a cool, dark, and dry place, such as a pantry or cellar.
    • Properly stored garlic can last for several months.

Garlic Care and Maintenance: Nurturing Your Garlic Crop

1. Watering:

  • Importance:

    • Garlic requires consistent moisture for optimal growth and bulb development.
    • Inadequate watering can lead to stunted growth, poor bulb formation, and increased susceptibility to pests and diseases.
  • Watering Schedule:

    • Water regularly, providing approximately 1 inch of water per week.
    • Adjust the watering frequency based on weather conditions and soil moisture levels.
    • Avoid overhead watering to prevent fungal diseases.

2. Weeding:

  • Importance:

    • Weeds compete with garlic plants for nutrients, moisture, and sunlight.
    • Regular weeding helps maintain a healthy growing environment and promotes vigorous garlic growth.
  • Weeding Methods:

    • Hand weeding: Manually remove weeds by pulling them out or using a hoe.
    • Mulching: Apply a layer of organic mulch around the garlic plants to suppress weed growth.
    • Use of herbicides: Consider using selective herbicides specifically designed for garlic cultivation, if necessary.

3. Mulching:

  • Importance:

    • Mulching provides numerous benefits for garlic cultivation:
      • Conserves soil moisture, reducing the need for frequent watering.
      • Suppresses weed growth, eliminating the need for excessive weeding.
      • Regulates soil temperature, preventing extreme fluctuations that can stress the plants.
      • Improves soil structure and fertility over time.
  • Mulch Materials:

    • Straw: A widely used and effective mulching material for garlic.
    • Compost: Provides additional nutrients to the soil while suppressing weeds and conserving moisture.
    • Wood chips: Can be used as mulch, but ensure they are well-aged to avoid nitrogen depletion in the soil.

Harvesting and Storing Garlic: Preserving Your Bountiful Crop

1. Harvesting:

  • Hardneck Garlic:

    • Typically ready for harvest in early summer when the leaves start to turn brown and the scapes begin to curl.
    • Gently lift the bulbs from the soil using a garden fork or spade.
  • Softneck Garlic:

    • Usually harvested in late summer when the leaves have completely died back.
    • Allow the bulbs to dry in the field for a few days before lifting them from the soil.

2. Curing:

  • Importance:
    • Curing is a crucial step that helps the garlic bulbs develop their full flavor and extend their storage life.
    • Hang the garlic bulbs in a warm, dry, and well-ventilated area for 2-3 weeks.

3. Storing:

  • Ideal Conditions:

    • Store cured garlic in a cool, dark, and dry place, such as a pantry or cellar.
    • Maintain a temperature range of 32-40°F (0-4°C) and a relative humidity of 60-70%.
  • Storage Methods:

    • Braided garlic: Braid the garlic bulbs together using their stems and hang them in a cool, dry place.
    • Mesh bags: Store garlic bulbs in mesh bags to allow for air circulation and prevent spoilage.
    • Airtight containers: Place garlic bulbs in airtight containers and store them in a cool, dark place.

By following these comprehensive care and maintenance practices, you can ensure a bountiful harvest of flavorful garlic. Proper harvesting and storage techniques will extend the shelf life of your garlic, allowing you to enjoy its culinary delights throughout the year.

How to Caulk a Bathtub?

0
Bathtub

Caulking a bathtub can completely transform the look of a bathroom. Over time, the seal around the tub can become cracked, discolored, or allow water to seep in between the tub and the wall. Replacing this seal with fresh caulk will help prevent leaks, improve aesthetics, and add value to your home. With some basic supplies and a little practice, even novice DIYers can learn how to caulk a bathtub for a seamless finish.

Gather Your Caulking Supplies

Before beginning any caulking project, it’s essential to gather the proper supplies. Having the right tools and materials on hand will make the process much smoother and allow you to achieve professional-looking results. Here are the key items you’ll need to caulk a bathtub:

  • Caulk gun – A caulking gun allows you to neatly and efficiently apply caulk in a continuous bead. Guns with smooth triggers and built-in rod cutters make the job even easier.
  • Caulk – For bathtub applications, 100% silicone caulk is highly recommended. Silicone provides maximum flexibility and adhesion in wet environments. Look for mold/mildew-resistant formulas.
  • Caulk smoothing tool – Also called a caulk finisher, this tool shapes and smooths the caulk bead after application. Hard plastic or soft rubber tools both work well.
  • Utility knife – To cut open the caulk tube nozzle and trim away old caulk, a sharp utility knife is a must-have.
  • Cleaning supplies – Such as rubbing alcohol, acetone, or denatured alcohol to thoroughly clean the surface before caulking.
  • Masking tape – Painter’s tape helps create super straight caulk lines. Blue tape for bathrooms works great.
  • Rags & paper towels – For wiping away excess caulk and old caulk residue.
  • Safety gear – Like gloves and eye protection. Caulk remover chemicals can be harsh.

With these DIY caulking supplies on hand, you’ll be ready to tackle the bathtub caulking project. It’s worth investing in high-quality caulk and tools for an easier, faster application and long-lasting results.

Prepare the Bathtub Surface

Proper surface preparation is crucial for successful DIY bathtub caulking. If the caulked seam isn’t completely clean and dry, the new caulk won’t adhere correctly. Follow these steps to get the surface ready:

Remove Old Caulk

Use a utility knife or caulk remover tool to fully remove any old caulk from the seam between the tub and wall. Pull up or scrape away as much of the old caulk as possible. Be sure to use eye protection and gloves during this step, as caulk remover chemicals can be harsh.

Clean the Surface

Give the newly exposed surface an intensive cleaning using rubbing alcohol, acetone, or another degreasing cleaner. This will remove any soap scum, oils, or other residue so the new caulk can properly bond. Scrub away any remaining caulk fragments and let the surface dry completely.

Apply Masking Tape

Run painter’s tape along the top and bottom edges of the tub-wall seam. Apply the tape in straight lines to define the area to be caulked. The tape will help you achieve super straight caulk lines for a neat, professional bathtub caulking job.

Now the bathtub surface is prepped and ready for fresh caulk. The time invested in proper cleaning and taping will pay off with superior results.

Apply the Bathtub Caulk

With a loaded caulking gun, you can begin neatly applying the silicone caulk along the bathtub seam. Follow these tips for smooth, effective caulk application:

Cut the Nozzle

Use a utility knife to cut the caulk tube nozzle at a 45-degree angle. This angled tip will make it easier to apply an even bead of caulk into the seam. Cut the opening just wide enough for the caulk to flow easily when squeezed.

Load the Gun

Insert the caulk tube into the caulking gun. Pull out the plunger and squeeze the caulk into the barrel, then release the plunger to push the caulk forward. Hold the gun at a 45-degree angle to keep pressure on the caulk.

Apply the Bead

Begin applying the caulk in a slow, steady motion along the length of the bathtub seam. Keep the caulk gun nozzle close to the surface and maintain consistent pressure as you smoothly run the bead from end to end.

Tool the Caulk

Once applied, use a caulk smoothing tool or dampened finger to shape the caulk into a neat, convex bead. Tool the caulk by running the tool along the length of the bead, pressing it into the corners. This will create a professional finish.

Remove the Tape

Carefully peel away the painter’s tape immediately after tooling the caulk. Pulling up the tape promptly prevents the caulk from bonding to it.

With practice, you’ll get the hang of smoothly applying caulk and tooling it into a perfect bead. Take your time on this key step to create a watertight, seamless caulk line.

Allow the Caulk to Cure

Freshly applied silicone caulk requires moisture to fully cure and gain its adhesive properties. Here’s what to expect during the curing process:

  • Most silicone bathroom caulk takes 24-48 hours to cure enough to be water-resistant.
  • Full curing can take 5-7 days. Avoid filling the tub or taking showers until the caulk has had time to fully cure.
  • The curing time may be a bit longer in dry climates. Try running a humidifier in the bathroom to speed up silicone caulk curing.
  • Cured silicone caulk should have a rubbery consistency. It will be fully hardened yet remain flexible enough for slight expansion and contraction.

Rushing the caulk curing process can compromise the seal, leading to leaks or caulk adhesion failure down the road. Be patient and allow fresh caulk ample time to cure before using the bathtub.

Achieve Flawless Bathtub Caulking

With the right supplies and techniques, DIYers can achieve seamless, professional-looking caulk lines around the bathtub. Here are some final tips for flawless bathtub caulking:

  • Take your time preparing the surface and applying the caulk for the best results. Rushing leads to messy edges and poor adhesion.
  • Less is more when it comes to caulk. Apply the smallest bead possible to seal the seam fully. Excess caulk leads to cracking and is harder to tool smoothly.
  • Wipe away any caulk smears immediately with a damp rag. Once cured, dried caulk is very difficult to remove.
  • If the results aren’t perfect the first time, simply reclean the area and reapply fresh caulk. Practice makes perfect!
  • Reseal the bathtub annually or whenever you notice cracked or discolored caulk. Maintenance prevents major leaks.

With some patience and the right techniques, DIY bathtub caulking can give your bathroom an instant facelift. Tackle this weekend project and enjoy the satisfaction of a job well done.


How to Replace a Toilet Flapper?

0
Toilet Flapper

Replacing a faulty toilet flapper is one of the easiest and most effective DIY repairs you can do to fix a running toilet. With just a few tools and a little know-how, you can replace the flapper in about 15 minutes.

In this comprehensive guide, you’ll learn everything you need to know about toilet flappers, from understanding how they work to identifying signs of a malfunctioning flapper. You’ll also find step-by-step instructions for replacing a toilet flapper, as well as tips for troubleshooting issues and preventing future problems.

Understanding the Toilet Flapper and Its Importance

The toilet flapper, also known as a flush valve seal, is a rubber component located at the bottom of the toilet tank. It covers the flush valve drain and plays a crucial role in allowing your toilet to function properly.

What is a Toilet Flapper?

The toilet flapper acts as a seal for the flush valve drain. When you flush the toilet, the flapper lifts up, allowing the water in the tank to empty into the toilet bowl. Once the tank is emptied, the flapper then seals off the drain again so the tank can refill.

A properly functioning flapper maintains a tight seal over the flush valve drain. This prevents water from continuously flowing from the tank into the bowl, which is what causes a running toilet.

How Does a Toilet Flapper Work?

The flapper is connected to the flush handle lever via a chain. When you depress the handle, it lifts the flapper up by the chain, breaking the water-tight seal. The water pressure in the tank forces the water to rush out into the toilet bowl.

Once the tank empties, the chain goes slack. The weight and elasticity of the rubber flapper then cause it to fall back down over the drain, sealing the tank so it can refill through the fill valve. This cycle repeats every time you flush.

Why Does a Toilet Flapper Need to Be Replaced?

There are a few reasons why a toilet flapper eventually needs to be replaced:

  • Wear and tear – The flapper is made of rubber and sits in water. After years of use, the material wears out and decomposes. Flappers typically last 4-7 years before needing replacement.
  • Mineral buildup – Mineral deposits from hard water can form on the flapper over time. This prevents the flapper from forming a tight seal, causing leaks.
  • Warping or cracking – Plastic or metal parts connected to the flapper can warp or crack. This can prevent the flapper from sealing properly.

Replacing the flapper is an essential part of routine toilet maintenance. A faulty, leaking flapper can waste hundreds of gallons of water per day and lead to higher water bills.

Signs of a Faulty Toilet Flapper

A failing or faulty toilet flapper will usually show these signs:

  • Running toilet – If you can hear water continuously flowing into the toilet bowl, the flapper is not sealing properly. This is the most common symptom of a bad flapper.
  • Difficulty flushing – A warped or cracked flapper may get stuck open. This prevents the tank from filling completely, leading to a weak flush.
  • Tank not filling – If the tank water level is very low or empty, the flapper may not be closing at all after flushing.
  • Toilet cycling on its own – Some flappers may intermittently leak for a few seconds, causing the toilet to run briefly. This is called phantom flushing.
  • Higher water bills – A continuously running toilet can waste 200 gallons of water or more per day. This leads to a spike in water consumption and your bill.

Identifying the Root Cause of a Running Toilet

It’s important to distinguish whether the flapper or fill valve is causing the running toilet. Here are some ways to identify the culprit:

  • Listen for hissing or flowing water and check if it stops between flushes. If so, the flapper is likely leaking.
  • Look at the overflow tube when the tank is full. If water is flowing down, the fill valve is on continuously.
  • Remove the tank lid and observe the flapper seal during flushing. A faulty flapper will not close properly.
  • Check if the water level drops when no flushing occurs. If so, the flapper isn’t sealing and is allowing water to leak into the bowl.

Distinguishing Between a Flapper and Fill Valve Issue

While both a flapper and fill valve can cause similar symptoms, there are a few key differences:

  • Flapper – Leaks intermittently, causes phantom flushing, and water level drops between flushes.
  • Fill valve – Water runs continuously, no phantom flushing, and water level remains the same.
  • Flapper – Running stops between flushes. Fill valve running is constant.
  • Flapper – No water down overflow tube. Fill valve causes overflow.
  • Flapper – Weak or incomplete flushes. Fill valve usually maintains normal flush power.

Knowing these differences will help you pinpoint whether you need a new flapper or fill valve. In most cases, a running toilet is caused by a faulty flapper.

Gather the Necessary Tools and Materials

Replacing a toilet flapper is a quick and straightforward project. You don’t need to be an expert plumber. With a few basic tools and a new flapper, you can complete this repair in about 15 minutes.

Essential Tools for Toilet Flapper Replacement

You’ll need the following tools:

  • Adjustable pliers – For disconnecting hoses and gripping fittings
  • Bucket – For setting aside bolts and gaskets during disassembly
  • Clean rags – For wiping up any water drips or spills
  • Flashlight – For better visibility in the dark toilet tank

Optional tools:

  • Sponge – For soaking up water in the tank or bowl
  • Gloves – For protection when handling toilet parts
  • Knee pads – For comfort when kneeling on bathroom floor

Selecting the Right Flapper for Your Toilet Model

Replacement flappers are inexpensive, usually $2-$8. However, you need the correct style for your toilet. The most common are:

  • Standard flapper – For 2” flush valve, with sliding clip ends. Fits most toilets.
  • Korky brand – For 2” and 3” flush valves. Has adjustable cone shape.
  • Tower flapper – For 3” flush valve only. Has large cylindrical shape.

Check your existing flapper and measure the flush valve opening to get the right replacement. Consult a home improvement store if unsure.

Finding Compatible Replacement Parts

Besides the flapper itself, you may also need:

  • Flapper chain – Links the flapper to the flush handle lever. Replace if rusty.
  • Overflow tube – The vertical tube that the flapper seals against. Replace if cracked.
  • Flush valve gasket – Creates a seal between tank and bowl. Replace if leaking.
  • Fill valve float – May need adjusting to prevent overfilling tank.

Buy multiple replacement parts in advance to avoid multiple trips back to the store.

Step-by-Step Guide to Replacing a Toilet Flapper

Follow these steps to successfully replace a toilet flapper:

Turn Off the Water Supply

  • Locate the water supply valve behind or near the toilet. It controls water flow to the toilet.
  • Turn it clockwise until tight. This shuts off the water so you can work safely.

Empty the Toilet Tank

  • Flush the toilet to drain most of the water from the tank down into the bowl.
  • Hold the flapper chain to prevent the flapper from sealing while the tank continues draining.

Detach the Old Flapper

  • Disconnect the flapper chain from the flush handle lever.
  • Remove the old flapper from the flush valve or overflow tube.
  • Use pliers if it’s stuck. Discard the old flapper.

Prepare the New Flapper

  • Inspect the new flapper. Ensure the style matches your toilet.
  • Attach the flapper chain to the flush handle lever. Adjust to a slack length.
  • If needed, trim the flapper chain using pliers. Remove any excess length.

Install the New Flapper

  • Align the new flapper properly over the flush valve opening.
  • For standard flappers, secure the clips to the overflow tube.
  • For other styles, attach as per the manufacturer’s instructions.
  • Ensure the flapper is centered and sits flat.

Turn the Water Supply Back On

  • Turn the shut-off valve counter-clockwise to restore water flow to the toilet tank.
  • Check for any leaks at the connections. Tighten if needed.

Test the New Flapper

  • Allow the tank to fill completely, then flush the toilet.
  • Verify that the new flapper rises and drops back down properly.
  • If needed, adjust the flapper chain length until flush action is smooth.
  • Check that water level is correct, not too high or low.

Additional Tips and Considerations

Here are some other useful tips for a smooth toilet flapper replacement process:

Troubleshooting Common Issues

Problem: Flapper doesn’t align properly or falls off when flushing.

Solution: Adjust flapper chain length or trim overflow tube.

Problem: Flapper leaks immediately after install.

Solution: Clean mineral deposits off flush valve. Check gasket seal.

Problem: Toilet flushes weakly or tank level too low.

Solution: Adjust float higher to increase water volume in tank.

Extending the Lifespan of Your Flapper

  • Clean the flapper with vinegar and water to prevent mineral buildup.
  • Ensure water level in tank is adjusted properly, not too high.
  • Use dye tablets in the tank to prevent bacteria growth on the flapper.
  • Consider installing a chlorine-resistant flapper for longer life.

Preventing Future Toilet Flapper Problems

  • Avoid harsh chemical cleaners that can degrade the flapper material.
  • Use a toilet tank cleaning brush regularly to remove debris and buildup.
  • Replace plastic or metal components attached to flapper if cracked or warped.
  • Check flapper seal and chain connection periodically for signs of wear.

Conclusion

Replacing a faulty toilet flapper is an easy, inexpensive fix that can save hundreds of gallons of wasted water each day. With some basic DIY skills and the right materials, you can replace a leaking, worn-out flapper in about 15 minutes.

Follow the steps outlined here, including turning off the water, detaching the old flapper, installing the new one, and testing the flush action. Be sure to get the correct replacement flapper for your specific toilet model. Adjust the chain length for smooth operation.

Taking the time to proactively replace your toilet flapper can prevent much larger problems down the road. Performing routine maintenance and checks will also help maximize the lifespan of each flapper. With this helpful guide, you can fix a running toilet and prevent excessive water usage.


Recent Posts