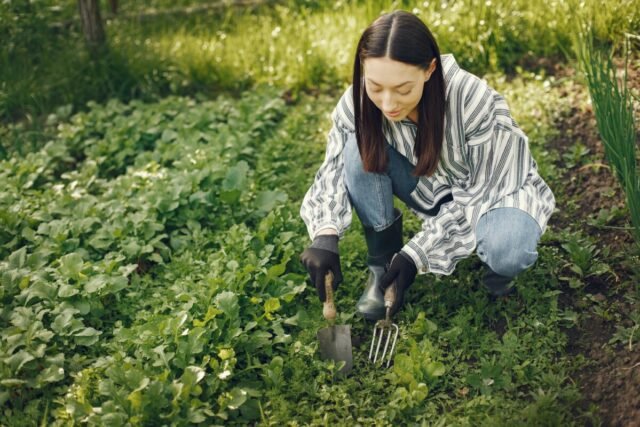
For many people, starting a home garden is a dream that conjures images of lush tomato vines, sweet-smelling herbs, and bountiful harvests of fresh fruits and vegetables. However, transforming this vision into a reality can seem daunting for beginners. Gardening may appear complicated, time-consuming, and reserved for those with innate “green thumbs”. Fortunately, with proper planning, preparation, and care, even novice gardeners can create a productive, thriving garden oasis.
Gardening provides a range of benefits beyond just producing food. Starting a garden for beginners can reduce stress, provide gentle exercise, connect you with nature, and give you a sense of accomplishment as you nurture your plants from seed to harvest. The satisfaction of growing your own healthy, organic fruits, vegetables, and herbs is a reward in itself.
While gardening does require an investment of time and effort, the basics are quite simple to learn. With the right guidance on gardening tips for beginners, anyone can discover the joy and satisfaction of growing their own food. This article will provide essential information on how to plant a garden for the first time, from choosing a spot to preparing the soil to planting, maintenance, and harvesting. Follow these simple gardening tips for beginners, and you’ll be on your way to garden success.
Section 1: Planning Your First Garden
Careful planning is the foundation of any thriving garden. Before rushing out to buy seeds and plants, take time to consider these key factors in designing your ideal garden space.
Choosing the Right Location
One of the most important gardening tips for beginners is selecting an optimal location. Make sure your garden site:
- Receives at least 6 hours of direct sunlight daily. Most edible plants require substantial sunlight.
- Has good drainage and fertile soil. Amend poor soil with compost or other organic matter to improve texture and nutrient content.
- Is near a water source. Hose access simplifies watering chores.
- Is away from trees and shrubs. These can shade your garden and compete for water and nutrients.
- Is close to your house for convenience. You’ll tend the garden more often if it’s readily accessible.
If your yard lacks a suitable spot, consider creating raised garden beds that provide you full control over soil quality, drainage, and placement.
Selecting Plants
When planning your first edible garden, it’s wise to start small. Focus on easy-to-grow vegetables and herbs that even beginning gardeners can succeed with. Consider these simple options:
- Leafy greens – Lettuce, spinach, kale, chard
- Root crops – Carrots, radishes, beets
- Herbs – Basil, parsley, cilantro, dill
- Tomatoes – Cherry or bush varieties
- Peppers – Jalapeno, bell, sweet banana
- Beans – Bush green beans
Also check that the vegetables and herbs you select are suited to your climate zone. Cool weather crops like spinach and kale thrive in fall and spring, while tomatoes and peppers prefer summer heat.
Finally, pay attention to the mature size of each plant and space accordingly. This prevents overcrowding.
Gathering Gardening Supplies
Before planting, assemble the basic gardening tools and materials every beginner needs:
- Gardening tools – Trowel, shovel, rake, hoe, pruners, watering can/hose
- Seeds or starter plants – Purchase quality seeds or starters from reputable garden centers or seed catalogs.
- Soil amendments – Compost, manure, worm castings to enrich soil nutrients and texture.
- Fertilizer – Organic granular fertilizers provide nutrients for optimal plant growth.
- Mulch – Shredded bark, leaves, straw retains soil moisture and suppresses weeds.
Investing in high-quality tools and building up your soil from the start will make gardening easier and more successful.
Section 2: Preparing Your Garden Site
Once you’ve selected the perfect spot, it’s time to prepare the space for planting. Proper soil preparation sets the foundation for a prolific, healthy garden.
Clearing and Tilling the Soil
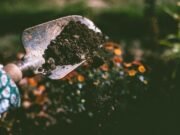
Start by removing any weeds, rocks, roots, or debris in your planting area, using a shovel, garden fork, or hoe. This creates a clean slate for preparing planting beds.
Next, loosen and aerate the soil using a rototiller or garden fork, at least 8-12 inches deep. Breaking up any compacted soil improves drainage and creates space for plant roots to grow.
Mix in any organic soil amendments like compost, manure, or peat moss as you till. These add nutrients, boost soil structure, and help retain moisture.
Building Raised Beds
In locations with poor drainage, compacted soil, or contamination, raised garden beds present an excellent gardening solution.
Raised beds provide:
- Better drainage and warmer soil for early spring planting
- Loose, fertile soil that’s easier to work with
- Protection from pests and diseases
- Reduced weed problems
- Less bending for easier maintenance
Build your raised beds 2-4 feet wide to allow easy access from both sides. Use rot-resistant wood, bricks, or stones to frame them, and fill with a quality potting mix.
Testing and Amending Soil pH
Soil pH indicates whether soil is acidic, neutral, or alkaline. Most vegetables thrive in slightly acidic soil with a pH between 6.0-6.8.
Use a soil test kit to determine your garden’s pH. If it’s too high or low, add amendments like lime (to raise pH) or sulfur (to lower pH) according to package directions.
With your garden site cleared, soil prepared, and pH adjusted, it’s finally time to start planting!
Section 3: Planting Your First Garden
Here are some key gardening tips for beginners to help you plant and care for your new garden:
Planting Seeds and Starters
Refer to your seed packets or plant tags for the recommended planting depth, spacing, and sunlight needs for each variety. Follow these tips:
- Plant seeds at the proper depth – usually 2-3x the width of the seed.
- Space seeds and plants appropriately so they have room to mature.
- Water gently after planting seeds to settle the soil.
- Transplant seedlings on a cloudy day or in evening to avoid transplant shock.
- Harden off seedlings for 7-10 days before transplanting them outside.
Providing Consistent Water
Vegetable gardens require about 1-2 inches of water per week from rain or watering. Established plants need deep, infrequent watering, while seeds and seedlings need light, frequent watering.
Use soaker hoses or drip irrigation to apply water directly to the soil. This conserves water and prevents fungal diseases. Avoid overhead watering.
Add 2-4 inches of organic mulch around plants to retain soil moisture and reduce watering needs.
Controlling Weeds and Pests
Weeds compete with your vegetables for water, space, and nutrients. Stop them before they spread by:
- Applying mulch to block light and suppress weed seeds from germinating
- Hand-pulling weeds, including the roots, while plants are small
- Cultivating gently around plants with a hoe or garden fork
Pests like aphids, beetles, and caterpillars can quickly damage vegetable plants. Practice organic pest control by:
- Removing pests by hand and dropping them in soapy water
- Using floating row covers as a barrier against insects
- Applying organic insecticidal soap or neem oil
- Inviting beneficial insects like ladybugs and lacewings
By taking a proactive approach, you can keep your garden lush and productive while avoiding chemical pesticides.
Section 4: Harvesting and Enjoying Your Bounty
After weeks of tending your garden, it’s time to reap the rewards! Follow these tips for harvesting produce at peak flavor.
Harvesting Vegetables at Their Prime
It takes patience and observation to harvest vegetables at the perfect stage of ripeness.
- Pick lettuce, kale, and other leafy greens when leaves are young and tender.
- Harvest broccoli, cauliflower, and cabbage heads while they are fully formed but before flowering.
- Pull carrots, radishes, and beets when the shoulders break through the soil surface.
- Pick tomatoes, peppers, beans, and other fruits when fully colored but still firm.
Storing Your Freshly Picked Produce
Proper storage keeps freshly harvested produce fresher longer:
- Store tender greens like lettuce in a bowl with a damp paper towel. Refrigerate.
- Set root crops like carrots in a container with damp sand. Store in a cool basement or cellar.
- Keep tomatoes, peppers, and eggplant at room temperature out of direct sunlight.
Preserving Your Bountiful Harvest
Consider these easy methods for preserving extra produce to enjoy year-round:
- Canning – Sterilize glass jars then hot pack chopped vegetables and boiling water or sauce.
- Freezing – Blanch vegetables, cool, pack into containers, and freeze.
- Drying – Use a food dehydrator or oven to dry herbs, tomatoes, peppers, and more.
Conclusion
Starting a garden for beginners may seem intimidating, but with the right guidance it can be simple, fun, and incredibly rewarding. Follow the steps in this article—from planning your garden layout to preparing the soil, planting, and maintaining your new garden—and you’ll be harvesting homegrown fruits and veggies in no time.
Gardening is a journey of continuous learning. Be patient with yourself, enjoy the process, and don’t be afraid to get your hands dirty! The satisfaction of nurturing your own plants and gathering fresh, organic produce is well worth the effort. So grab your trowel and let’s start gardening!
