Stop That Drip! Your Ultimate Guide to Fixing a Leaky Shower Head
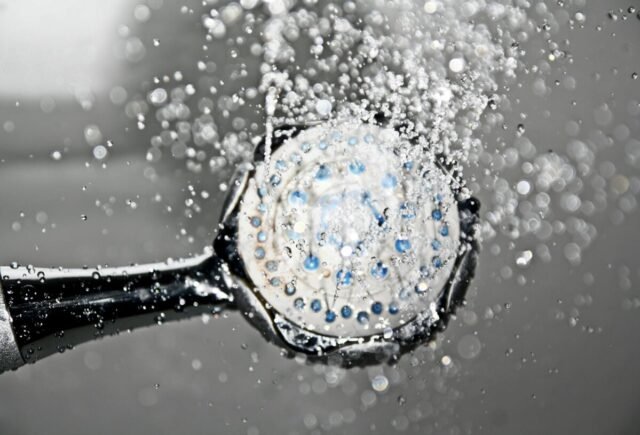
A dripping shower head is a common household problem that can lead to water waste, higher bills, and potential damage to your bathroom. In fact, a single dripping shower head can waste up to 3,000 gallons of water per year, which not only hurts the environment but also puts a strain on your wallet. If you're dealing with a shower head leak, don't worry – this comprehensive guide will walk you through the common causes and solutions to help you fix that dripping shower head once and for all.
Why is My Shower Head Dripping?
There are several reasons why your shower head might be leaking when the water is turned off. Understanding these shower head leak causes can help you diagnose the problem and find the right solution. Some of the most common culprits include:
- Mineral buildup: Over time, hard water can leave mineral deposits, such as calcium and lime, on your showerhead. These deposits can clog the nozzles and cause water to drip even when the shower is turned off. This is especially common in areas with high levels of hard water.
- Worn-out washer or O-ring: Inside your showerhead, there's a small rubber washer or O-ring that creates a watertight seal. As this component ages and deteriorates, it can lose its ability to seal properly, leading to leaks and drips.
- Loose connection: If the connection between your showerhead and the shower arm is loose, water can seep through the threads and cause drips. This can happen if the showerhead wasn't tightened properly during installation or if the threads have become worn over time.
- High water pressure: In some cases, excessive water pressure can put strain on your showerhead and cause leaks. While this is less common than the other causes, it's worth checking your home's water pressure if you can't identify any other issues. High water pressure can also lead to other plumbing problems, so it's important to address it promptly.
Tools and Materials You'll Need
Before you begin your shower head repair, gather the following tools and materials to ensure you have everything you need:
- Adjustable wrench or pliers: You'll need these tools to remove the showerhead from the shower arm and tighten it back in place after cleaning or replacing parts.
- Plumber's tape (Teflon tape): This special tape helps create a watertight seal between the showerhead and the shower arm, preventing leaks.
- Replacement washer or O-ring: If the rubber washer or O-ring inside your showerhead is worn or damaged, you'll need to replace it with a new one of the same size.
- Vinegar or descaling solution: To remove mineral buildup from your showerhead, you can soak it in a mixture of equal parts white vinegar and water or use a commercial descaling solution.
- Old toothbrush or cleaning brush: These tools are helpful for scrubbing away stubborn mineral deposits and grime from your showerhead.
Optional: You may also want to purchase a showerhead repair kit, which contains various sizes of washers and O-rings to ensure you have the right replacement parts on hand. These kits are available at most hardware stores and can save you time and hassle in finding the correct size components.
Step-by-Step Guide to Fix a Dripping Shower Head
Follow these detailed steps to repair your dripping showerhead and stop that annoying leak:
- Turn off the water supply: Locate the shut-off valve for your shower, which is usually located near the shower or in your home's main water supply area. Turn the valve clockwise to stop the water flow completely. This is a crucial step to prevent any water from spraying out during the repair process.
- Remove the showerhead: Using your adjustable wrench or pliers, grip the nut at the base of the showerhead where it connects to the shower arm. Turn the nut counterclockwise to loosen and remove the showerhead. If it's stuck, apply some penetrating oil and let it sit for a few minutes before trying again. Be careful not to scratch or damage the finish of your showerhead or shower arm.
- Inspect the washer/O-ring: Look inside the showerhead for the rubber washer or O-ring, which is usually located in the center of the connecting nut. If it's worn, damaged, or missing, you'll need to replace it. Take the old washer or O-ring to your local hardware store to find an exact match, or use a showerhead repair kit if you have one.
- Clean the showerhead: To remove mineral buildup and restore your showerhead's flow, soak it in a mixture of equal parts white vinegar and water for several hours, or overnight for heavily clogged nozzles. Alternatively, you can use a commercial descaling solution following the manufacturer's instructions. After soaking, use an old toothbrush or cleaning brush to scrub away any remaining deposits, paying close attention to the nozzles and crevices.
- Apply plumber's tape: Once your showerhead is clean and dry, wrap a few layers of plumber's tape (also called Teflon tape) around the threads of the shower arm. Start at the base of the threads and wrap the tape clockwise, overlapping each layer by about half the width of the tape. This creates a watertight seal and helps prevent future leaks.
- Reattach the showerhead: Screw the showerhead back onto the shower arm, making sure it's tight but not overtightened. Hand-tighten the showerhead first, then use your wrench or pliers to give it a final quarter-turn. Be careful not to cross-thread the connection or apply too much force, as this can damage the threads and cause leaks.
- Test for leaks: Turn the water supply back on and run the shower. Check for any leaks around the showerhead or shower arm. If you spot any drips, tighten the connection a bit more or reapply plumber's tape as needed. Run the shower for a few minutes to ensure the leak is fully resolved and the water pressure is back to normal.
Troubleshooting Tips
If you've followed the steps above but your shower head is still dripping, here are a few additional tips to help you troubleshoot the issue:
- Check for cracks: Inspect your showerhead and shower arm for any cracks, chips, or damage. If you find any, you may need to replace the entire showerhead or call a plumber for repairs. Cracked components can cause persistent leaks that can't be fixed with cleaning or new washers.
- Use penetrating oil: If your showerhead is stuck and difficult to remove, apply some penetrating oil to the connection and let it sit for a few minutes. This can help loosen the threads and make removal easier without damaging the finish. Be sure to wipe away any excess oil before reattaching the showerhead.
- Adjust the water pressure: If you suspect high water pressure is causing your shower head leak, you can install a water pressure regulator or adjustable valve to reduce the pressure. Aim for a pressure between 40 and 60 psi for optimal performance and leak prevention. You can test your home's water pressure with a simple gauge available at most hardware stores.
Prevention is Key
To keep your shower head leak-free in the future, follow these simple maintenance tips:
- Regular cleaning: Clean your showerhead every few months to prevent mineral buildup and ensure optimal water flow. You can soak it in vinegar or use a descaling solution as described in the step-by-step guide above. Regular cleaning not only prevents leaks but also improves your shower's performance and extends the life of your showerhead.
- Check connections: Periodically check the connection between your showerhead and shower arm to ensure it's tight and secure. Loose connections can cause leaks and water damage over time, so it's important to address them promptly. If you notice any looseness or leaks, tighten the connection or reapply plumber's tape as needed.
- Install a water softener: If you live in an area with hard water, consider installing a whole-house water softener to reduce mineral deposits throughout your plumbing system. Soft water is gentler on your fixtures and appliances, and can help prevent clogs, leaks, and other issues caused by mineral buildup. A water softener can also improve the quality and feel of your shower water.
- Use a showerhead filter: Another option for reducing mineral buildup is to install a showerhead filter. These filters attach directly to your showerhead and trap minerals, sediment, and other impurities before they can clog the nozzles. Showerhead filters are easy to install and replace, and can significantly extend the life of your showerhead while providing cleaner, healthier water for your shower.
A dripping shower head may seem like a minor annoyance, but it can waste a significant amount of water and lead to more serious plumbing issues if left unchecked. By following this comprehensive guide and implementing regular maintenance tips, you can stop that drip and enjoy a leak-free, high-performing shower.
Remember, the key to fixing a leaky shower head is to identify the cause, gather the right tools and materials, and follow the step-by-step instructions carefully. If you encounter any challenges or are unsure about a repair, don't hesitate to call a professional plumber for assistance. With a little know-how and effort, you can say goodbye to that pesky dripping shower head and start enjoying a more efficient, environmentally friendly shower experience.


